Thursday, September 15, 2016

Hello Junkies!
Karen McAlpine here today with a scary Halloween treat! This project was made with stamps from the September new Release stamp from Technique Junkies.  I made two versions of my card. One is colored with Copics and the other is colored with Distress Inks. The first photo is the Copic version.


Materials List:
Ink: Black die 
CS: white and black
Copic Markers or Distress Inks for coloring


 Make It:

  • Make a card from black CS
  • On white CS, stamp the Halloween House with black ink
  • Color the image with Copic Markers and add to the card base


  • Stamp Trick or Treat Banner on white CS
  • Color with blue Copics and cut out
  • Add to card with dimensional adhesive


This is the second version that is colored with Distress inks.  I used the Ranger blending tool to add the ink.  The coloring is just a bit subtler.  But, still very effective.


Great Halloween card!  I would also use this for an invitation. Another great collection of New Stamps from Technique Junkies!!  So happy you stopped in today and see you next time.
Karen McAlpine
Dreaming and Creating

Tuesday, September 13, 2016

Always Hope


Hey there fellow stampers and friends, it's Beth Norman here with a fun card for you today.

I started out by sponging Distress Inks in Worn Lipstick, Salty Ocean and Picked Raspberry.  After I let it air dry for an hour, I used Bubbles Stencil and rubbed white SU Craft ink through the circles.

Using Big Flourish and French Text, I stamped my card front using SU's Blackberry Bliss.

My flowers were created by using the Tie-Dye Chick Embellishments technique found on the Stampbooking CDFrench Text was stamped onto the flowers.

Finally, I used Always Hope as my sentiment.  I picked out this sentiment because of the flourished script that coordinates with Big Flourish.

Thank you for stopping by.


Monday, September 12, 2016

Happy Halloween!

Greetings Ink Friends!

I'm back today to show a couple Halloween cards using the September New Releases!

I used both the Pumpkin Tree Guy and the Happy Halloween stamps
for both cards just done a little different on each!

For this first card, I heat embossed the Pumpkin Guy with black embossing powder and then painted him in using Art Anthology Paints. I used my finger to paint a moon in the corner too.
After drying, I sprayed the piece with the Colorations sprays and the painted piece resists the sprays! I used a piece of printed paper from the Spooky Prints stack and heat embossed the Halloween greeting in White embossing powder. I die cut a Bat from my Snapshot Frames set and
popped him off the corner to finish off the card.


For the next card, I treated the Pumpkin Guy the exact same way as above, except
I used Cosmic Grape & Blue Lagoon Splashes for the background. I sponged River Rock ink
around the edges and splattered Sour Lemon Silk to create a starry night. I popped him off another print from the Spooky Prints pad. I inked the Halloween greeting in Whip Cream and heat embossed with Clear Powder this time to give a more ghostly effect.


I simply LOVE how the images over at Technique Junkies work so well with all the other supplies we own! Makes them SO versatile! Be sure to hop on over and check them out!

Until Next Time...
Happy Creating!!
~ Tonya    
~oxoxox ~


Saturday, September 10, 2016

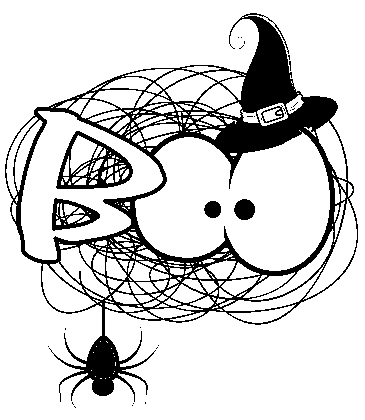
A BOO from me to you!

Hello All Lanette Here!

Can you believe that Halloween is right around the corner?? With that in mind I would like to share a quick little card that I created using one of this months new releases....


Products Used: Technique Junkies BOO stamp, Art Anthology Minx Ink, Art Anthology Sorbet, Art Anthology Colorations, Ranger and Ink, Archival Ink Misc- Embossing powder, Bobble Eyes, Thread, Foam Dots & Bling.

A few details just for fun..


Here is a better look at the stamp I used today...


Thank you so much for stopping by today! 
I hope that I have inspired you in some way!


Thursday, September 8, 2016

Forever Friends

Good Morning Junkies! Pam here today to share another project. For this week's card I am featuring two fantastic TJ stamps: a sentiment from Sentimental Sayings and a background stamp Poppies, Large.


I stamped the sentiment in Versafine Black ink and covered with clear embossing powder. I then stamped over the sentiment panel with the background stamp for  a coordinating effect and to add some interest.


The background was created using a technique called monochromatic ink layering which you can see here by Jennifer McGuire.


I just love how subtle the background is using this technique and it's super simple!
Thanks for joining me again this week and be sure to stay tuned to our blog for more great inspiration!
And don't forget today is the last day for the 15% off the Semptember releases so be sure to stock up now!
Embrace Imperfection
Pam


Tuesday, September 6, 2016

BOO! Polka Dots


 Boo! It's Scary September and I have a fun card for you today. This sweet little BOO card is really not all that scary...not when it is matched with brightly colored Polka Dots!

Making this card was really simple. The background was made by swiping Dusty Concord, Fired Brick and Wild Honey Distress Inks directly onto the Large Dots Background in three Swipes. The focal image uses the Boo stamp, which was stamped in black ink, then traced over with a black glitter gel pen.  Here is the close-up:
It's even more shimmery than it seems in the picture, too.
Don't forget: all of the September Releases are 15% off through September 8th -- make sure you take advantage of it before it's too late!

Happy Scary September!
Pat

Monday, September 5, 2016

Be Scary!

There are times in everyone's life when things do not go the way you plan.  The tyranny of the "URGENT"  becomes the driving force in a day's happening.  That has been my last 3 days.  I am scheduled to post to the Design Team blog on every other Monday.  My "every other Monday" is Labor Day September 5.  I will barely make it -- it will be almost midnight before this is posted.  But it will be done!

I was away for almost 2 weeks.  I had to watch my three young grandchildren for almost 2 1/2 days straight.  I will need to do this tomorrow afternoon as well.  No crafting time with 7, 5, and 3 year old to watch!

But here is my card for today - Monday, September 5. I used two NEW Technique Stamps to create my card. I used Be Scary - http://techniquejunkies.com/be-scary/, and Witchy Moon - http://techniquejunkies.com/witchy-moon/.  Remember these stamps are on sale for 15% off through September 8!


By the time I was able to begin to work on this card -- at nearly 9:00PM -- I was almost brain dead.   But I forged ahead. I have found -- for me -- if I need inspiration I need to look at what ever scraps are laying around on my craft table and see what I come up with.  And that is what I did!

 I saw a piece of orange glitter paper and wondered what I do with it.  I used Art Anthology paints and some other thick paints very similar to those for this card.  I spread of the green paints on the bottom of the trimmed to size orange glitter paper.  Then I sprayed some purple Art Anthology Colorations spray across the top.  I used a paint brush to spread that puddled Colorations spray across the sky.  I heat set those paints.  Then I inked up the witch with black Versafine ink pad and stamped it on the orange glitter paper.  I wasn't even sure this would work because of the texture!  I spread detail black embossing powder over the image and heat embossed.  I was quite please with the results!  A word to note - this glitter paper is very smooth!  However, the center of the very solid parts of this image did not emboss as well as the edges.   So I "painted" some the reinker for this  ink pad over those solid ares and heat embossed with black detail embossing powder.  Success!

Now I want the moon to stand out against the orange sky.  I first tried the Art Anthology gold Minx and painted it over the surface of the moon,  It worked to a certain degree  but not how I was now envisioning the moon to look. I put on two layers of the Minx and heat set between each one.  Then I took some of the light yellow Art Anthology bger medium and painted over the moon.  That was better but still not "quite right."  So I got out the gold Minx again and spread more of that over the gel medium.  That was closer to my imagination!  Then I heat set it.  As it dried the moon's surface developed sop,e interested texture.  

I stamped the verse on yellow vellum, heat embossed  it, and ran it through the smaller Xyron machine. After tearing the edges  I adhered to the card front.  It is all layered on black card stock.

Happy stamping, and get inky!

Judy Jackson