Showing posts with label Christmas Frame. Show all posts

Wednesday, October 27, 2021

A Lovely Christmas Frame


Happy Wednesday to everyone! I am showcasing two October stamps; Christmas Frame (#S916) and the sentiments are from the new set called Light of Faith (#SS142). They were all pretty quick to make with the area for the sentiment to be placed!
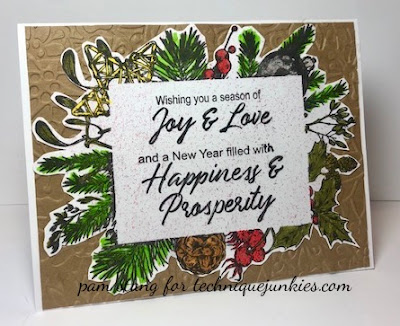

My first card was stamped on confetti white card stock (a blast from the SU! past). Next, I colored it with Zig watercolor brush markers and then fussy cut it out. I finely stippled some red in sentiment area. The card base is white and I embossed Kraft card stock for some interest.
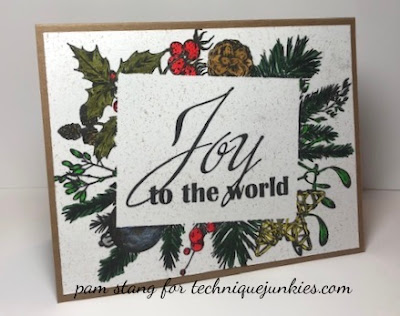
The image was stamped in black on confetti white cardstock and colored with Zigs again and placed on a Kraft card stock base. I like that you can stamp this frame any way...there isn't really a top or bottom.
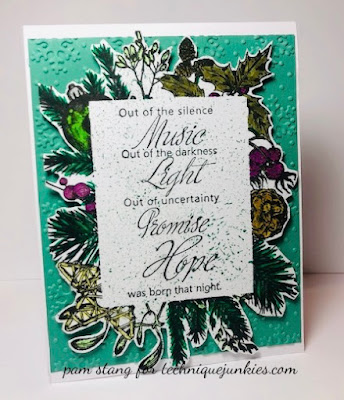


My last card here was stamped on white card stock and colored with Zigs.....I added some shimmer to the ornaments which is tough to see. I did stippling on the sentiment area again. The Bermuda bay base was embossed with a snowflake folder and the image is on dimensionals.


Tuesday, October 12, 2021

Stamping & Fussy Cut Christmas Card


Want to add some extra special detail to a few Christmas cards this year? Adding a little effort to one or two cards in your project stash is well-worth the effort, especially when the card itself is the gift. I like to do this with my older family members or for those who live far away; they always appreciate the time it clearly takes to stamp, color and fussy-cut a lovely card.


This new release set is absolutely gorgeous, and you will be able to make SO many lovely projects with the stamps! (Make sure when you shop, enter coupon code TJ10ERIN to save 10% on your entire order!)


I used Archival Ink to stamp the Christmas Card Frame onto white cardstock. Then I stamped one of the "Light of Faith Sentiments" in the center. After that, I used Distress Inks and Distress Oxide Inks and a water brush to add color to the leaves, pine boughs, pinecones, and star.


With some "Dragon's Blood" Shimmering Bliss Spray, I added the red color to the ornament and the berries. I love the shimmer it gives!


Once it was colored, I used a craft knife to cut out the intricate details inside the branches. Then I used detail scissors to fussy cut the outside of the entire stamped image. I mounted it on a piece of die cut patterned paper from "This Miracle Night" paper collection by Craft O'Clock and embellished the card with a few fussy-cut elements also from the same paper collection. As a final touch, I added a few sequins.

I did the same process on a second card, and created a video tutorial as a companion. If you are interested in this process and want to learn to color with inks or to fussy-cut stamped details, check out the video below:


Thank you for looking!