

Hello, Beth Norman, here with a short tutorial for you that is simply called Art Squared. This is a great card for many occassions by simply adding a sentiment in place of all the picture stamps. I have scraps left over so I'll eventually post another card using this style.

Supplies: Kaleidacolor ink pad (or a variety of ink pads), sponges, glossy cardstock, white cardstock (not shown), paper trimmer and StazOn

Using a regular piece of white paper, stamp out your plan. This will allow you to make any adjustments as necessary.
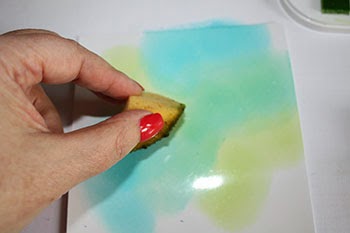
Using your sponge, ink up glossy cardstock.

Using your choice of adhesive, glue down your image onto your cardstock in which you have laid out your design plan. My choice of adhesive was the use of my ATG gun. Continue adding your inked pieces until your design plan is fully covered.
STAMPS USED:
TIPS:
- Colour two identically sized (scraps will do too) pieces of glossy cardstock with ink. This will allow for any mistakes. For example, when I first stamped out my Bold Daisy, they were just blobs because I used a juicy pad. On my second attempt, I did not re-ink and pressed out two flowers
- To keep an exact size of paper, place your blade at the bottom of the glossy paper and cut upwards. Cutting downwards may make your glossy cardstock uneven, as I found out.
- Cut your design plan slightly smaller than finished size to avoid white edges to show.
- Let your StazOn images to completely dry before adhering them to your cardstock. It takes StazOn to dry a little slower compared to regular ink on regular cardstock
