Hello,
Beth Norman here, with a remix of
Colorful Silhouettes, a technique I developed and was published in the
August 2011 issue of the Technique Junkie Newsletter.
For 10% off your order please use TJ10Beth.
Today, I am using
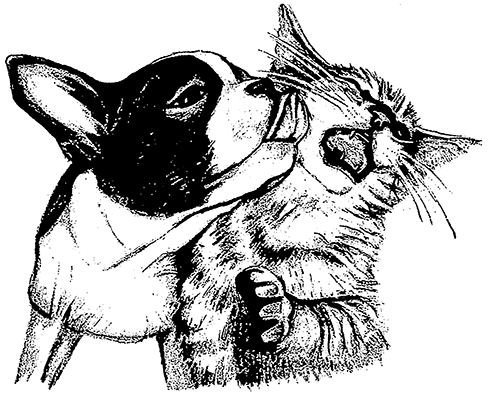
I Woof You, and
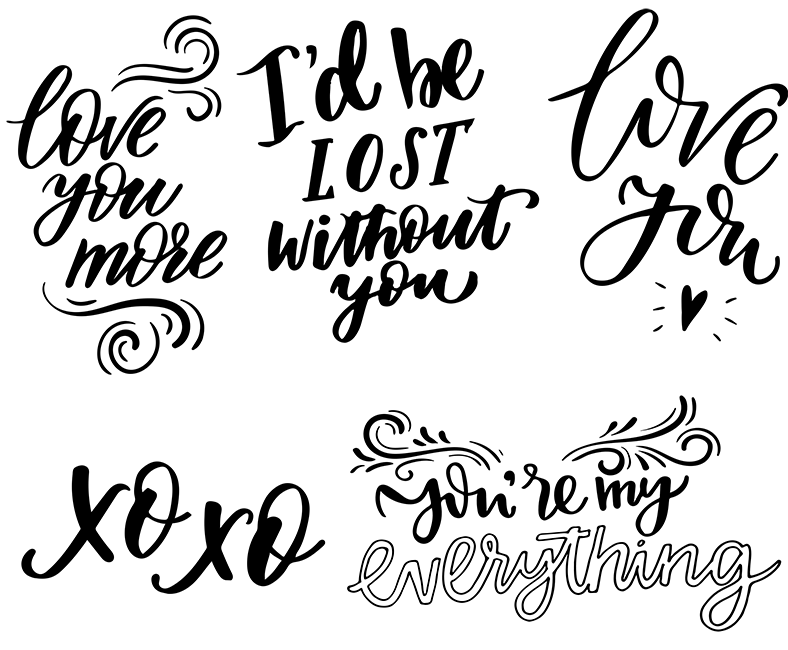
Swirls and Curls. You can receive these stamps and receive 10% off your total order simply by using my code below.
In this "remix" I introduced an iron to my background simply because of the words, "
I Woof You." I wanted to be sure that the words were crisp and clear. You do not have to iron your image if you are going to use a silhouette stamp; it covers nicely.
Supplies: Background stamp with lots of open areas, silhouette, or other, stamp, VersaMark, white embossing powder, black embossing powder, sponges, 2 or 3 ink colours, heat gun, embossing buddy.
Sponge your colour onto cardstock. Here I used pink and red for Valentine's Day. Make sure your cardstock is dry thoroughly before you proceed to the next step. You can use a heat gun to speed up the process.
With VersaMark, stamp the pad all over your background stamp, add white embossing powder and emboss.
If you are using a silhouette stamp you can skip this step. Otherwise, place copy paper over top of your image and, on low heat, and lightly iron your embossing so it flattens.
Using VersaMark, stamp your image and add black embossing powder and heat emboss You are now ready to complete your card as desired. In my example my background was not ironed. I wanted to keep a cohesive finish so I used
Swirls and Curls both on my main image and on my background.