Showing posts with label Distress Oxide Inks. Show all posts

Tuesday, November 23, 2021

Create "Anyday" Cards All Year Round!


We MUST remember to create “anyday” cards to keep on hand, and today I am sharing a lovely variation with the “Leaves and Berries” stamp. This stamp is part of the November 2021 New Stamp Release from Technique Junkies. 


I suppose it is intended to produce more “holiday-themed” projects, but when I saw this stamp I immediately thought of bright oranges, pinks, yellows and navy blue. 


First, I stamped “Leaves and Berries” in VersaMark ink and embossed with a navy blue embossing powder. This creates significant border lines inside all the leaves, which is essential when coloring in with watercolor or ink.
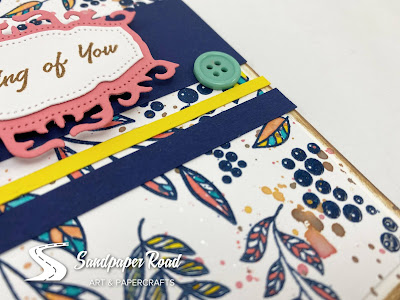


To color in the leaves, I simply used my Nuvo Water Pen and my Distress Oxide Inks. I just “smooshed” the ink onto a slick surface (I use an acrylic block or my craft mat). Then, I treated the ink like watercolor and just colored in the lines. For final touches, I used the remaining smooshed ink to create a “spatter” around the edges.

The “Thinking of You” sentiment is one of the “Four Little Sentiments” set. I stamped it with Archival Ink and die cut with a Spellbinders die that I had in my stash. Honestly, this card design is perfect to make a set of cards and then customize each card with a different sentiment from the set. I really like the nice font and it stamps beautifully!


Before I adhered all the parts together for my card, I used scrap pieces of navy blue and yellow cardstock to create some grounding for my sentiment. Just imagine this card without the navy blue strips of cardstock… the sentiment would be “floating” around on the background. If your cards look like they “need something”, try adding a solid color strip or two (or three) across the entirety of the card and THEN add the sentiment. It should be just what your project needs!


Thank you for looking!


Technique Junkies Stamps Used:

Leaves and Berries Stamp Set

Four Little Sentiments Stamp Set


Tuesday, October 26, 2021

Wintery Poinsettia Christmas Card


It’s always nice to put some extra time and effort into a few of your holiday card projects. I like to have special, detailed cards to give to those few people who appreciate cardmaking or who live far away. For me, this project was one of those special, detailed cards - where the card itself will be the Christmas gift.


I started with the Bird and Poinsettia Border Stamp by Technique Junkies. This stamp is so lovely and is really versatile for Christmas, holiday and also general winter cards. I also think this would be the perfect stamp to use for those “winter birthday” cards as well.


I stamped with brown Archival Ink and then used my Nuvo Waterbrush Pens and a combination of Distress Oxide inks and regular Distress Inks to color in the image.


Then, I used my craft knife to carefully cut out all the INSIDE spaces… look carefully in between the branches and the little pinecones. This was all hand-cut out with my craft knife and some time. :)


After I cut out the INSIDE spaces, then I could easily fussy-cut around the outside of the stamped image. I used Nuvo Deluxe Adhesive to glue the stamped, fussy-cut image to a piece of patterned paper from the "Frosty Sparking" paper collection by Craft O’Clock.


I stamped the Dotted Merry Christmas stamp with black Archival Ink and used a rectangle stitched die from my stash to cut it out and add to my card.


The paper collection has lots of coordinating fussy-cut elements, so I simply found a bird, a candy-cane, two leaves, one anise seed, and a few flower elements to add on top of the stamped image. I used a combination of hot glue and my Nuvo liquid adhesive (the hot glue adds dimension). 


I mounted the whole thing on top of a black card base. This card did take me quite a while, but I enjoy the detail work every now and then. When I showed my husband the finished card, he said, “Wow… you really put some time into that one!”


Hope this inspires you! Thank you for looking! 


Tuesday, July 20, 2021

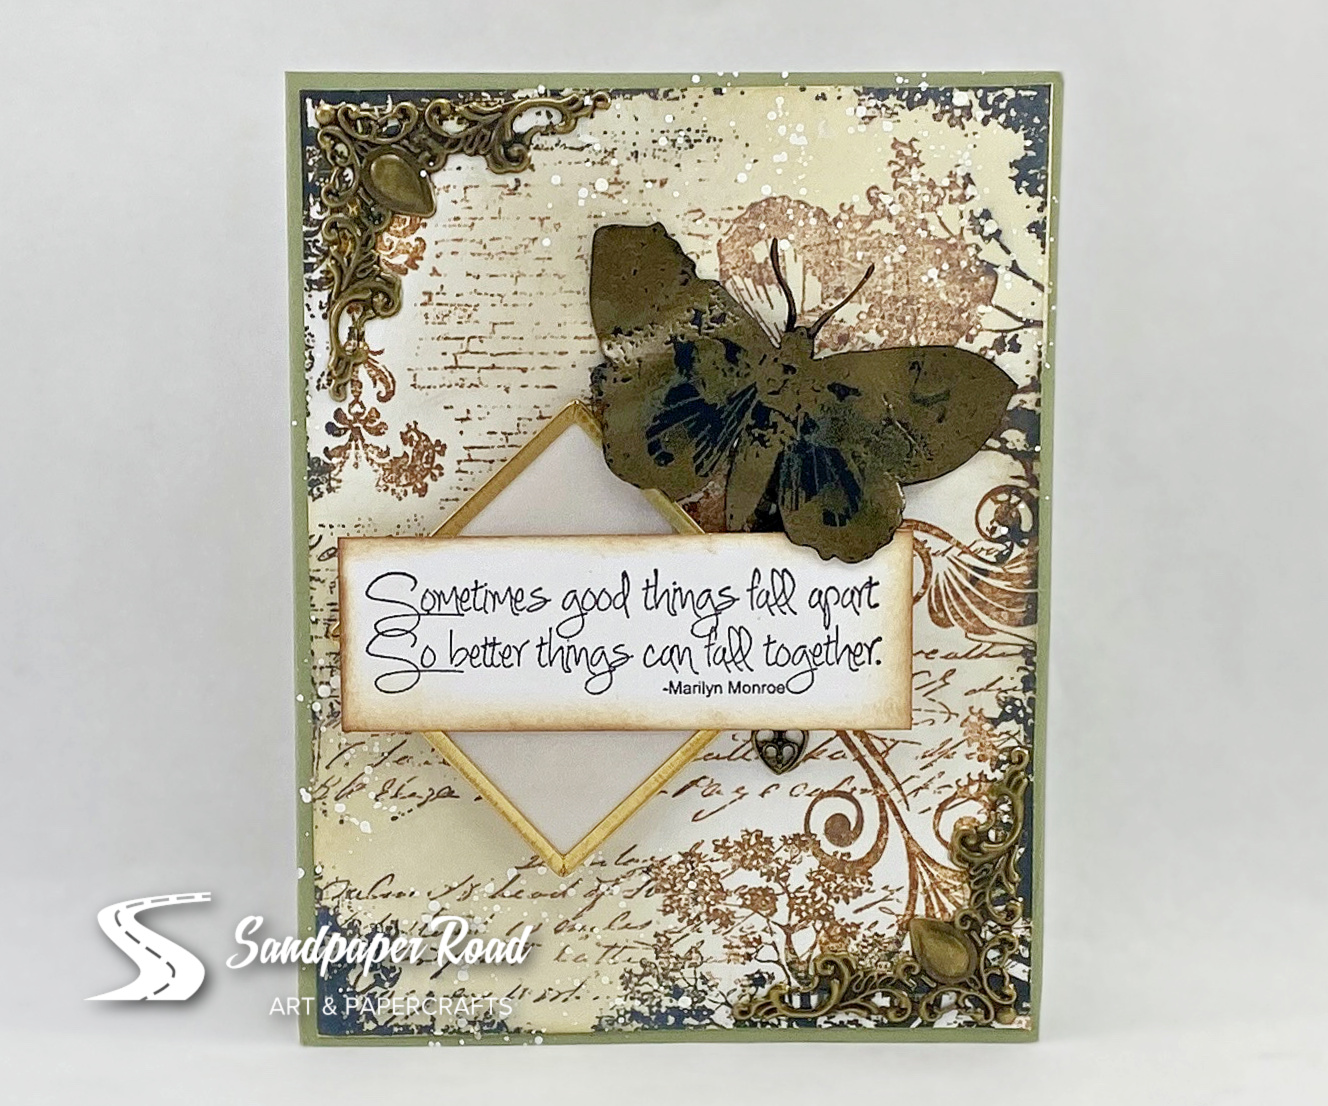
Card Inspiration | Vintage Butterfly | Sandpaper Road


Today, I am pleased to share some card inspiration with everyone! This project was a creative "retreat" for me, as I played with lots of inks and supplies from my stash.

Here's how I created this encouragement card:


Sunday, May 9, 2021

Adulting is Overrated


This poor lady is having one of those days and she is just throwing her hands up to say "adulting is overrated."  It really is, sometimes, isn't it??  LOL  

I started by stenciling some Mermaid Lagoon Distress Oxide ink over the Fading Circles stencil (A Colorful Life Designs).  Then I used the same mermaid oxide ink to stamp the lady from Vamps and Vixens as well as the Adulting Is Overrated sentiment.  All of these supplies are from Technique Junkies.  

You can save 10% by using this code, TJ10Holly, when you shop at Technique Junkies.  You'll find all kinds of stamps, stencils, Distress Oxide inks, and Shimmering Bliss sprays just waiting to jump into your cart.  Have fun shopping!


Wednesday, May 5, 2021

Sunset Ink Blended Amsterdam Reflection Card

Hello!  Designer Tracy Shultz here with you today with a beautiful ink blended card featuring the gorgeous Amsterdam Reflections stamp from Technique Junkies, part of the new May 2021 Release. 
May release stamps are 15% off until May 8th.  Use my code TJ10Tracy for a 10% discount on the rest of your shopping cart items.

I invite you to watch this video from my YouTube Channel where I unbox all the new May 2021 TJ Stamps, as well as show you how easy it is to create the card above:
1:02 Mark: Where I created the Amsterdam Reflection Card

You can also use my coupon code to save 10% on everything (except the new release stamps): TJ10Tracy

To create the Amsterdam Reflections card, I followed these steps:
1. Using a piece of 4.25" x 5.5" white card stock, I ink blended the following Distress Oxide colors (from bottom to top) using domed foam ink blending tools:
  • Salvaged Patina
  • Fossilized Amber
  • Spiced Marmalade
  • Kitsch Flamingo
2. I stamped the image using Versafine Clair Nocturne Ink
3. I allowed the ink to dry, then I trimmed the image to fit on a mat of gold foiled card stock size 4" x 5.25"
4. I adhered both the ink blended panel and the mat layer to a black A2 card base, size 4.25" 5.5"

Make sure you check out the Technique Junkies Website for more ideas and inspiration. Also, join the Technique Junkies Facebook group where you can see ideas and post your own creations that use Technique Junkies Stamps


Saturday, January 16, 2021

Snarky Mouth


 I almost think this Woodstock Girl stencil from A Colorful Life Designs was made for this sentiment! Don't we all have a little problem holding things in sometimes? I know I do (occasionally). The background was created using a Distress Oxide dip technique and the stencil and My Mouth image were placed right over the dried colorful cardstock.

Pat Huntoon

Tuesday, July 9, 2019

Foot Down


 Hello to my fellow Junkies. Kia here with you today and I am putting my "Foot Down." Or I should say this fun zen Flamingo is putting her foot down.
We painted a Flamingo in my watercolour class that I attend and we used a lot of different colours to achieve our final results. I liked mine so much I framed it for my living room. 
 I wanted to do a Distress Oxide background, so I took my cue from that class. I used 6 colours for this background. Pinks, Corals, and a bit of Marmalade, building the colour as I went along.
 Once I was finished the colour and dried the piece I die cut using my Deckled Rectangle die. I added a few splatters, then added Nuvo Shimmering Pen in Midas Touch to the Flamingo's body, neck and beak, along with more splatters.

To finish up I added black fun foam to the back of my panel, attaching using Scorpal tape. 

This is a video of my process:

I hope you have enjoyed this card and thank you for joining us today here at Technique Junkies.

Friday, June 15, 2018

TJ Inkspiration: Distress Oxide Reinker Watercoloring

I am militant about purchasing the matching reinker whenever I buy a new ink pad. When I started collecting Distress Oxides inks, it was natural for me to buy the reinker...and of course, I had to look for new ways to use them, too. Today I am happy to share this technique showing how to water color with the reinkers.

When I first started playing around with the idea, I think I was most impressed with how the reinkers looked when they dried.  It is a very pastelly/chalky look that is very color intense.  Not only that, but the entire process was remarkably easy and forgiving (make a mistake? Just add water or dab it with a paper towel!). I was sold and knew I had to share it with you.

I used the SS075 Watermelon Summer Set for this technique:

SS075 Watermelon Summer_ Set of 3
Distress Oxide Reinker Watercoloring

Here is the artwork from the tutorial:
Watercolored Watermelon Summer

Enjoy today's video!

Distress Oxide Reinker Watercoloring
    
I hope you are a little inkspired by today's issue. See you next week!

Pat 

Friday, February 16, 2018

TJ Inkspirations: Stenciled Bands using Distress Oxide Inks

I've had this little technique rolling around in my head for a few weeks. I was torn between making it simple, or more complicated - I chose the simple route. I can always post a more complicated version another time, right?

I chose to use Distress Oxide Inks for my tutorial. You can use what you have, though. I just find that they move very nicely on paper. I also managed to show you my most favorite tip of all time in the video, too.

Here are the stamps I am using in the video:


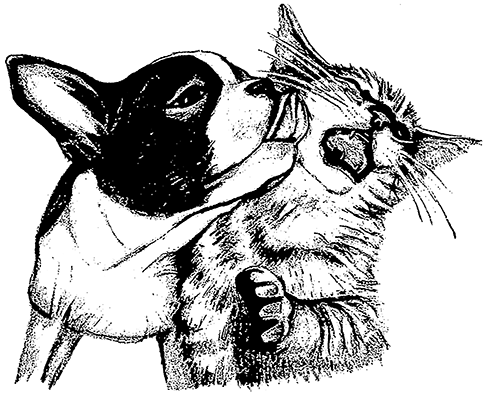
SD813 The Kiss

Whimsey Love Stencil


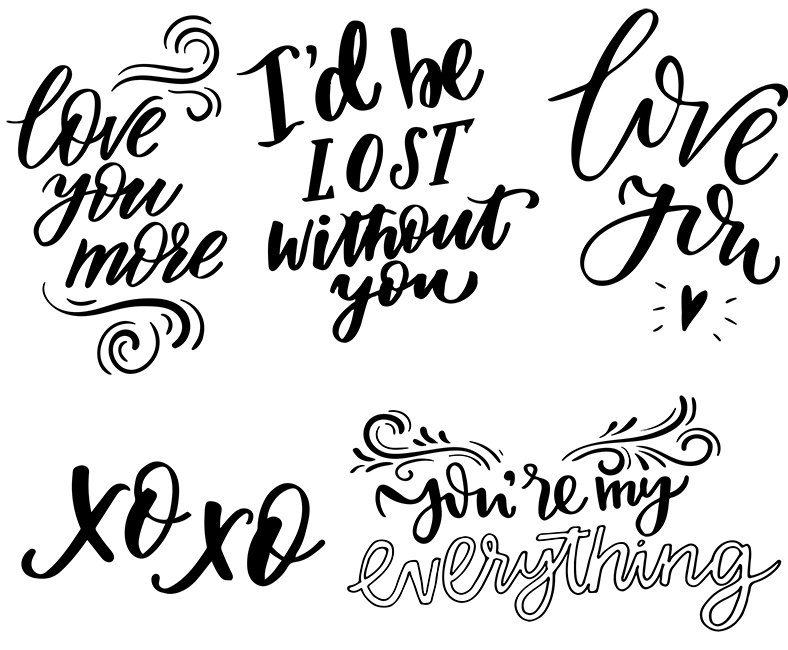
SS079 Love you More, Set of 5


MISTI 
The Most Incredible Stamping Tool Ever
8" x 10"


5 Minute Shimmering Backgrounds

Here is the artwork from the video:
 

and the video:
Stenciled Band with Distress Oxides

I hope you are a little inkspired by today's issue. See you next week!
Sincerely,

Pat Huntoon
Technique Junkies LLC 

Friday, September 29, 2017

TJ Inkspiration: Coffee Stain Background with Distress Oxide Inks

It is incredible to me that we are so close to the end of September.  On Sunday, October 1st, we will be celebrating our monthly stamp release with a blog hop, so I hope you will join us for that.

On this Friday, though, I have a short (very short - less than 3 minutes) video showing you how to use Distress Oxide inks and a stencil to create a fun background that mimics coffee cup stains on a piece of wood furniture.

We are only using two stamps for this video:
Coffee Kitty

And on of the sentiments from this set:
Typewriter Set
Coffee Stained Background
This is the simple little card I made using the technique in the video:

Simply Framed - Autumn


And here is the video tutorial:

Coffee Stained Background with Distress Oxide Inks
I hope you are a little inkspired by today's issue. See you next week!
 
Sincerely,
 

Pat Huntoon
Technique Junkies LLC 

Friday, September 15, 2017

TJ Inkspirations: Vintage Stamping with Distress Oxide Inks

No other ink in the world blends as well as Distress Oxide ink. I know that is a pretty bold statement, but I truly love the way the inks move and blend. That makes them ideal to use to create the vintage style, sepia-toned background highlighted in the video.

Here are the stamps I am using today:
Greatest Oak


Holly Bird


Sepia-toned Vintage Stamping
Here are the finished cards for the techniques:
 
The Greatest Oak

Holly Bird

and here is the video tutorial:

Vintage Stamping with Distress Oxide Inks
I hope you are a little inkspired by today's issue. See you next week!
 
Sincerely,
 

Pat Huntoon
Technique Junkies LLC 

Friday, June 30, 2017

TJ Inkspirations: A sneak peek and a secret

If you have followed Technique Junkies for a while, you know that we release new stamps every month on the first of the month.  This month is no different - but since it is June 30, I thought I would give you a little peek into tomorrow's release and blog hop!

Earlier this week someone mentioned something to me that I found a little disconcerting.  They said that "no-one buys the brown Distress Oxide Inks."  While that is not strictly true, I personally think its a little sad. The brown inks (Walnut Stain and Vintage Photo) produce a pretty cool effect, and it is a shame that they are overlooked.  With 12 new colors of Distress Oxide Inks ready to come out in the next few weeks, I thought it might be time to give the browns their due. That's what today's tutorial is about. And the sneak peek doesn't hurt either!

Here is a link list of the stamps and ink used in today's tutorial:

and for the Second sneak peek, below:
Palm Collage
Watermelon Set
Seagrass Mat in Distress Oxide Browns


This card uses two of the July stamps - Seagrass Mat and Joy and Laughter. The Distress Oxide browns were used to color the mat background. It was simple to do, but the matte, almost-chalky
look of the Oxide inks is exquisite in person.

Here's how it was done:
 
Ink the stamp with Walnut Stain Distress Oxide Ink. Stamp on white cardstock. 
 
Using a blending tool, apply Vintage Photo Distress Oxide Ink to the card stock, coloring it somewhat unevenly.
 
Apply the ink heaviest around the edges.

The Joy and Laughter stamp was colored using Pastel Pencils.  Isn't she glorious? It just makes me happy to look at this stamp.

Joy and Laughter


Ready for the Secret?
Palm Collage - July 2017 Release
The New July Stamps are ready for you RIGHT NOW! Of course you will still receive your 15% discount, too - now through July 8th. Add any new July Release stamps to your shopping cart and the stamps will be discounted at checkout.

Make sure you come back to the Design Team blog tomorrow, too -- you won't want to miss the Design Team Blog Hop. Their work and inspiration is wonderful!

I'll send a quick email in the morning to remind you. I hope you love these new stamps as much as I do. See you tomorrow!
Pat Huntoon