Saturday, September 30, 2017

Autumn Splendor


Good Morning!!!!

These cards reflect my favourite season-Autumn
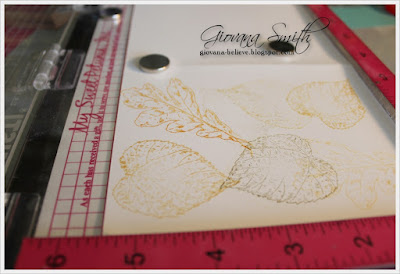
I created this background using a Watercolor block technique and the Autumn Stamp Set
Quick and Easy, but quite striking if I don't say so myself!!!!


For this card, I stamped the Beautiful Autumn Stamp set
I stamped the image in Brown, Watercolored the leaves and added a touch of gold glitter!!!!!
Hope your Autumn day is wonderful!

--Vicki~~

Friday, September 29, 2017

TJ Inkspiration: Coffee Stain Background with Distress Oxide Inks

It is incredible to me that we are so close to the end of September.  On Sunday, October 1st, we will be celebrating our monthly stamp release with a blog hop, so I hope you will join us for that.

On this Friday, though, I have a short (very short - less than 3 minutes) video showing you how to use Distress Oxide inks and a stencil to create a fun background that mimics coffee cup stains on a piece of wood furniture.

We are only using two stamps for this video:
Coffee Kitty

And on of the sentiments from this set:
Typewriter Set
Coffee Stained Background
This is the simple little card I made using the technique in the video:

Simply Framed - Autumn


And here is the video tutorial:

Coffee Stained Background with Distress Oxide Inks
I hope you are a little inkspired by today's issue. See you next week!
 
Sincerely,
 

Pat Huntoon
Technique Junkies LLC 

Thursday, September 28, 2017

Best wishes

Hello friends! Giovana here today sharing with you a holiday card, this sentiment is perfect in case you were late sending Christmas cards, this sentiment will save you!! {wink, wink}

This card was super easy to put together, here I use one of the sentiments from "Gift of Christmas" set.
  • For this project you will need a piece of Coastal blue cardstock, Snow acetate and a snowy die-cut (or you can hand cut a snowy hill)
  • Stamp the sentiment on the die-cut , then ink all the edges of the little houses with Vintage Photo Distress Ink. 
  • Adhere panels on a white card base, add a gold snowflake and your card is done!!

Easy peasy, right?
If you like this sentiment or more stamps , get them HERE, also don't forget to add this code to your shopping cart and get a 10% off (excludes September release)
Hope you like it.
Have a fantastic day!


Wednesday, September 27, 2017

Foiled Pinecone

Hello, Junkies!

The Crafty Nurse here with some Autumn splendor using gold foiling.  I have a great kit from Indigo Blu, but any sticky glue and foil will do.

Stamps: Pinecone #SD821 and Autumn Set of 6

Supplies: A Colorful Life's "Square Fade Stencil", Delicata Gold Ink, My Favorite Things Flag Die, Flitter Glu, Tricolor foil, Distress Ink.

I love an interesting background and often just try things to see how they work.  The base layer of cardstock is colored using extra Distress ink I "mopped up" from my craft mat using a baby wipe and pouncing it on card stock.  The next layer is the gorgeous Delicata Gold ink on black card stock using the very detailed Autumn Set of 6 set. For the focal image, I started with more of the mopped up ink then over that I stenciled the Square Fade stencil using a light touch and making sure to heat set.  I then stamped the pine cone using Flitterglu and foiled.


We hope to see you in the Facebook group and participating in our monthly challenge over at the Design Team Blog. 

Happy Inking!!

Tuesday, September 26, 2017

Hi fellow Junkies.  Beth Norman here with a new-to-me split style of card.  I love the song Amazing Grace and because it is a song, I incorporated Treble Clef, small with Amazing Grace

I plan on making more of these in a variety of colours to send to my sister.  She is always after me to give her cards as she uses them all and is almost out of them. 

Thanks for stopping by.

Monday, September 25, 2017

Best Box of Crayons


Happy Monday!

Jeanne here today with a water colored Fall card using the beautiful Autumn Set (set of 6 stamps!). This is such a versatile set. I'm sure I'll be using it year round. 


Use coupon code TJ10Jeanne for a 10% discount!!!


Have a great day!
Jeanne


Saturday, September 23, 2017

Stocking up!

Hello Everyone!

Today I thought I would share a couple thank you cards. I Always like to have thank you cards on hand, because usually when you need one you don't have time to make one! :)

So because I am running low I decided I would stock up a bit.  Here you can see three of the cards that I created....

Technique Junkies Stamps Used: Being You & Coral

Technique Junkies Stamps Used: Being You & Seagrass Mat


Technique Junkies Stamps Used: Being YouFrench Text


I used the same technique for each card.....

First I stamped and matted my verse.

Next I using a large background stamp, I triple stamped the image with 3 different Distress Oxide Inks and Water.

Then I heat embossed the same image with a pearl embossing powder.

Finally I added a bit of twine & bling and my cards are ready to go!


Thank you so much for stopping by today!


Friday, September 22, 2017

TJ Inkspirations: Simply Framed Technique Featuring Nuvo Glitter Markers


 Today's tutorial brings back an old favorite from the Technique Junkie Newsletter: Simply Framed.  This is a one-layer (really, a no-layer) technique which is timeless (I published the original technique nearly 10 years ago!). 

To set off the images in the technique, I am using Nuvo Glitter Markers. While I was making the video for this, I got a little carried away with tips...so this video ended up being a little longer than I would like, but trust me, there are some very good tips in it!

Here are the stamps I used in the video:


Simply Framed Technique
Here are the finished cards for the technique. The first is the one from the video - far simpler than the second, but I did that so you didn't have to watch me color a thousand leaves:

Note the difference in the doodling around the frame. The first has a ton of doodling, making it more elaborate and whimsical; the second is more elegant with just a hint of doodling.


And here is the video:


Simply Framed Tutorial featuring Nuvo Glitter Markers

I hope you were a little Inkspired by today's video. See you next week!
Pat Huntoon

Thursday, September 21, 2017

Blame it on the Christmas Kitty

Hi everyone!  Chris here, sharing a Copic colored Christmas card using new September release stamps!  I've made a number of these cards to send to my cat-loving friends in December.


This card reminds me so much of the holidays at my house.  There is a reason (actually three reasons), why our tree doesn't go up until Dec 15th or so, and comes down December 27th.  

Cats.
Three.  Gray.  Cats.

So I decided to use this sweet image in commemoration of the holiday damage they can cause with trees, tinsel, glass ornaments, gift wrap, stockings... you name it, at my house, they've made a mess of it.

Today I chose to use this sweet santa-hat-wearing feline stamp, Christmas Kitty and The Stockings Were Hung greeting stamp for my card today.  The details in this stamp are amazing.  Look at those eyes!  They are fascinating. I used yellow-greens to add a bit of color to his eyes, being very careful to leave that highlight white.  


I stamped with Memento Tuxedo Black ink and added just the hint of additional cool grey copics to color him just like my kitties.  His hat was colored with the R22, 27, 29 and R59, as well as "texture" added to the hat with dots of warm greys.


I added the greeting with Versafine ink.
(Red Copic marker past-tense emphasis mine)

Don't forget!  All new TJ Stamps are 15% off through tomorrow, September 8th!  

Happy stamping everyone!


Wednesday, September 20, 2017

Greetings from Michigan

Hello, Junkies!! I'm happy to be back with you today from sunny Michigan. At least it's sunny as of the writing of this post. The leaves are starting to change into some beautiful colors and the air is starting to smell like Autumn. For those of you in the south, I hope you were spared from the hurricanes.

I have a few cards to share today. I really had fun making this first one. It features the Weed or Wish set.

To start, I used some gelatos (red, orange and yellow) and "smooshed" them around my cardstock using my finger. I then embossed the panel and cut out a rectangle. After lining up where I wanted the image, I stamped it on a piece of golden CS and attached it to my card base.  Using foam tape, I added the panel to the front of the card. I stamped the sentiment on some white CS, trimmed it down, and attached it to the card. I then added some Flowersoft to the image. To finish off the card, I simply added a piece of orange ribbon.

This next card was a very simple one featuring French Text and a sentiment from the With Sympathy set.


I added a teal piece of CS to my card base. On a piece of kraft CS, I stamped the French Text background with Versamark. I then added some teal and brown chalk pastels to bring out the text. That was adhered to my card, then I added some silk flowers I had in my stash. The sentiment was stamped on the same CS I used for my matting panel, trimmed and adhered to the card. I added a few light blue embellishments to the sentiment panel and centers of the flowers.

My final card is a Christmas one (it's never to early to start those, right?). This card features two of this month's new releases, Pinecone and Good Night.


Using the Pinecone stamp, I created a background by stamping with Versamark ink and heat embossing with some chunky clear embossing powder. While still warm, I added a sprinkling of white embossing powder and heat set again. The sentiment was then stamped and heat embossed in white. I trimmed down the panel and adhered it to a white mat, which was then adhered to the card base. On a separate piece of CS, I stamped and embossed the pinecone. I then trimmed it out and gently shredded the edges to give it a softer texture. That was foam mounted to the card. I finished it off with a few dots of Nuvo Crystal Drops.

I hope you are feeling a little inspired to do some stamping. If you want to order any of these great stamps, simply add the code below and you will save 10%!

And don't forget to play along with our monthly challenge: Transitional Ombre!

Til next time,
Keepin' it inky!


Tuesday, September 19, 2017

HE CAUSED THE STORM TO BE STILL

Hi Junkies!  

I've been blessed by so much in my life, and one more blessing is to learn that my family members in the states of Florida and Texas survived the recent hurricanes there.  Those in Texas lost much in the way of home structure and first floor furniture.  They are happily digging in, cleaning out and grateful for the many blessings of neighbors and friends who are helping them in ways they never imagined.  The human spirit shines in tragic events such as this.  

I understand there is another hurricane churnning out in the Atlantic (Maria) and I continue to pray it by-passes our already devestated friends and family in the southeast USA.  I created this card as a message of hope and celebration for the lives saved and the passing of the horrific recent hurricanes.  


I heat embossed the background "Sea Waves" with white ep and then sponged Distress Inks in blues (dark to light) then added some deeper color in the areas where the "waves" would have shadows.  The sentiment is from "Pslams of the Sea", which was part of the June 2017 release.  

I hope you found some inspiration here today....and grab yourself some stamping time this week. 


Monday, September 18, 2017

Vintage Mantle


These two Technique Junkies just say Christmas!  And they pair so well with this festive background paper.  The Vintage Mantle stamp (www.techniquejunkies.com/vintage-mantle/)
, and the greeting from Gifts of Christmas ( www.techniquejunkies.com/gifts-of-christmas-set-of-5/)  go well together.

The image is colored with my Copic Markers.  I used a festive background paper that a vintage look to me.  Lots of layers finish the card.  I felt the background paper was embellishment enough.

I enjoy making Christmas cards, and I enjoy thinking of ways to make each card be festive but simple enough to mass produce.  This sure fits that bill!

There are lots of stamps to fit every mood, to fit lots of varieties of occasions, greetings, and images in the Technique Junkies store - http://techniquejunkies.com/  -  plus there are stencils, and Art Nuvo products, and all kinds of other items.  Have you checked it out?  And do you want a discount (I always want one!), please use this code TJ10Judy to get a 10% discount.  

Have a wonderful day ---and get inky!

Judy Jackson

Saturday, September 16, 2017

Two ways in the Moonlight


Good Morning!!!!

I wanted to feature the Santa in Moonlight set and show you a couple of ideas with it!

The first is a glittery confection..I actually Stamped in a Blue tone and then used some pretty turquoise glitter on the image. I added some copic marker shading to the moon and outlined her in Silver.


I created this background using Distress Oxide Inks, White Signo Pen and Stickles

I stamped the image on yellow cardstock and die cut a circle in the background for the moon show through. Using my Misti, I stamped the image on the background paper and embossed in Silver. That way I got the bright yellow Moon!!!!

I used the two stamps:


Have a wonderful weekend,

--Vicki~~

Friday, September 15, 2017

TJ Inkspirations: Vintage Stamping with Distress Oxide Inks

No other ink in the world blends as well as Distress Oxide ink. I know that is a pretty bold statement, but I truly love the way the inks move and blend. That makes them ideal to use to create the vintage style, sepia-toned background highlighted in the video.

Here are the stamps I am using today:
Greatest Oak


Holly Bird


Sepia-toned Vintage Stamping
Here are the finished cards for the techniques:
 
The Greatest Oak

Holly Bird

and here is the video tutorial:

Vintage Stamping with Distress Oxide Inks
I hope you are a little inkspired by today's issue. See you next week!
 
Sincerely,
 

Pat Huntoon
Technique Junkies LLC 

Thursday, September 14, 2017

Autumn is...


Hello friends! Giovana here today, sharing a fun Autumn card, for this project I used the new Autumn set.
Let me show you how I did it:
  • Start stamping the leaves on White cardstock in Memento Rich Cocoa, then color them with markers, here I used Spectrum Noir LG1, LG2, LG3, TN1, TN2, TN3.
  • Cut out all the leaves and distress ink all the edges with Vintage Photo Distress Ink.
  • Stamp the leaves on the card front using your MISTI, used fall color inks.
  • Stamp sentiment on a piece of gold cardstock in Black Ink, add strips of gold cardstock to each side.
  • Adhere sentiment on card front, then add leaves to each side.

Here is the card, as a final touch I added baker's twine and clear dew drops.


You can get this set and more from the September release HERE, and if you find any other stamp you like (except September release), you can use this code and get 10% off!!

Hope you like it!
Have a great day!