Tuesday, February 7, 2017

PLAYING WITH YUPO PAPER

Hello Junkies!  

I've been having some fun playing with yupo paper.  If you don't know, yupo paper is a "plastic paper", (now that's an oxymoron).  It's non-porous and in our world of papercrafts it's used mostly with alcohol inks and markers for making backgrounds.   I've found several tutorials on YouTube and thought I'd get out my plastic gloves and see what I could create.  

(You definitely want plastic gloves while playing around with a variety of alcohol inks, it can be very messy, and I found, when the alcohol ink got on my fingers, it dried the skin around my cuticles.) 

You can heat set yupo paper with your heat gun, but you must keep it moving and not hold it in one place too long, otherwise, (remember this is plastic), you'll have a shrinky dink card.  (I know this to be true, LOL).  

The inks you'll want to use for stamping on yupo should be Stazon or Archival Inks.  In my card, I used Ranger black Archival ink.  Beside the alcohol inks, you'll need some 91% alcohol for helping you move the ink around the paper.  

Also, you'll want to seal background piece, when you're ready to use it.  Alcohol inks, can be reactivated unless you seal it.  I used a light coat of Kamar Varnish, which I purchased at ACMoore craft store.  


My card uses TJ Stamps #S661 "Growing Wild" and #SDX083 "In My Prayers".  

Here's another example of playing with yupo that I posted on my blog last week.


For one more day, you can grab the Technique Junkie February release stamps at a 15% discount. You don't need a code, it will calculate upon check out.  Easy peasy.  

I hope you get some crafting time today - it's fun there.  


Monday, February 6, 2017

Kitty Love

This is one of the fun new Technique Junkie February Releases.  I love this kitty in the new Kitty in Curlers stamp - http://techniquejunkies.com/kitty-in-curlers/.  However for this card it is the verse from Technique Junkie  stamps - Mae West Sentiments - http://techniquejunkies.com/mae-west-sentiments/ - that makes the card.

Miss Kitty is colored with Copic markers.  Then I added rhinestones and a pearl to create a necklace for her big date.  A clear heart and the pearl are colored with a hot pink Copic marker.

So now I hope you do know that the February Releases for Technique Junkie are on sale for 15% off through February 8.  What are you waiting for?

Have a wonderful day -- and get inky!

Judy Jackson

Friday, February 3, 2017

TJ Inspirations - Gorgeous Glimmer Paste

I recently added Nuvo Glimmer Paste to the site, and after demoing it all last weekend, I thought it might be fun to show you one of the easy ways this beautiful product is used.

The stamp we are using, Throw Kindness, is one of the new stamps from the February release. Remember that the February 2017 release stamps are 15% off through February 8th. Just add any stamps from the category into your shopping cart and the discount will be automatically applied.

Throw Kindness

Nuvo Glimmer Paste - Amethyst Purple

Nuvo Glimmer Paste - Blue Topaz
The Stencil we are using is from A Colorful Life:
A Colorful Life - Dotty Double Stencil

Glimmering Kindness       

This technique couldn't be easier- yet it has tremendous impact. 
Place the stencil over the cardstock. I recommend using painter's tape or reuseable tape to hold the stencil down. 
Dip into the Glimmer paste bottle with a spatula, and use the flat edge to apply it to the stencil. For best results, use the spatula like a butter knife, applying the paste like buttering toast.

Once the first color is applied, clean the spatula.
 
Apply the second color of Glimmer Paste to the stencil in the same manner.
  a
Remove the stencil, lifting it straight off the cardstock. Immediately wash the stencil.
 
The glimmer paste may be dried with a heat tool, or left to air dry. Note that the paste on my card was nearly fully dry by the time I finished washing my stencil. It is very fast drying.


I hope you are a little inkspired by today's issue. See you next week!
Sincerely,

Pat Huntoon
Technique Junkies LLC 

Wednesday, February 1, 2017

Welcome to the hop! New Stamps for February!

 Today I am proud to show off the 15 newest stamps in the Technique Junkies line. The TJ Design Team has tons of inspiration for you to view to kick off the release!

All February 2017 New Release stamps are 15% off through February 8th. We can all use a little bargain now, right? No codes needed, just put them in your shopping cart and the discount will be applied at checkout.

This is the first stop after you are done here, you can go right on to Lanette next to view the whole hop and be inspired:


Our first fun card uses the  Downton Boy Kitty image with the Sarcasm sentiment. I just thought the expression on the cat's face worked fabulous with the Sarcasm comment...

The second card today uses the Beautiful Strength focal image. Te sentiment is from the previously released Beautiful Faces set.

The background uses a brand new stencil from a new stencil company with a wonderful line of stencils that I am releasing this week. More to come on that background!

One more before you move on to the next stop on our hop:

The final card on this blog today uses the Talking to You background with the Kitty in Curlers focal Image. To create the colorful background, I simply swiped three different ink colors on a white sheet of paper, then stamped the background over the top. I swiped and stamped the image again, then cut out the "Hi There" word bubble for the Kitty. 

Here is an up-close view of the kitty:
Time to move on to Lanette's blog for the rest of the hop -- have fun and make sure you take advantage of the 15% discount on the February Stamps!

Pat Huntoon

Tuesday, January 31, 2017

With Heartfelt Sympathy


Hello TJ friends, this is Beth Norman with two fun techniques (sorry, I couldn't find the two techniques I used in the Newsletter).  I needed sympathy cards so I worked on three of them and am happy with how they turned out.

I used one of my ultimate favourite stamps called Flourished Floral and paired it with With Sympathy Set of 5.  How perfect for what I needed.


I heat embossed with white embossing powder and inked it up with Distress markers.  I rubbed the Distress markers onto an acrylic block and watercoloured using the Distress ink I scribbled onto the block.

Please don't forget there is a new release tomorrow and a hop to go along with that.  I look forward to seeing you come back for the reveal.

I hope I have inspired you to try these techniques.  Have a super day!


Saturday, January 28, 2017

Sweet & Sparkly

Hello All! Lanette Here!

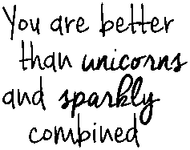
Today I wanted to share a quick card that I created for my daughter using our Unicorns are Sparkly Stamp (#SDX090). She just loves unicorns and all things sparkly so this stamp is perfect for her!


If you would like to see how I created this quick card you can watch my video here:


A few details just for fun..


Here is a better look at the stamp I used today...

SDX090 Unicorns and Sparkly


I just love this stamp its perfect for all the sparkly little ladies out there!

Thank you so much for stopping by today! 
I hope that I have inspired you in some way!


Friday, January 27, 2017

TJ Inkspirations - Tri-Panel Accordion


Today's tutorial is a blast from the past.  The original technique shown here was on the Designer Paper Perfection CD. I have a condensed version of the tutorial below, but if you have the CD, I suggest you look it up on the CD for more specific directions and additional artwork.

Start with a  5 1/2" x 12" piece of card stock. Score the paper at 4", 6 1/2", 9" and 10 1/2". With the 1 1/2" fold facing left, use a bone folder to score the folds as mountain, valley, mountain and valley.

Use the bone folder to flatten the folds.


Mat designer papers or stamped pages onto the first two accordion folds. The first panel of paper is 1 1/4" x 5 1/4" with a 1 3/8"x 5 3/8" mat. The second panel uses a 2 1/4" x 5 1/4" paper with a 2 3/8" x 5 3/8" mat.
Add a layer to the inside of the card with a 3 3/8" x 5 1/4" piece of paper. Stamp the layer, if desired.

Stamp, mat and color the focal image. Punch small holes on the left and right side of the image and thread a ribbon through the holes, with the ribbon running along the back of the image. Adhere the left side of the image to the top panel of the accordion.
Tie the ribbon to close the accordion card.

Here is another sample using the Left Unsupervised stamp as a focal image:
New Products!

I recently added some additional Nuvo products to the Technique Junkies Website. I've added additional Mousse colors, glitter drops and metallic flakes. I will be highlighting them in the coming weeks with techniques on the blog and in the weekly email.
I hope you were inspired today!
Pat Huntoon