Wednesday, November 16, 2016

Day 2 of the 30 Days of Christmas

Planner Clips Using Technique Junkies Stamps

Hey, Inky Friends! Ro, here, with a special project just for you. 

I jumped on the Planner Bandwagon some time ago. I love keeping track of all my "stuff" in there. So I thought for the holidays, I would make some cute planner clips using the Technique Junkies Christmas Stamps currently featured.  


I created a set of three clips using the Christmas Trees set of 6 stamps (SS045). I even created a little video for you to show you how simple they are to make using Shrinky Dinks. It's my first instructional video, so be gentle...lol.


Basically, you sand the shrinky dink medium, then stamp with a permanent ink, shrink and mount to a paper clip. And with this set of stamps you get six individual trees in all different styles. So much fun!

Hope you are inspired to give it a try! And remember to come back tomorrow for Day 3 of the 30 Days of Christmas!

Til next time,
Keepin' It Inky!


Monday, November 14, 2016

Winter Wonderland


This is not necessarily a Christmas card, but it sure could be.  It involved some creative stamping but it was not hard to do. I had this vision in my mind of snow covered trees in the forest.

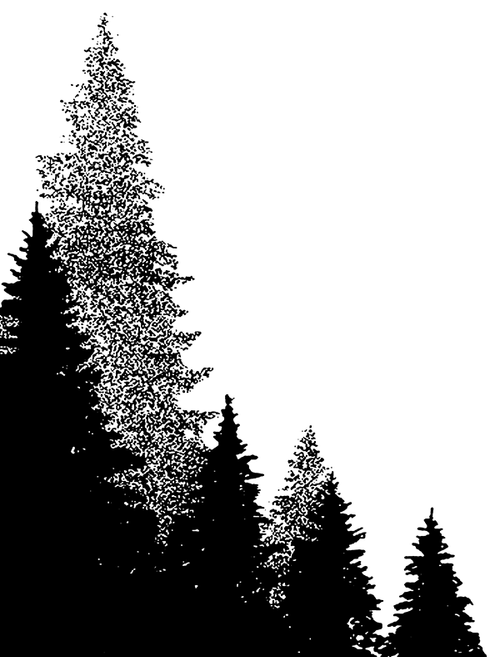
I first stamped the trees (Technique Junkie Stamps Hillside Pines - http://techniquejunkies.com/hillside-pines/)  with a nice dark green ink.  I stamped them in layers - one on top of the others.  I then cleaned my stamp very well.  I used a heat tool to dry the green ink.  Then I used my embossing buddy over the entire sheet of card stock so I wouldn't get embossing powder where I didn't want it. I inked my tree stamp lightly with Versamark ink.  I didn't want to get a solid image. I did not use my MISTI because I didn't want to have the Versamark exactly where my green trees were stamped.  Then I covered the Versamark with white embossing powder and heat set.  I repeated this process over both the tall and short trees.

Then I used  my handmade and home drawn could stencil.  Sponging different colors over the different sections of the stencil gives a unique look and no sky will ever look exactly the same.

Then I used the Winter Wonderland stamp from the Technique Junkies Winter Wonderland Sayings set - http://techniquejunkies.com/winter-wonderland-sayings-set-of-3/.

Several layers and ruffled ribbon finish the card.  Enjoy your winter.

Have a great day -- and get inky!

Judy Jackson

Thursday, November 10, 2016

Fall Colors and Trees

Hello Junkies!
Karen McAlpine with you today!!  I live in Michigan, USA.  And we are really enjoying Fall weather.  The leaves are turned and falling--now I have to rake--again!  Oh well, the trees are so pretty.  And, with all the beautiful colors outside, I just had to use those same colors on my projects.  I made two Fall cards using stamps from the Technique Junkies November New Release .


Materials List:
Stamps: Creaking Trees and Glowing Branches both from Technique Junkies
Ink: Archival Black and Sepia
CS: Kraft, black, and orange
Tulle 
Ribbon


Make It:

  • Make a card base from kraft CS
  • On orange CS stamp the branches of the Glowing Branches stamp with Sepia ink; set aside
  • On kraft CS, stamp Creaking Trees with black ink; add a layer of black CS


  •  Add stamped trees piece to orange background
  • Wrap tulle around this unit; tie in a knot and then add to card base
  • Tie ribbon around tulle


*******************


On the second card, a dry embossed background was used.  Distress the dry embossing with Vintage Photo Distress ink.
Add ribbon in a criss-cross pattern.  


I just love this stamp.  I would use this for Thanksgiving too.
So glad you stopped by today.   There are lots of fun Fall and Winter projects coming up over the next two months.  Technique Junkies is having a Thirty Days of Christmas Event starting Nov 15.  The design team will be showcasing Christmas stamps--with a discount on those stamps during the entire event!!!
 So, I will see you next time!!
Karen McAlpine
Dreaming and Creating

Wednesday, November 9, 2016

Bold Brilliant You

Hello Junkies!!

The Crafty Nurse here with a bit of inspiration from the November Technique Junkies release using "Typewriter Set #SS064".  The technique on this tag uses a variation on the "Layered Stencils" technique from Sensational Stencils CD using Tim Holtz Woodgrain & Typo stencils.  The first layer was put down with Distress Stains and the second with Lava Art Anthology Dimensional Paints.   I've taken a close up so you can see how matte and "lava like"this texture really is.  If you haven't played with the texture paints, they are so great for stenciling, gelli plating, and just all around coloring on your projects when you want some dimension.


I hope you are getting as excited as I am for the 30 days of Christmas that we've got planned here on the Design Team Blog beginning November 15th.  See you there!

Happy Inking,


Tuesday, November 8, 2016

How to Make a Tea Bag Holder


Hello fellow stampers and friends.  Beth Norman here with a cute tea bag holder which pairs perfectly with this month's stamp release called Like a TeacupThe best part of today's post, is a gentle reminder that today is the last day to receive your 15% off discount from Technique Junkies November Release.
Supplies:  Score board or blade, ribbon, small circle punch red line tape, One 3 1/2″ x 7 3/4″ cardstock, One 6 1/2″ x 7″ designer paper


Place your cardstock horizontally and score at 3 1/2″ and 4 1/4″


Place your designer paper so the short end is along the top.  Score at 1/2″ and 3 1/2″


Add Red Line tape to the top of your cardstock where it was scored as shown above


Fold your second score line and tuck it under the first score line.  Fold over the small score line with the Red Line tape and burnish well.
With the long side placed horizontally score at 3 5/8″
Turn the designer paper over and score, once again, at 3 5/8″
Fold your two score lines as shown
Take your circle punch and punch our a U-shape.  Repeat for the other side
Place Red Line tape in between the two score lines
Adhere designer paper onto cardstock in between the two score lines

Add teabags into slots and close with ribbon (approximately 25" then trimmed accordingly).  Finally, add Like a Teacup onto the front of your tea bag holder.

Monday, November 7, 2016

Coffee and Friends

Greetings Inky Friends!

Today's post brings you more yumminess from the November New Release!
Tomorrow is the LAST DAY to grab these at 15% OFF too!! SO go shop NOW
(well after you look at my card!) haha!

I used the Layered Swirls background and the  Coffee with Friends stamps on this card.
For the background I used the Tim Holtz Polished Stone technique with alcohol inks
and blending solution and then inked the Swirled background with some
Archival Ink and stamped onto the background.
I stamped the Coffee image and fussy cut a border and popped it off the Gold Thread.

Make sure to visit again on November 21st for my last card using this background
(or check the Blog Hop from Nov. 1st to see 3 other cards using this background!)

Until next time...
Happy Creating!

~Tonya xoxox

Saturday, November 5, 2016

Trust your Journey...

Hello All Lanette Here!

To day I wanted to share a quick tag that I created using a few stamps from this months new releases!


Products Used: Technique Junkies Trust your Journey &Hillside Pines Art Anthology Minx Ink, Art Anthology Colorations, Twinkling H2O, Tim Holtz Distress ink,  Archival Ink, Misc Ribbon, Button, wood veneer & Twine


Here is a closer look at the stamps I used today...


S695 Hillside Pines


SDX081 Trust your Journey


Thank you so much for stopping by today! 
I hope that I have inspired you in some way!