
| |||||||||||||||
| |||||||||||||||
Friday, February 3, 2017
TJ Inspirations - Gorgeous Glimmer Paste


 a
a


Wednesday, February 1, 2017
Welcome to the hop! New Stamps for February!

All February 2017 New Release stamps are 15% off through February 8th. We can all use a little bargain now, right? No codes needed, just put them in your shopping cart and the discount will be applied at checkout.
This is the first stop after you are done here, you can go right on to Lanette next to view the whole hop and be inspired:
Design Team Blog: http://techniquejunkies.blogspot.com
Lanette Erickson: http://stacksofscraps.blogspot.com
Cheri Weston: http://stampnboomer.blogspot.com
Kathy Stacy: https://craftynurse4u.wordpress.com
Ro Donner: http://rodonner.blogspot.com/
Beth Norman: http://www.sunflowers-dragonflies.ca
Beth Norman: http://www.sunflowers-dragonflies.ca
Pam DeChellis: http://journeyawakensthesoul.blogspot.com
Judy Jackson: http://judysstampart.blogspot.com
Pat Huntoon: http://patstamps.blogspot.com
Our first fun card uses the Downton Boy Kitty image with the Sarcasm sentiment. I just thought the expression on the cat's face worked fabulous with the Sarcasm comment...

The second card today uses the Beautiful Strength focal image. Te sentiment is from the previously released Beautiful Faces set.
The background uses a brand new stencil from a new stencil company with a wonderful line of stencils that I am releasing this week. More to come on that background!
One more before you move on to the next stop on our hop:

The final card on this blog today uses the Talking to You background with the Kitty in Curlers focal Image. To create the colorful background, I simply swiped three different ink colors on a white sheet of paper, then stamped the background over the top. I swiped and stamped the image again, then cut out the "Hi There" word bubble for the Kitty.
Here is an up-close view of the kitty:

Time to move on to Lanette's blog for the rest of the hop -- have fun and make sure you take advantage of the 15% discount on the February Stamps!
Pat Huntoon
Tuesday, January 31, 2017
With Heartfelt Sympathy

Hello TJ friends, this is Beth Norman with two fun techniques (sorry, I couldn't find the two techniques I used in the Newsletter). I needed sympathy cards so I worked on three of them and am happy with how they turned out.
I used one of my ultimate favourite stamps called Flourished Floral and paired it with With Sympathy Set of 5. How perfect for what I needed.

I heat embossed with white embossing powder and inked it up with Distress markers. I rubbed the Distress markers onto an acrylic block and watercoloured using the Distress ink I scribbled onto the block.
Please don't forget there is a new release tomorrow and a hop to go along with that. I look forward to seeing you come back for the reveal.
I hope I have inspired you to try these techniques. Have a super day!

Saturday, January 28, 2017
Sweet & Sparkly
Hello All! Lanette Here!
Today I wanted to share a quick card that I created for my
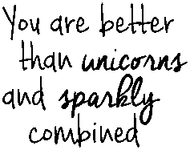
daughter using our Unicorns are Sparkly Stamp (#SDX090). She just loves
unicorns and all things sparkly so this stamp is perfect for her!

TJ Products Used: Technique Junkies Unicorns are Sparkly Stamp, Art AnthologyCotton Velvet, Art Anthology Parrett & Tink Sorbet, Prima Pastels, Versa
Fine Print Stamp, Misc. embossing powder & Glitter.
If you would like to see how I created this quick card you
can watch my video here:
A few details just for fun..

Here is a better look at the stamp I used today...
I just love this stamp its perfect for all the sparkly little ladies out there!
Thank you so much for stopping by today!
I hope that I have inspired you in some way!

Friday, January 27, 2017
TJ Inkspirations - Tri-Panel Accordion

Today's tutorial is a blast from the past. The original technique shown here was on the Designer Paper Perfection CD. I have a condensed version of the tutorial below, but if you have the CD, I suggest you look it up on the CD for more specific directions and additional artwork.

Start with a 5 1/2" x 12" piece of card stock. Score the paper at 4", 6 1/2", 9" and 10 1/2". With the 1 1/2" fold facing left, use a bone folder to score the folds as mountain, valley, mountain and valley.
 Use the bone folder to flatten the folds.
Mat designer papers or stamped pages onto the first two accordion folds. The first panel of paper is 1 1/4" x 5 1/4" with a 1 3/8"x 5 3/8" mat. The second panel uses a 2 1/4" x 5 1/4" paper with a 2 3/8" x 5 3/8" mat.

Add a layer to the inside of the card with a 3 3/8" x 5 1/4" piece of paper. Stamp the layer, if desired.

Stamp, mat and color the focal image. Punch small holes on the left and right side of the image and thread a ribbon through the holes, with the ribbon running along the back of the image. Adhere the left side of the image to the top panel of the accordion.

Tie the ribbon to close the accordion card.
Here is another sample using the Left Unsupervised stamp as a focal image:

| New Products! |
I recently added some additional Nuvo products to the Technique Junkies Website. I've added additional Mousse colors, glitter drops and metallic flakes. I will be highlighting them in the coming weeks with techniques on the blog and in the weekly email.
I hope you were inspired today!
Pat Huntoon
|
Thursday, January 26, 2017
Where I Need to Be...Inspirational Tag
Happy Thursday Junkies! Pam here today to share a quick inspirational tag project. Today's tag uses the stamps Rain Dance (definitely one of my favorites) and Needed to Be. These two stamps pair so well together.

For the background I decided to play with my Tim Holtz Distress Crayons. Love how these blend so seamlessly. Then overtop I used a stencil and a baby wipe to lift the crayon and get the "stars" to shine in the background.

I used my MISTI stamping tool to ensure I got a good image stamping in Archival Black Soot atop the distress crayons. This tool is a must for silhouette stamps like this- a perfect image every time!
Thanks for joining me today and stay tuned here and to my blog for more inspirational tags using these fantastic stamps!
Embrace Imperfection
Pam
Wednesday, January 25, 2017
WHAT HAVE YOU DONE TO MY STAMPS???
Oh, you know, just some deconstruction by Ro! lol
***
Sometimes when I look at stamps, I see them not as they are, but as they could be. Case in point...For my February calendar page, I loved the giraffes, but the sentiment wasn't very Februaryish (that's a word, right?). So, I did a little surgery and cut the sentiment apart from the image...two stamps for the price of one! ;) I then used the sentiment from Messy Love which fit perfectly with February.
***
And that worked out so well, I decided to do it again with another set. I loved the umbrella couple from Survive Together, but I didn't want to use the sentiment. So I stamped it in black and colored in the words. And Partners In Crime is in three rows on one stamp. I wanted to do it in a banner, so snip-snip-snip. I used a different sentiment on the inside of each note card.


Patterned Cardstock from Pink Paislee and Craft Smith, Memento Ink
***
For my last project, I just wanted to have a sympathy card on hand. And these required no surgery! I stamped and embossed the background on some Kraft cardstock and added the sentiment (stamped on vellum) using a decorative clip. I added some score lines to finish off the card.

* Partners in Crime and With Sympathy both include multiple sentiments in their sets. Well worth the purchase!
***
That's my share for today! If you would like more information on how these cards went together, just leave me a note in the comments and I will happily respond!
Til next time,
Keepin' It Inky!

Subscribe to:
Posts (Atom)
