Wednesday, March 22, 2017

DRAGONFLY DREAMS

“The Dragonfly brings dreams to reality and is the messenger of wisdom and enlightenment from other realms.” – Author Unknown
I have always been fascinated by dragonflies and butterflies. Their ethereal wings fluttering by. I love it when a dragonfly hitches a ride when I'm kayaking. So, admittedly, Dragonfly Collage (S681) is one of my favorite background stamps. It was my inspiration for today's card. I love how the light airiness of the wings are balanced out by the heaviness of the stenciled word. Might just have to make one to frame for my craft space!
To make this card:

  1. Start with black A2 card base.
  2. Cut floral paper slightly smaller and adhere to card base.
  3. Stamp Dragonfly Collage (S681) onto a 3 7/8” x 5 1/8” piece of kraft cardstock using Versamark Ink, then emboss with clear embossing powder. Adhere to slightly bigger piece of black cardstock and attach to card base.
  4. Stamp Dragonfly Collage again onto floral paper using Tuxedo Black Memento Ink. Trim out the larger butterflies and dragonflies.
  5. Add foam adhesive to the wing area of each trimmed piece. Remove backing tape. Add glue to the body of the images and attach to the appropriate areas of the embossed background image.
  6. Using the Art Anthology Soliloquy Stencil and painter’s tape, mask around the desired word and attach to the card front.  Add Art Anthology Stone Effects Dimensional Medium in Lava with a paint brush, dabbing through the stencil. Be sure stencil is kept flat to avoid bleeding. Remove (and wash) stencil. Let dry.


--> What inspires you?

Til next time,
Keepin' it inky!

Tuesday, March 21, 2017

HELLO CUPCAKE WITH SPONGING

Hey there, Junkies,

A very quick post today.  I had some fun making this very quick card using the sponging of various colors of Distress Inks and the new Hello Cupcake stamp set. This is an awesome set!


To make this card, I sponged on the diagonal then colored the various cupcakes with Copic markers.  I also highlighted and did some doodling with my white gel pen to help make the image pop off the background.  

After I finished coloring, I splattered some black acrylic paint on the layer with my paint brush.  I like the detail that gave the bg.  I had a scrap piece of designer paper so I used it to accent the layout.  

I hope you find ways to use this technique with some of your stamps.  

Thanks for stopping by.


Monday, March 20, 2017

Friendly Daisies

 
To create this lovely spring card I used Technique Junkies Spring Daisies - http://techniquejunkies.com/spring-daisies/. I used black Memento  ink and then used both Copic markwers and watercolors to add the color to this panel.  The verse on the tag is called A Good Friend - http://techniquejunkies.com/spring-daisies/ - and is a wonderfully true thought.  Good friends are are very real treasures.

The verse was stamped with black Versafine ink and heat embossed with  detail black embossing powder. I punched out the shape and several "ribbon tags" of both green and gold glitter paper.  I adhered the "ribbon tags" with glue dots, and used several layers to finish the card.

Have a great day and get inky!

Judy Jackson

Wednesday, March 15, 2017

Strike a Pose!


Hey Junkies!

The Crafty Nurse back with some inky inspiration for this wonderful almost spring day!  This is such a beautiful time of year filled with new hope and promise of beautiful things to come.

Along that thought, I wanted to share my favorite stamp of the new March 2017 release called, "Queen SD787".  Such a striking figure, right?  To create her I used my MISTI.  Stampers, if you don't have one of these tools, run, don't walk.  I resisted for a long time but once I got one I wish I'd done so a lot earlier.  They really making getting good impressions so easy to achieve and the techniques that you can do with these are just amazing.

For the focal image, I began by selecting the areas I wanted brown and I used Distress Markers in Gathered Twigs to color just those areas.  I had to do this multiple times, but that's okay because the MISTI allows for perfect alignment.  Once I did that, I repeated the areas I wanted black, coloring those with Black Soot and then the lips in Fired Brick.  Now, here comes the really cool part. Apply clear embossing powder to your entire image and heat set.  Now your entire image is resistant allowing for any application of technique over it.

The final step for my focal image is application of Faced Jeans Distress Ink through the Art Anthology Cracked Stencil cool, right? For the background I used a version of Distressed Stain Dip from the Artistic Effects CD also using Faded Jeans and Gathered Twigs Distress Ink.  Finally, I added another TJ stamp to the edge of my background called, "Bubble Icicle #S573", which I also stamped using my MISTI with Archival Ink.


Thanks for stopping by the Technique Junkies Blog today and we all wish you lots of creative play today and always.

Bye, Bye for now!!
The Crafty Nurse

Tuesday, March 14, 2017

Hello Cupcake


Hello cupcake.  Beth Norman here. So glad you could join me today for a delicious treat.  I was so thrilled when Pat sent me this stamp set in the March new release.  I think I jumped for joy and danced in circles.  I never, never tire of cupcakes, and is there anything that has stayed in vogue for so long?  I have more plans in my head for using this Hello Cupcake, Set of 7.

When I added my sentiment, using SU’s Tempting Turquoise, I used my Misti to get a bright finish.  I used Doodlebug’s 6 x 6 pad of paper for my designer paper and added brads to each corner.  My stamp was coloured with Prismacolor pencil crayons and OMS.  I found the mat too wide by using the next larger size of die, so I carefully cut the Tempting Turquoise mat by hand.

That’s it in a nutshell.  Thanks for stopping by today!

Saturday, March 11, 2017

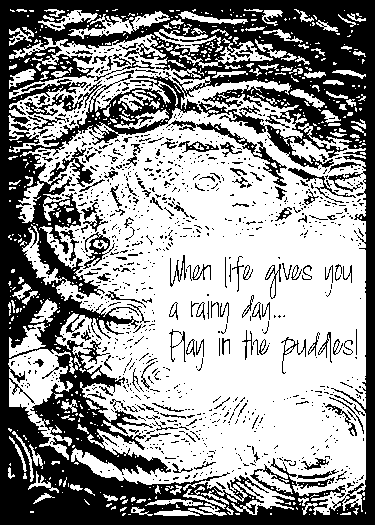
Play in the Puddles!

Hello All Lanette Here!

I just wanted to share a fun mixed media tag that I created using one of this months new releases. 


Products Used: Technique Junkies stamp Play in the Puddles & Crosshatch, Archival Ink, Watercolor Tag, Twinkling H2O's, Art Anthology Sorbet & Stencil, Distress Ink, UmWow Chipboard,  Misc. Sequins, Tread, Buttons  Ribbon.

Now lets take a look at how my tag came together...


I started by stamping my image on my watercolor tag and twice on a sheet of white cardstock using Archival Ink.


Next I stared building my background by spraying my tag with water and adding a mix Twinkling H2O watercolors.


Then I added a bit of texture with a bit of Art Anthology Sorbet through an Art Anthology stencil. 


Next I added a bit of my faviorte background stamp (Crosshatch) using a bit of Distress Ink.


I embossed my chipboard using a bit of White embossing powder and a Versa Mark Ink Pad.


After building my cluster I added a few finishing splatters :)


A few details just for fun..


Here is a better look at the stamps I used today...


Thank you so much for stopping by today! 
I hope that I have inspired you in some way!


Friday, March 10, 2017

TJ Inkspiration - Light Watercoloring with Distress Inks

I love Ranger's Distress Inks - they are versatile and allow many different effects. The technique I am using today takes full advantage of how well the inks work with water.

Today I am showing you a light watercolor technique with Distress Inks. This technique allows for very light, translucent coloring.


Here is the stamp I am using today:
Big Bunny

Light Coloring with Distress Inks        

. 
 First I stamped the Big Bunny stamp on white cardstock with brown StazOn.
 

To color the image, I placed a small amount of water into a paint well. I dipped a paintbrush into the water, then ran it gently along a corner of the ink pad (my first color was Brushed Corduroy), picking up some color from the pad. Then I dipped the brush back into to well, swirling the brush to tint the water. Once the desired color intensity was achieved, I painted the bunny in the areas I wanted the Brushed Corduroy ink to show.
The second color I used was Lucky Clover for the leaves and background. I used the same technique as above to add green where I wanted it.
 
To add highlights and additional color, I used Pickled Raspberries on the ears and around the nose, and Vintage Photo to areas where I wanted to add shadows.
    
Flowers were added to the bottom of the card after matting.
 
Bubblegum Pink Crystal Drops were added to the center of the flowers to add dimension.


From now through Next Tuesday (March 14th), use the Coupon Code crystal20 at checkout 
to receive 20% off all Nuvo Crystal Drops! 


Now is the time to stock up on all your favorite colors!

Pat Huntoon