


| ||||||||||||||||||
| ||||||||||||||||||
Friday, May 26, 2017
TJ Inkspirations: Watered Nuvo Mousse


Thursday, May 25, 2017
Be Silly, Be Honest, Be Kind
Hello friends!! Giovana here with a fun card using the technique from our current challenge (with a little twist) and a deconstructed use of stamps ;) Super easy and another way to use your stamps.
Let's get started:
- First I started with a 6"x6" white card. Die-cut chapel kinda style and position my card base front, Rose Cluster stencil and die-cut, securing them with painter's tape. Then, I used Mustard Seed Distress Ink and started sponging from left to right, putting less pressure on the right side.


- After sponging, move the stencil a bit to the right and using a marker and trace on all thw white parts.

- You will get something like this.

- For the beautiful roses from Rose Doodles, I stamped them on a piece of White cardstock in Memento Pink Rose and Bamboo Leaves, colored them with the new Chameleon Color Tone Pencils, then I fussy cut all of them ;) I arranged them on the left side, under I added silver thread and stamped this beautiful "Be Silly"sentiment using my MISTI and Color Burst Lamp Black Ink.

As a final touch I added pearls and the card was done!!


Hope you like my project!
Have a fantastic day!

Wednesday, May 24, 2017
Shiny Pearls
The Crafty Nurse here for a midweek post to spark your creative flow. Please join us over at the new Technique Junkies Facebook Group to share your work.
Stamps: "Be Your Own Kind of Beautiful"
Technique: Stenciled PE from the Sensation Stencil CD

Please enjoy 10% off at the Technique Junkies store using TJ10Kathy.
Happy Arting
Tuesday, May 23, 2017
How to Make Faux Designer Paper


For 10% off these, or any other, stamps and products (excludes new releases and clearance items), you may use the code above.
Technique Junkies Stamps Used:
If you belong to the Technique Junkies FB page,
I’d love to see your take on this technique. Don’t forget, we have a
challenge which you’ll find at the top of the page. Hope to see you
there!
Sunday, May 21, 2017
A tribute card for Memorial Day

God Bless America.
Stamp: Last Breath
Pat Huntoon
Saturday, May 20, 2017
Same Stamps 2 Ways
Hello All Lanette Here!
I just love our new Crazy Cat Border Stamp! So I thought it would be fun to create two very different cards using this fun stamp... Heck I even used the same verse stamp and the same papers...
First I kept it clean and simple....


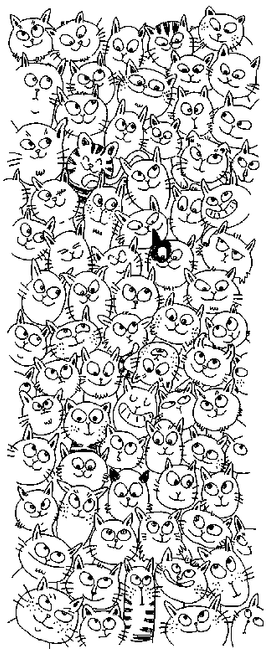


I just love our new Crazy Cat Border Stamp! So I thought it would be fun to create two very different cards using this fun stamp... Heck I even used the same verse stamp and the same papers...
First I kept it clean and simple....

Next I mixed it up a bit with a bit of Distress Oxide Ink....

Here is a better look at the stamps I used today...
Thank you so much for stopping by today!
I hope that I have inspired you in some way!

Friday, May 19, 2017
TJ Inkspirations
If you haven't seen, Jeanne Streiff just announced the newest Technique Challenge on the TJ Facebook Group and blog. The challenge is to use the Shaped Stencils Technique (directions here) with Technique Junkies stamps for a chance to win a $25.00 gift certificate to anything in the TJ store.
Here is my take on the Shaped Stencils Technique:

I stamped and cut apart the Left Unsupervised sentiment, and used the Peeking Image over the shaped stencil. The shape is a circle die that I sponged ink through, using the Grammies's Lace stencil from A Colorful Life Designs. I colored my girl very lightly with Chameleon Colored Pencils.
 I created the shaped stencil portion using the Stonework Stencil from A Colorful Life Designs through an Apothecary Die. To "grunge" my piece a bit, I sprayed the background with Timeless, Rustic and Warm Art Anthology Colorations Sprays.
Once dry, The Downtown Boy and Sarcasm stamps were stamped directly on the stenciled portion, using brown StazOn ink. The cat was colored with Chameleon Colored Pencils.
|
The Rules
| |
You will have a whole month to complete the challenge. Enter as many times as you wish using the link list at the bottom of the post for a chance to win a $25 Technique Junkies Gift Certificate!
You have until June 11th to enter. Winner will be announced June 12th.
A few simple rules.
You must use Technique Junkies stamps to be chosen to win a prize.
If you don't have any Technique Junkies stamps feel free to play along and link your project but you will not be in the drawing for a prize.
You must use the challenge technique in your project (that's the challenge!)
No linking old projects. Projects must be new.
Please list Technique Junkies stamps with links in your project posts.
Please link directly to your project (not a general blog).
If you have a problem linking to the challenge contact Jeanne
Hope you were inkspired today!
Pat
| |
Subscribe to:
Posts (Atom)

