Saturday, May 29, 2010

Metallic Rose Technique By Design


Hello TJ friends. Kathie McGuire here with today's featured project. The design for this card comes from the first Technique By Design challenge a few months ago. I loved the easy layout and design and found that it was the perfect way to use up all of those TJ scraps that I've saved for so long.

This card features two of my all time favorite techniques: Nail Polish (4/04) and Starch Smoosh (8/09). The Grunge Rose (focal point) is something that I seem to be using on everything since they are so fast to make and so easy! Plus, I got to recycle some old silk metallic poinsettias from Christmas decorations as leaves for this flower.

I hope you've enjoyed the card and thanks for stopping by today.

~Kathie McGuire

Thursday, May 27, 2010

Colored Reverse Grid Lines and Pastel Detailing by Judy Jackson


Colored Reverse Grid Lines - from the August 2006 TJ newsletter - looks harder than it really is. It is an easy way to add real visual interest to your cards.
And coloring in a very detailed stamped image like this one from Artistic Out Post couldn't be simpler than with the Pastel Detailing technique from the December 2007 TJ Newsletter. This image from the Old Grist Mill set was easy peasy to color in using this technique!
A few spritzes of the new Log Cabin Smooch Sprays and it looks pretty! Add a few embellishments and some card stock layers and your card is done.
Have you tried any of the older techniques that have been around a while? If you are an Ultimate Junkie then you have full access to ALL of the techniques on the Technique Junkie website. What is an Ultimate Junkie, you ask? Contact Pat Huntoon and she will be more than happy to tell you all about it!
Judy Jackson

Wednesday, May 26, 2010

Hetty bugs a can

For all of you who love to try metal in their embossing folders, I have a tip for you today: Go shopping!
When you go to the supermarket and do your regular shopping, take another look at the soda cans. Some have beautiful colors (and even the drinks inside are nice too!!) . When you are home and have finished your drink, take some garden scissors and cut of the top and the bottom of the can. Now you can flatten te metal and lay it inside your embossing folder.You can also use the metal side (inner side of the can), but for the double metal embossing, the outside is great. Once you have run it trough the cuttlebug, you take some sandpaper and sand your metal before you run it trough the cuttlebug again with another folder. I used my asian flowers and swiss dots folder for this one. And one more tip: the ceapest cans work the best, for their metal is much softer!
Papers and stamps for this card are all by Club Scrap. It is from the May Blossom collection.

There is more inspiration on my Craftchaos Blog:

Tuesday, May 25, 2010

Color My World....

Happy Tuesday, again! Jane Bosi, here, sharing a project featuring the Whisped Frames technique, February 2010. This is the pefect way to highlight my adorable image from Hambo Stamps. I just love this little Pig-casso!

Yes, I did find myself a bit clever when I discovered an awesome paint splat stamp from I Brake For Stamps--I made my "faux" Bingo Blast (April 2009) this way....patting myself on the back a time or two for my genius! LOL! Some would call it lazy, but.......oh, how it made me happy! The musical score background stamp is from Impression Obsession and the sentiment, from Amuse.

It's a rather loud card, but as the sentiment goes....you color my world!! Go color yours!
TTFN, Jane

Saturday, May 22, 2010

Ann's Impression


Hey, there! Ann Clack here!  How is your weekend started?    Mine will be full of rain.  Which isn't entirely a bad thing......that means I'll have time to stamp!!  I actually totally spaced that I needed to have this card done and ran downstairs last night after our family left.  Had this card done in a jiffy.  The background is called Brayered impressions from the Dec 09 newsletter.  I submitted the technique but I don't think I was the first to really think of it!  It is so fast and fun.  Give it a try!

Wednesday, May 19, 2010

Burnished Embossing

My  card today features a technique from January '08: Burnished Embossing.  I was a little more 'generous' with the burnishing than the tutorial shows, but it also works.   The flourish stamp is from Stampers Anonymous and the sentiment is from Verses Rubber Stamps.


.....Evelyn Spikes

Saturday, May 15, 2010

Metallic Parchment


Kathie McGuire is stuck on Metallic Parchment (4/2010)! That's right. I'm hopelessly helpless when it comes to this technique. It first came to me as one of my TJ Designer assignments, so I had no choice but to try it. It looked simple enough, and well, I already had of the necessary supplies to do it. So, off I went to try Metallic Parchment.

I felt lucky to have been assigned a technique that only had a few simple steps (I admit, sometimes I should be called the Slacker Stamper!). And I was excited to learn a new technique where I could use my alcohol inks, since they are often the most neglected inks in my cabinet. And then there's that huge pile of tissue paper waving at me from the top shelf every time I walk past it in my garage. And lastly, I was giddy when I was able to get out my metallic acrylic paints that seldom get any use.

Fast forward 5 minutes and I had my first piece of Metallic Parchment in my hands. I was overjoyed with the results, to say the least. Since I chose one of my favorite color combinations (teal/torquoise/purple/copper), I thought this pallette was just right for a southwest/desert image. I found my Taylored Artwork stamps couldn't be more perfect. I stamped the image with Versamark ink onto watercolor paper and added copper embossing powder to coordinate with the MP background. The image is colored with Watercolor Crayons.

If you haven't tried Metallic Parchment yet, you are missing out on one of the fastest, easiest and most stunning techiques ever featured in the TJ Newsletter. It may be my all time favorite!

Thanks for listening and stopping by the TJ blog today!!

~Kathie

Friday, May 14, 2010

Burnished Background meets Tri-fold Shutter Card by Judy Jackson


The first image shows the Tri-fold Shutter card folded flat. The next one shows the opened and sitting on the table. The background (wheeled with Versamark, and embossed in gold) was white card stock which I burnished with sponges and olive ink. I watercolored the butterflies and various highlights in the background. The large F - and the word friend - are also stamped on white cardstock, stamped with Versamark and embossed with gold embossing powder. Then I burnished the "F" with the same olive ink on a sponge. The small purple square was also burnished with plum ink after I stamped the flourishes with white pigment ink and embossed with clear powder. I added large rhinestones to the center of the large flowers. I used background paper for the inside papers and then added more stamping, and/or chunky glitter or microbeads. All of it just adds up to an elegant card!
Have a wonderful weekend! I hope you have some creative time!
Judy Jackson

Thursday, May 13, 2010

Try that Technique (and 2005 half Price)

Today's Try That Technique is one of the all-time favorites of the Technique Junkies. Pulled from the February 2005 issue of the Technique Junkie Newsletter, there were three different ways to achieve the Warhol look. I chose "Warhol 2" because I thought the ladybugs looked cutest with that style. All of the stamps used on my card are from Mark's Finest Papers.

Now it is time for YOU to Try that Technique! Simply create a Warhol card and post it to the TJ egroup, post a link to your creation in the comments below, OR email it to me (phuntoon@optonline.net).  

If you don't have these issues, no worries! You can get them for half-price this week (plus shipping) -- only $9.00 for 6 issues. Just email me for an invoice, and you will be creating Warhol masterpieces of your own before you know it!

Tuesday, May 11, 2010

Glimmering Butterfly

Happy Tuesday! Jane Bosi, here, bringing you a project showcasing the Glimmer Mist Watercolor technique (April 2010). I finally had a chance to try this technique--what beautiful results! The shimmer of the g. mist really adds something special!

To complete my card, I used a new stamp from Memory Box--such a beautiful butterfly, I couldn't resist. Masking each area separately, I used my Copic Airbrush to color the entire image. I love the smooth results and vibrant color achieved with the airbrush--don't you?

Be inspired today! Make a little mess and see where it takes you :)
TTFN, Jane

Monday, May 10, 2010

Judy Jackson does Pointillism


Try this Technique
Do some techniques scare you and you think, "Boy, I am not sure I can do this one?" Well, that is how I felt when I started to create the background for this card. As I read the directions for the Pointillism technique from the December 2006 Technique newsletter they seemed simple enough. But as I was working I wasn't so sure, but I think i got it right!
Now the background is dry! What stamp shall I use? I decided to use this lovely giraffe from Prickly Pear. I embossed it with a brown embossing powder and then watercolored the image.
It ended up being a fun card to create. What don't you try it too?
Have a wonderful stamping day!
Judy Jackson

Saturday, May 8, 2010

To Mom from Ann

I got a card in the mail today from Cathy Yamashita.....it was just lovely.  AND since I hadn't made my card for my mother yet, I used her idea and made this card!  The stamps are from Hero Arts and Stamp Camp.  The technique is Masked Spellbinders from the April 2010 newsletter.  It is such an easy technique.  Give it a whirl today!  May be inspired as I was!


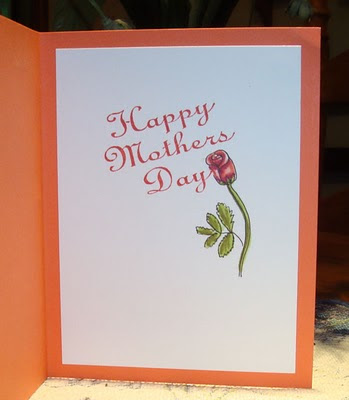
Now for the inside.  Found the stamp I wanted, inked it up, stamped it and drat!, I had a smudge at the end of the word 'day'.  So.......what to do......cover it up!!  I drew the rose bud, colored it in and now no one but you and me will know!

Thursday, May 6, 2010

Try That Technique FAUX DESIGNER PAPER


Good morning stampers! Beth here with another challenge for you. This week Diana Enns and I challenged each other to use the Faux Designer Paper technique from December 08. My faux designer paper took me into the direction of shabby chic, but you can create any style you like.

If you would like to play along for a chance to win your cards on the Technique Junkie Yahoo group home page, link up your card below.

Congratulations Hetty. You are, once again, the lucky winner from last week. Your card is up on the home page.


Wednesday, May 5, 2010

Walnut Ink Resist

Hi!  It's Evelyn here with a technique from April/May 2008.  I used Lilac Walnut Ink spray with a butterfly image from Penny Black and a sentiment from River City Rubber Works. 


....Evelyn Spikes

Tuesday, May 4, 2010


Don't forget about the TJ Sketch challenge! All of the April Issue entries are due in May 15th, based on the sketch in the newsletter and online. My card above uses the sketch with the Torn Frames Technique from the December 2008 issue of the TJ Newsletter.  I can't wait to see YOURS!
All stamps and paper: Stampin' Up!

Sanded Core'dination by Judy Jackson


This is a card that the different aspects of the finished product evolved as I went along. That is what happens to me most often when I stamp. I rarely can see the finished prodecut in my mind first -- however, it does happen from time to time, but not this time!
First I chose the paper to emboss and then sand. Then I chose the embossing folder. Now I wanted flowers that would match or blend with the type of flowers on the embossing folder. Done -- now how shall I treat the flowers as just plain stamping didn't appeal to me -- ahh I will use the Kiss With a Twist technique. Cool! It gave the flowers a very soft look. Stamps are from Stampin' Up and Close to My Heart -- both are retired sets.
Add some layers, distress some edges but not all, add some sponging, add some home made glimmer spray, add some ribbon, add a saying on a tag for the final embellishment -- and I am done!
I hope flowers are blooming for you today!
Judy Jackson

Sunday, May 2, 2010

Sanded Core'dinations by Chris

Hello Junkies - This is Chris Dickinson coming by to share a few cards using the technique Sanded Core'dinations from the April/ May 2010 newsletter.

The first card is a BRAND NEW release from I BRAKE FOR STAMPS

Stamp Set: Collage Stamps at I Brake for Stamps!
Cardstock: Coordinations, Teal, Celery, Apricot
TECHNIQUE: Sanded Core'dinations technique from Technique Junkie Newsletter
Accessories: Copics, Cuddlebug, Big Shot, Sanding Block, Stickles , Dew Drops, Grosgrain, Paper Piercing Tool
Stamp Set: Our Daily Bread Designs Sing to the Lord, Words by SU
Cardstock: Core'dinations, Basic Grey, Neenah #80 White
Accessories: Scallop Punch, 1 3/8 & 1 1/2 circle punch, Xyron, Glitter, Dimensionals, Martha Stewart Punch, Burgundy Organdy


Thanks so much for stopping by and looking! Have a great day!

Chrissy D