Wednesday, June 10, 2015

Hot Glue Stencils

Hey Junkies!  The Crafty Nurse here with some inky fun using stamps from the June Technique Junkies Release and a home made stencil.  Would you believe these "sketchy" flowers were made in less than 5 minutes using hot glue?  Yep, hot glue.   I've seen many stamps and dies in this shape and you can create these in no time at home. What's even better, the hot glue stencils pair perfectly with the techniques on the Sensational Stencils CD.


All you need is a non-stick surface and hot glue.  Simply start in the middle and create circular motions outward.  You DO want some of the lines to touch so the flower stays together.  It also looks more like pedals once the ink is applied if they are touching.  That's it.  While you have your glue gun out, you can make other types of pedal flowers, circles, geometric or organic designs.  How fun is that?

I sprayed several panels using Dylusions and Lindy's Stamp Gang Sprays. 

My first card  uses Lindy's Stamp Gang Sprays and the Technique Junkies June Release Sentiment, "Different Flowers."  I know my sister would love this card.  The Technique is called "Stencil Spray Fun and is found on the Sensational Stencils CD."

. 

My Second card also uses the "Stencil Fun Technique," but with Dylusions Ink.  If you look in the background I added another TJ Stamp called "Whimsical Garden" using Versamark ink.   The "Different Flowers" sentiment is stamped with Versafine Black Onyx ink and embossed with clear powder.


I hope you'll head on over to the Technique Junkies store and check out more of the new June Release stamps.  While your there, pick up the Sensational Stencils CD and make your own hot glue stencils!

Happy Inking
The Crafty Nurse


Tuesday, June 9, 2015

Art Squared


Hello, Beth Norman, here with a short tutorial for you that is simply called Art Squared.  This is a great card for many occassions by simply adding a sentiment in place of all the picture stamps.  I have scraps left over so I'll eventually post another card using this style.


Supplies:  Kaleidacolor ink pad (or a variety of ink pads), sponges, glossy cardstock, white cardstock (not shown), paper trimmer and StazOn


Using a regular piece of white paper, stamp out your plan.  This will allow you to make any adjustments as necessary.


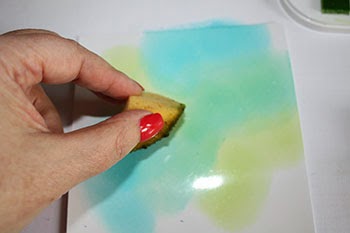
Using your sponge, ink up glossy cardstock.


Using your choice of adhesive, glue down your image onto your cardstock in which you have laid out your design plan.  My choice of adhesive was the use of my ATG gun.  Continue adding your inked pieces until your design plan is fully covered.

STAMPS USED:


TIPS:

  • Colour two identically sized (scraps will do too) pieces of glossy cardstock with ink.  This will allow for any mistakes.  For example, when I first stamped out my Bold Daisy, they were just blobs because I used a juicy pad.  On my second attempt, I did not re-ink and pressed out two flowers
  • To keep an exact size of paper, place your blade at the bottom of the glossy paper and cut upwards.  Cutting downwards may make your glossy cardstock uneven, as I found out.
  • Cut your design plan slightly smaller than finished size to avoid white edges to show.  
  • Let your StazOn images to completely dry before adhering them to your cardstock.  It takes StazOn to dry a little slower compared to regular ink on regular cardstock 


Monday, June 8, 2015

Good or Evil


Hi, it's Gini, here to share a little Technique Junkies inspiration with you. I had fun pairing this sweet and innocent Big Hat Girl with the cheeky Good or Evil sentiment. My focal image was colored with Gelatos directly to the stamped image.

Saturday, June 6, 2015

Claaaams!

Before I get carried away, 
let me remind you that you still have two days left to get 15% off 
Head on over there, now!  Then come back and read my post...
...I'll wait.  ;)
 
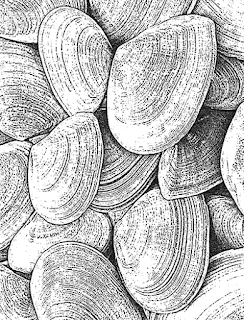
I just love the realistic feel of this stamp, Clam Shells!  
Ooooh, the possibilities...

To make this card, I cut out the middle with a 1" frame and matted it.  
Then, I attached it with foam tape to give it some depth.  
I did the same thing with the top layer, but cutting out a bit off-centered.
 
http://techniquejunkies.com/clam-shells/?page_context=search&faceted_search=0 


I added some coordinating Dew Drops to accent the card.

I DID stamp the verse stamp, Winds of Change,  BEFORE adhering it to the card.

http://techniquejunkies.com/winds-of-change/ 

Until next time...
robinredd.typepad.com/reddrobinstudios/


Thursday, June 4, 2015

Forever And A Day.....

{jane bosi}
Happy Thursday, Junkies!!  I have a romantic grungy resist card to share today!  Before I get started, just remember that all of the June Release Stamps are on SALE until Monday!!  Get them while it's hot!!

I created a resist by stamping the beautiful and romantic Cottage Rose stamp with white ink and embossing powder.  I added watercolors to the rose and leaf images.  Later, I stamped the French Script in the open areas and then added to the grungy look by sponging in an earthy colored ink.  A little lace and the heart warming sentiment, Forever and A Day finishes things off.

Give it a whirl and, don't forget to be awesome!  TTFN, Jane

Tuesday, June 2, 2015

In Pieces

Good morning Junkies!  Marilyn here and I have something a little different for you today.  Jigsaw pieces!  Yep, I purchased one of the large 24 count children's jigsaw puzzles and have set out to alter them into mini works of art.


I decided to work left to right, top to bottom.  For my first piece, I first gessoed the pieces and then sprayed with Art Anthology Grass Colorations.  Using some Art Anthology Stucco and the Pipe Dream stencil I stenciled on my background.  Then using a sponge, I rubbed Art Anthology Tango Velvet over the entire piece.  Lastly, I rubbed Art Anthology Tuxedo Velvet around the edges and added my sentiment, Winds of Change SD621.


For the second piece, I gessoed then sprayed with Waimea Bay Colorations.  Next I stenciled on a random design using the Meridian stencil and Stucco by Art Anthology.  Following that, I rubbed Tango Velvet over the entire piece with a sponge.  Then I stamped The Rules SD618 (fast becoming a favorite), trimming it so it would fit.  Finally I next rubbed Art Anthology Wineberry Velvet around the edges and added my trimmed stamp.


See how well they fit together?  Well 2 down, 22 more pieces to go!

Don't forget, all June Releases are 15% off until the end of this week.  Visit Technique Junkies to pick some up.

Until later.................


Monday, June 1, 2015

It's A New Release Hop!!

 
 Happy June, Junkies!!  The start of a new month means lots of new stamps in the Technique Junkie Store!  While we look forward to the warm, lazy days of summer, the Technique Junkie Designers have a hop FULL of inspiration for you!  We are showcasing the June Release images and letting you know that they will be offered at a 15% discount for the next week!  

The June release is full of stamps sure to inspire and encourage!  The Rules, Winds of Change, Friend Like You, High Hope and Like Stars....just to name a few!  You can see the whole release here!

Now, grab a cuppa and hop on through to see the Designer's Creations!! First up is the Fabulous Pam DeChellis!  The whole hop is listed below, just in case you get mixed up!

Design Team Blog http://techniquejunkies.blogspot.com  {You are Here}
Pat Huntoon http://patstamps.blogspot.com

Be sure to follow the whole hop for all kinds of awesome inspiration!  And, don't forget that the entire June Release is on sale 15% until June 8th!

TTFN & Don't Forget The Awesome!