Sunday, January 14, 2018

The Kiss!

Hello, Hello!

Hope everyone is staying warm this January!
We have entered my favorite card making season- Valentine's prep!  There are so many fun images out there and it seems everyone is wanting to give (and receive) a valentine card.  The Kiss has become one of my top favorite Valentine images.  You can get 10% off of it, or any other stamp with code TJ10LeeAnn. 
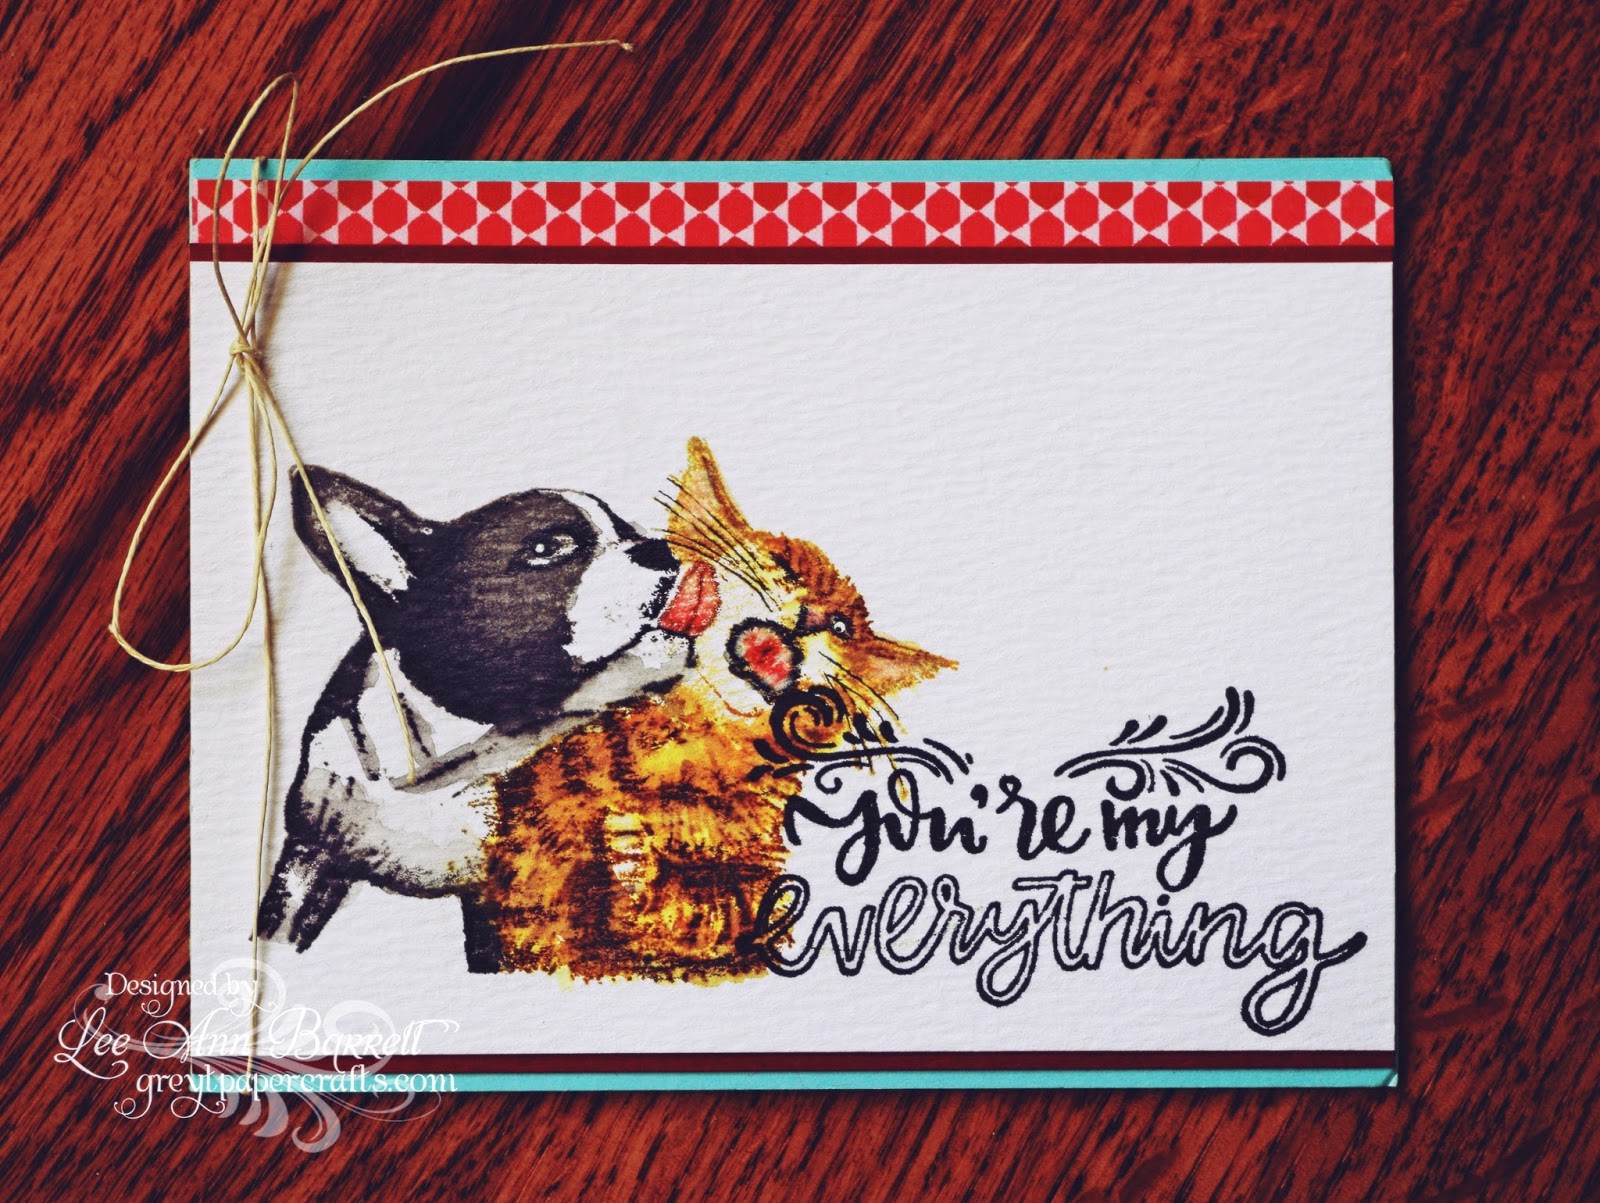

I paired it with a sentiment from the Love You More set. 
I kept it very simple, focusing on the two cuties.  They were watercolored with distress inks.  I used my MISTI to get precise placement of color. 
Using watercolor paper, I inked up precise areas of the image, masking off some areas as I went along; this allowed me to put the color where I wanted it.  Once the color was down, I moved it around some with water.  I repeated this process until I reached the desired look.


Thats it for me; when I am not here, you can find me at Greytpapercrafts.blogspot.com.

Have a wonderful  and crafty week all!

Lee Ann

Saturday, January 13, 2018

You Are So Loved

Hello Junkies!
It's Ceal, here to share with you today I am gearing up to make lots of Valentines cards, and this stamp is perfect, so perfect that you don't even have to use it for valentines, you can use it anytime of the year to let someone know how much they are loved. I also have a code at the bottom of this post where you can save 10% off your order at Technique Junkies, now how cool is that to save 10% and let someone know how much you love them. Scroll down to get your code 


To make this card I started with a white top folding card base, a Powder Pink panel embossed with a heart embossing folder and of course this fabulous stamp You Are So Loved.


Using the Mini Misti, I stamped the image on a scrap piece of cardstock in Versamark ink and then wiped off the hearts and sprigs and embossed just the greeting in gold embossing powder. Because I used the MISTI I was able to go back and color the hearts and sprigs with Tombow markers and stamp again to give it more color. I then used a stitched heart die to cut it out and attached to the front of my card using foam tape.


Friday, January 12, 2018

TJ Inkspirations: Pretty Pearlescent Watercolors, Part 2 of 2

I finally have my voice back and I was able to finish and edit the second part of the two-part Niji Pearlescent Watercolor tutorial.I was also able to create a few more tutorials this week so that we keep on track while my travel schedule heats up in the next few weeks.

One of the places I am going to next week is Creativation -- it is the show most of us know by it's former name -- CHA.  I plan to take live Facebook videos when I walk the floor so that you can see and hear all of the excitement and new product launches. Check out my Facebook page for the videos (and friend me, if we are not already friends).

Now for the technique this week:

Today's video is #2 of a 2-part series. If you haven't seen the first, I urge you to go back and watch it, so that you have all the techniques in your arsenal. Today I cover two quick techniques for using these gorgeous watercolors. One of the reasons I love them so much is their ease-of-use, and at $7.95, for 21 little pots of color, the price can't be beat, either.

The products I used on the finished cards are here:
_10.95
S771 Paint Rings
Partners in Crime Set

Something will Grow

Niji Pearlescent Watercolors


Pearlescent Watercolors, Part One


Here is the artwork from the video:
Pearlescent Paint Rings


And the second card from the video:
Pearlescent Something will Grow

and the video:
Pearlescent Watercolors, Part Two

Join our new Facebook e-group!

I would like to invite you to join the Technique Junkies Facebook Group, which recently moved from Yahoo.  We have a fun, interactive group with plenty of artwork for you to view! Simply search Technique Junkies Group in Facebook or copy and Paste this link:

Keep in mind that the FaceBook group is different than the Technique Junkies Facebook Page -- we encourage you to participate in the group!
Join Today!
The 2018 Tradeshow Schedule is nearly solidified.  Here is what we are planning for next year!
2018 Tradeshows
January 27, 28
Mesquite TX
February 10, 11
New Port Richey FL
February 17,18
Columbia SC
March 3, 4
Rockford IL
March 10, 11
 Oaks PA
April 6, 7
 Allentown PA
Note change to Friday/Sat
April 28, 29
Akron OH
May 19, 20
Syracuse NY
June 1, 2
West Springfield MA * Note change to Friday/Sat
June 9, 10
Collinsville IL (tentative)
June 30, July 1 Kissimmee FL
July 7, 8
Raleigh NC
July 28, 29
Pittsburgh PA
August 11, 12
Cincinnati OH
August 25, 26
Hamburg NY
September 8, 9 Westminster MD
September 15, 16
Duluth GA
September 29, 30 Southfield MI
October 12, 13
York PA (tentative)
Note change to Friday/Sat
October 20, 21 - Sevierville TN
See you at the show!


I hope you are a little inkspired by today's issue. See you next week!
 
Sincerely,
 

Pat Huntoon
Technique Junkies LLC 

Thursday, January 11, 2018

Birthdays Are Like Donuts Card

Greetings from the cold northeast U.S.  Lynda Joy here, with a card using a stamp from the new January release.  Just a reminder, if Santa didn't bring you all the TJ stamps you wanted, you can get 10% off your stamp purchase of any non-release stamps by using my code TJ10Lynda.

I used the TJ stamp Birthdays and Donuts . 

Before stamping, I did a little surgery on my stamp, and cut off the donuts, so that I could use them individually, separate from the verse.  This is very easy to do, just cut the stamp where you want with scissors, leaving a little area around the image.  I figure I can always use it the way it was intended by just placing the stamps in that order.  Here's how my set looks now.....
I wanted to create this background of scattered donuts. I stamped with Ranger archival ink in the color 'coffee,' and used watercolor and markers to color the donuts.  For the verse, I used the same 'coffee' ink, and mounted it onto coordinating card stocks, wrapped bakery string around the bundle, and attached to my card with foam tape.  I fussy-cut one of the donuts, and added that, also. 

To finish off the card, I attached the panel to a brown A2 card, and added some tube beads to resemble sprinkles.

Would you like to WIN $25 worth of TJ stamps?  FREE stamps...wow!  All you have to do is enter the Technique Junkies Challenge HERE for a chance to win.  You have nothing to lose, so come on over.  It's a win/win.  We get to see your artwork, and you qualify to win a prize.   

Be sure to check out our TJ Facebook Page.  There are lots of ideas there, and we would love for you to post some of your cards there.   And don't forget to check out the release stamps and other stamps over on the Technique Junkies website.   If you find any goodies you just have to have, don't forget to add TJ10Lynda at checkout for 10% off.
Blessings,

Wednesday, January 10, 2018

Bless Your Heart!

Hey, Junkies! Toodle Noodle Ro here with you today. I hope your New Year has been kind to you. Since I received a brand new grandson on New Year's Day, I am filled with a whole lotta love! So of course I want to share a Valentine with you!

In case you missed out on the Blog Hop sale, and there are still some goodies on your "want list", you can still save 10% by using the code TJ10Ro. Just click HERE to go shopping!

Well, Valentine's Day is just a little over a month away and I was feeling very in love with the new stamp set, Butter My Butt.  What does that have to do with love, you ask? Oh, this set of sentiments has a little fun for everyone. With 8 sentiments from which to choose, you're sure to find a something fun and fitting for any type of card. I chose "Bless Your Heart". A great southern term to cover a LOT of meanings! lol


Here is a little peek at the sentiments that are included in this fun set:
To start my card, I used Messy Love for my background. Using Gelatos in three shades of red and pink, I randomly colored the stamp and stamped onto some white cardstock. I generously sprayed with water, then dried it with a heat tool. I loosely stamped the whole panel with Versamark and added some chunky clear embossing powder. I then added a little Merlot Colorburst and sprayed it lightly with water. After drying and trimming down the piece, I die cut a heart in the center. 

On a slightly larger piece of red cardstock, I lightly marked where the heart would fall that was die cut from the stamped panel. Using masking, Versamark, and white embossing powder, I added the "Bless Your Heart" sentiment. I erased the pencil marks, added dimensional tape to the stamped panel and adhered it to the red panel. That was then adhered to the white card base.

I hope you're inspired to spread a little love of your own. Don't forget you can save 10% on your orders using the code below. 

Thanks for visiting!

Til next time,
Keepin' it inky!


Tuesday, January 9, 2018

PARCHMENT CRAFTING HAPPY WINTER WISHES

Hello Junkies, 

I've got a fun technique for you to try.  Have you ever heard of Parchment Crafting (Pergamano)?  It's a parchment paper art which came from the Netherlands.  You can find lots of interesting examples on Pinterest, so I won't link any here.

The proper way to do this is with parchment paper, but not having it, I decided to try it on heatable vellum paper because it's heavier than regular vellum and not easily torn.  I really like the results and will be doing more of it, but thought I'd share this attempt using "Happy Winter Wishes" stamp set from the new January 2018 release with you.  


After stamping the bunny with VersaMark ink and heat embossing it with white ep, on the vellum, I turned the piece over, face down, on a foam board I use for piercing.  Taking a stylus I used for dry embossing, I rolled it around the interior of the bunny's body.  Once that was done I decided I would color the scarf and coat with Copic markers (again on the reverse side).  When I was satisfied with the look, I fussy cut the bunny out of the vellum and mounted it on a pale blue cs panel I had already prepared with inked "hills" and the sentiment.  A touch of Copic markers for shadow/grounding, a few sequins and this card was done.  

Don't you love Technique Junkies Stamps?  There are so many creative ways to use them.  Go grab a bunch and use my discount code TJ10Cheri for 10% off your ENTIRE order!!!! 

When you get your new stamps, (using my discount code) come on over to our Design Junkies blog and join in on our monthly challenge for a chance to win even more Technique Junkies Stamps.   

Thanks so much for stopping by.  I hope you found some inspiration here and if you did please join us on our FaceBook page and share your creations with us.  We love seeing them.  

Have a happy day!


Monday, January 8, 2018

Dutch Door Valentine


If you are like me, you want your Valentine to receive a special card with a little more thought than just a few hearts stamped on it.  This is true for me even though my Valentine cards primarily go to my grandchildren and their parents.  So when I saw a Dutch Door card on another blog I knew I wanted to use that idea for a  Valentine.  There are tons of tutorials with a variety of measurements on the internet including on Splitcoast Stampers and Pinterest.  So have a search, but I will give you the measurements I used. 


I used three Technique Junkies Stamps to create this card.  I used Love Heart - http://techniquejunkies.com/love-heart/  , Love Harlequin www.techniquejunkies.com/love-harlequin/, and Happy Valentine day -  

Did you notice the goof I made in creating the background with the Love Harlequin stamp?  I stamped it ONCE and then accidentally dropped the stamp onto the card stock.  It created this perfect double image.  I liked it so I used it! It was a "creative opportunity."

These are the measurements I used:
1. The larger red panel is 4 1/4 by 8 1/2 inches. Score at 5 1/2 inches.
2. The smaller panel at the bottom is 2 inches by 8 3/8 inches. Score each end at 2 inches.
3.  The interior white panel is 4 inches by 5 1/4.

Directions:
1. Score each piece as directed above.
2. Using secure glue or tape adhere the bottom panel to the bottom of the card.
3. Cut background paper or card stock to an appropriate size for layering and adhere. 
4. Create a flap to open the bottom "doors" with any design that appeals to you.


This is the last day to choose several stamps and take advantage of the 15% off sale of new stamps through January 8 but you may also use the TJ10Judy and get 10% off of anything else in her store.

Have a wonderfully creative day and get inky!

Judy Jackson