


Thursday, January 18, 2018


You are in my prayers


I loved all these stamps! I decided to use the Deco Roses and In my prayers sets. The Deco Roses Background is so pretty!
Few details how I made this card:
- Stamp background Deco Roses on a piece of Red Cardstock in White Pigment Ink. Add Bridal Embossing Powder (this embossing powder is a cream color + glitter, it is beautiful!!) then heat set.
- Die-cut piece and adhere it to a White card base using foam adhesive.
- Stamp sentiment on a piece of White cardstock, die-cut piece.
- Add silver thread, then adhere sentiment with foam adhesive.
- Add white pearls.

Hope you like it!
Have a fantastic day!

Tuesday, January 16, 2018
How to Make Scrappy Spots

I love this technique because it's so unique. It may look like a lot of work, but trust me, it goes together quickly.
I used Birthdays and Donuts. Ah, donuts, my weakness in life.


I hope I have inspired you to try this technique out. It's a fun one!


Sunday, January 14, 2018
The Kiss!
Hello, Hello!
Hope everyone is staying warm this January!
We have entered my favorite card making season- Valentine's prep! There are so many fun images out there and it seems everyone is wanting to give (and receive) a valentine card. The Kiss has become one of my top favorite Valentine images. You can get 10% off of it, or any other stamp with code TJ10LeeAnn.

I paired it with a sentiment from the Love You More set.
I kept it very simple, focusing on the two cuties. They were watercolored with distress inks. I used my MISTI to get precise placement of color.
Using watercolor paper, I inked up precise areas of the image, masking off some areas as I went along; this allowed me to put the color where I wanted it. Once the color was down, I moved it around some with water. I repeated this process until I reached the desired look.

Thats it for me; when I am not here, you can find me at Greytpapercrafts.blogspot.com.
Have a wonderful and crafty week all!
Lee Ann
Hope everyone is staying warm this January!
We have entered my favorite card making season- Valentine's prep! There are so many fun images out there and it seems everyone is wanting to give (and receive) a valentine card. The Kiss has become one of my top favorite Valentine images. You can get 10% off of it, or any other stamp with code TJ10LeeAnn.
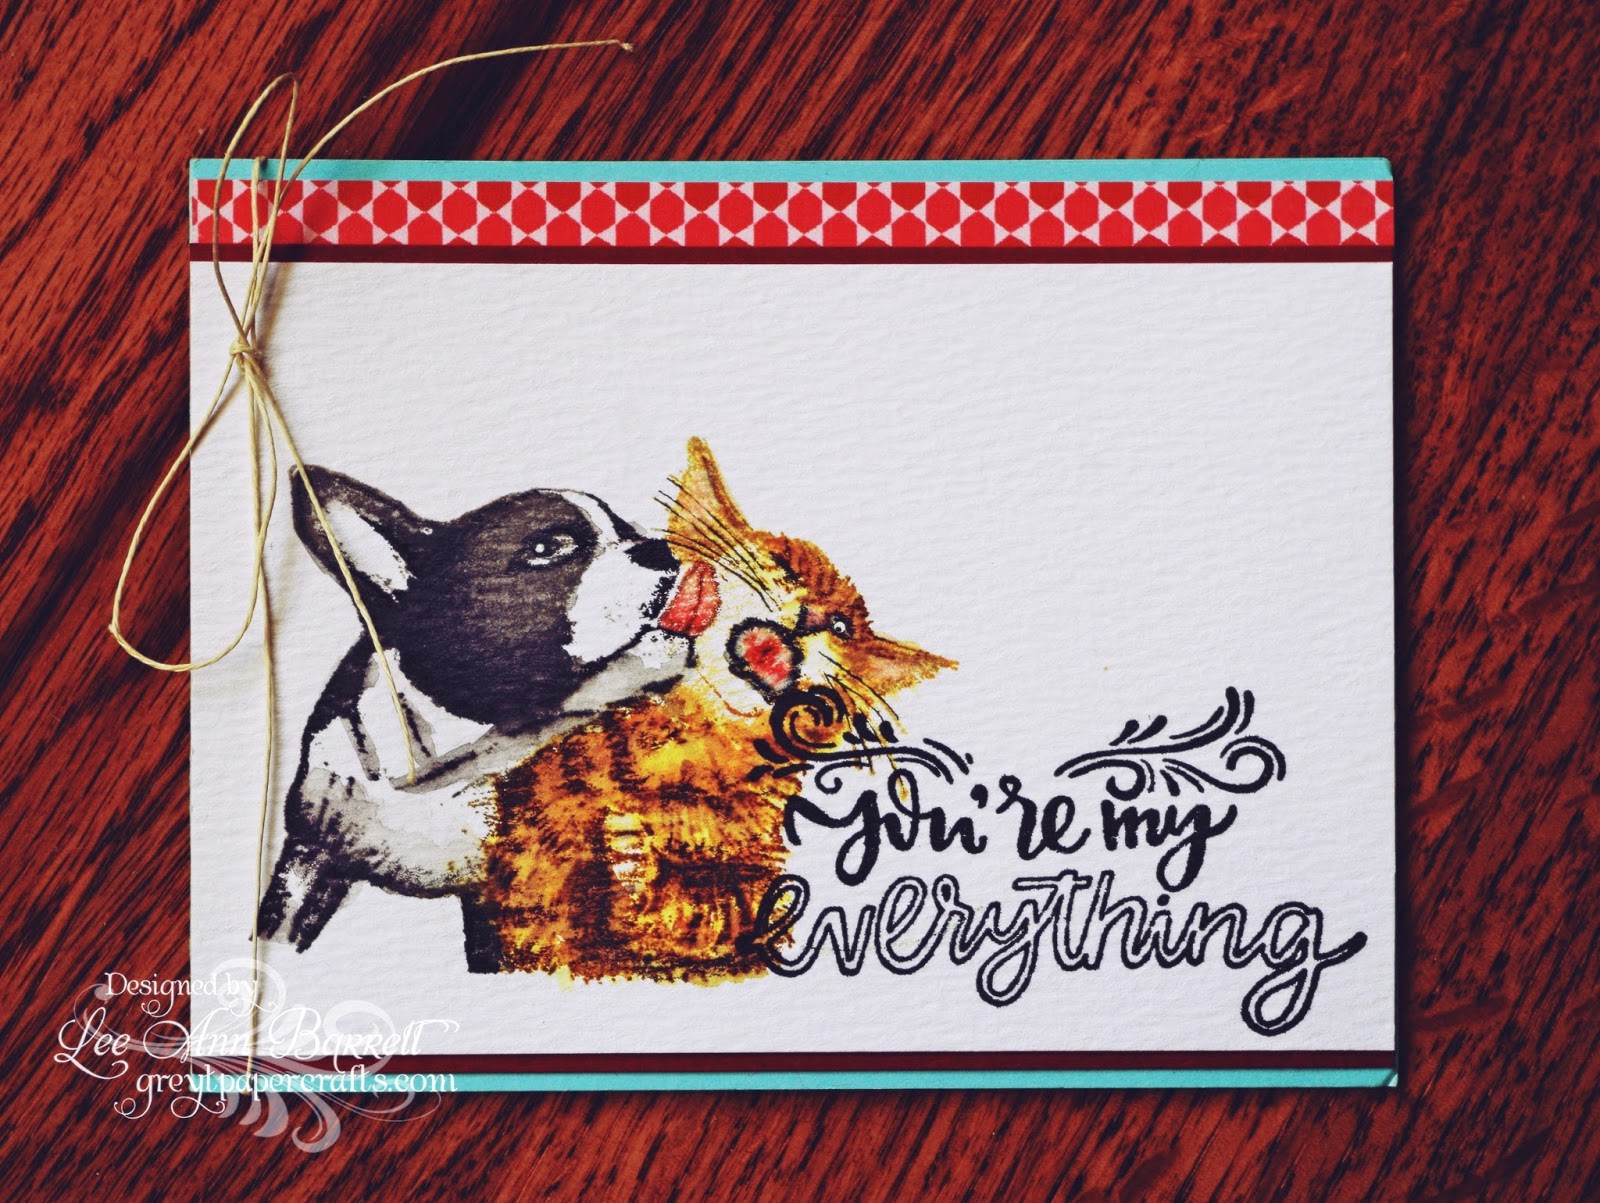
I paired it with a sentiment from the Love You More set.
I kept it very simple, focusing on the two cuties. They were watercolored with distress inks. I used my MISTI to get precise placement of color.
Using watercolor paper, I inked up precise areas of the image, masking off some areas as I went along; this allowed me to put the color where I wanted it. Once the color was down, I moved it around some with water. I repeated this process until I reached the desired look.

Thats it for me; when I am not here, you can find me at Greytpapercrafts.blogspot.com.
Have a wonderful and crafty week all!
Lee Ann
Saturday, January 13, 2018
You Are So Loved

Hello Junkies!
It's Ceal, here to share with you today I am gearing up to make lots of Valentines cards, and this stamp is perfect, so perfect that you don't even have to use it for valentines, you can use it anytime of the year to let someone know how much they are loved. I also have a code at the bottom of this post where you can save 10% off your order at Technique Junkies, now how cool is that to save 10% and let someone know how much you love them. Scroll down to get your code
To make this card I started with a white top folding card base, a Powder Pink panel embossed with a heart embossing folder and of course this fabulous stamp You Are So Loved.

Using the Mini Misti, I stamped the image on a scrap piece of cardstock in Versamark ink and then wiped off the hearts and sprigs and embossed just the greeting in gold embossing powder. Because I used the MISTI I was able to go back and color the hearts and sprigs with Tombow markers and stamp again to give it more color. I then used a stitched heart die to cut it out and attached to the front of my card using foam tape.


Friday, January 12, 2018
TJ Inkspirations: Pretty Pearlescent Watercolors, Part 2 of 2
| ||||||||||||||||||||||||||
| ||||||||||||||||||||||||||




Thursday, January 11, 2018
Birthdays Are Like Donuts Card
Greetings from the cold northeast U.S. Lynda Joy here, with a card using a stamp from the new January release. Just a reminder, if Santa didn't bring you all the TJ stamps you wanted, you can get 10% off your stamp purchase of any non-release stamps by using my code TJ10Lynda.
 I used the TJ stamp Birthdays and Donuts .
Before stamping, I did a little surgery on my stamp, and cut off the donuts, so that I could use them individually, separate from the verse. This is very easy to do, just cut the stamp where you want with scissors, leaving a little area around the image. I figure I can always use it the way it was intended by just placing the stamps in that order. Here's how my set looks now.....
 I wanted to create this background of scattered donuts. I stamped with Ranger archival ink in the color 'coffee,' and used watercolor and markers to color the donuts. For the verse, I used the same 'coffee' ink, and mounted it onto coordinating card stocks, wrapped bakery string around the bundle, and attached to my card with foam tape. I fussy-cut one of the donuts, and added that, also.
To finish off the card, I attached the panel to a brown A2 card, and added some tube beads to resemble sprinkles.
Would you like to WIN $25 worth of TJ stamps? FREE stamps...wow! All you have to do is enter the Technique Junkies Challenge HERE for a chance to win. You have nothing to lose, so come on over. It's a win/win. We get to see your artwork, and you qualify to win a prize.
Be sure to check out our TJ Facebook Page. There are lots of ideas there, and we would love for you to post some of your cards there. And don't forget to check out the release stamps and other stamps over on the Technique Junkies website. If you find any goodies you just have to have, don't forget to add TJ10Lynda at checkout for 10% off.
 Blessings,


Before stamping, I did a little surgery on my stamp, and cut off the donuts, so that I could use them individually, separate from the verse. This is very easy to do, just cut the stamp where you want with scissors, leaving a little area around the image. I figure I can always use it the way it was intended by just placing the stamps in that order. Here's how my set looks now.....
To finish off the card, I attached the panel to a brown A2 card, and added some tube beads to resemble sprinkles.
Would you like to WIN $25 worth of TJ stamps? FREE stamps...wow! All you have to do is enter the Technique Junkies Challenge HERE for a chance to win. You have nothing to lose, so come on over. It's a win/win. We get to see your artwork, and you qualify to win a prize.
Be sure to check out our TJ Facebook Page. There are lots of ideas there, and we would love for you to post some of your cards there. And don't forget to check out the release stamps and other stamps over on the Technique Junkies website. If you find any goodies you just have to have, don't forget to add TJ10Lynda at checkout for 10% off.
Subscribe to:
Posts (Atom)

