Are you dreaming of a beach day? I always want to be on the beach! Here is a beachy card to help you dream. It features Underwater Borders Set of 3 (SS107) and Beach Day (SDX071).
I stamped the image on an A2 card base using Versamark and white embossing powder. I then brushed on Distressed Oxide Ink (Peacock Feathers). I faded out the ink about 2/3 the way to the top. I added a piece of washi tape then embossed the sentiment on that and added some random Nuvo Dew Drops to the top to finish off the card.
I love this border set. There are three beautiful scenes included.
So if you're dreaming of making some beachy cards, this is definitely the set for you. You can even save 10% on your TJ order by entering the code TJ10Ro at checkout!
Hope you found a little inspiration today!
Til next time,
Keepin' it inky!
Wednesday, June 26, 2019
Tuesday, June 25, 2019
Beautiful Hydrangeas
Hello all, Kia back with you today.
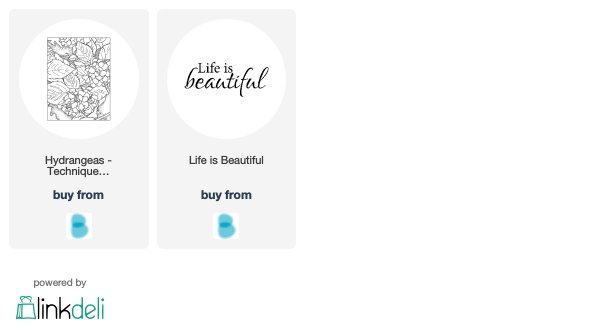
I wanted to watercolour this beautiful Hydrangea image for my post today, and decided I would use my watercolour palette.
I started by stamping the image using my mini Misti and Ranger Archival ink in Jet Black on watercolour paper.
My personal watercolour palette holds a mix of different brands. I pick my choices by the colour, not the brand, so I have Winsor Newton, Schmincke, DaVinci and Daniel Smith.
The leaves are done using Sch Cad Yellow Lt, WN Sap Green, Sch May Green and DS Green Apatite. For the soil I used WN Raw Sienna and Burnt Umber. The flowers are done using DS Lemon Yellow, touches of DaVinci Leaf Green and DS Quinacridone Pink. I finished up by adding a bit of Nuvo Shimmer Midas Touch to the flowers.
I had a nice lazy couple of hours painting this. I have several layers of watercolour, and I like to let the paint dry naturally, so it takes some time. To finish I added my panel to a green card base matted with black, then using the Life is Beautiful stamp I heat embossed using white embossing powder in black card stock. I attached it to the card front using foam squares.
Thank you for joining me today.
Monday, June 24, 2019
Puppy Love
Happy Monday!
I have a quick and easy project to share today using Eat, Play, Love and a background made with Shimmering Bliss and a stencil.
I made the background by spraying Shimmering Bliss (Dragon's Blood) through the stencil (A Colorful Life Designs Scooped Triangles). I used my MISTI to stamp Eat, Play, Love on another panel and colored in the heart.
Don't forget if you are ordering today you can get an additional 10% off by using the code TJ10Jeanne at Technique Junkies!
Labels:
A Colorful Life Designs Stencils,
Jeanne Streiff,
Shimmering Bliss Sprays,
Technique Junkies Stamps
Saturday, June 22, 2019
Splash into Summer!
Shop today with a 10% discount!
Enter code TJ10Janelle during checkout!
It's age or distractions, or both, but I do find I either get a perfect stamped image and immediately smudge it or a partially stamped image even when I use a stamp positioner! So with the increasing amount of unusable stamped images on my work table, I needed to get creative on how to use them. Take a look to the left of the dolphin, and you'll see proof that I've found a way to use up my mistakes!
Stamp the image some more and don't worry about not getting it all perfectly stamped (I forgot to snap a photo so just image a letter size sheet stamped repeatedly with the Nautical Doodles stamp.)
I did a bookbinder technique called Paste Paper to get a fun wavy look, but it could also be done with colored (blue paste in the photo below) ink on the Whitecaps stamp.
Then use Shimmering Bliss Spray in Lapis Lazuli, Miami Vice, and Mardi Gras. Use a piece of paper or sticky note to make a horizon and spray the bottom third of the paper with Lapis Lazuli and Mardi Gras for the ocean.
Use the mask again to cover the Shimmering Bliss ocean and sponge white paint thinly from the horizon towards the top of the paper.
Color a stamped Dolphin on white cardstock and trim around the image. Glue at the horizon and then add white pen lines for highlights on the dolphin and ocean water. Stamp the Make A Splash sentiment and glue onto a card base!
I promised a second card, and here it is to support our troops! Take a look at this clean and simple Brave Hearts card that pops with patriotic colors!
Use water-based markers to color the heart flag and ink up the sentiment in black. Stamp using a positioner tool because the heart flag may need to be stamped a couple of times. That's it!
Have a wonderful weekend and remember to use code TJ10Janelle during checkout for a 10% discount!
Friday, June 21, 2019
TJ Inkspirations: Diamonds Technique Kit
| ||
|
Thursday, June 20, 2019
Eat. Play. Love
Hello friends!!
Giovana here today with a puppy card!!
I am a dog person, I don't dislike cats, but I prefer dogs {wink, wink}
In Peru I had dogs, after moving to America I left my dog with my dad, he lived 17 long years!
After 15 years of no dog around, we got a very energetic boy, he is only a year old, sometimes gives me more work than a toddler, lol, but he is my company every day.
His name is Milo Jack.
Anyways, here is the card I created for you.
I think the "eat, play, love" statement is very accurate, I would add sleep too, lol
Details:
Stamp the Eat, Play, Love on white cardstock in Brown Ink, then add clear embossing powder and heat set. Die-cut it using a tag die.
Blend the panel with Distress Oxide Ink, then mist the panel with Festive Flamingo Shimmering Bliss and Gold Shimmering Bliss Topper.
Stamp Paw Prints Background on a piece of Kraft cardstock in Versamark Watermark Ink, then add White embossing powder and heat set.
Stamp the cute puppies from All Shapes stamp, color the little one and fussy cut them.
Add panels to a white card base.
Stamp Paw Prints Background on a piece of Kraft cardstock in Versamark Watermark Ink, then add White embossing powder and heat set.
Stamp the cute puppies from All Shapes stamp, color the little one and fussy cut them.
Add panels to a white card base.
Use my TJ10Giovana code to get a 10% on your order
Hope you like my card
Have a wonderful day
Wednesday, June 19, 2019
Groovy Christmas
When I saw the current Fusion Card Challenge, I knew I had the perfect stamps in my Technique Junkies Stash.
I pulled out my Groovy Christmas and stamped it in Nocturne Ink on watercolor paper and clear embossed. Then I painted a watercolor rainbow for an abstract look using the colors from the Bus.
I wanted to add some of the swirly effect from the Inspiration Photo, so I added stenciled corners using the Lace Doily Stencil to give it more of that Boho feel.
Love this groovy design for one of my holiday cards.
Remember, you get 10% off your entire order using my discount code TJ10Stephanie.
Subscribe to:
Posts (Atom)