Tuesday, July 28, 2015

Give Me Wings

Good morning Junkies!  I've got quite a colorful journal page for you today.  It's simple but full of texture and bright colors.


To create this page, I spread Black Sand Texture Paste onto a piece of watercolor paper and then raked a Catalyst Wedge through it.  Once that dried (it takes a while), I sprayed several layers of Art Anthology Heart, Waimea Bay, and Salted Caramel Colorations until I go the desired color depth.

I stamped Big Butterfly, Big Bee, and Wings of Possibility onto a piece of cardstock and then fussy-cut out.  The butterfly was painted with Art Anthology Dimensional Gems in Amber and Rhodolite.  The bee was painted with Art Anthology Velvet in Lemon Tart, Tuxedo, and a mixture of Cotton Candy and Cotton (for the wings).  I then centered everything and glued it down.  It will make a journey to it's new home this week.

Check out our website at www.techniquejunkies.com for a lot more stamps just as wonderful as these.

Until later............
Marilyn

Monday, July 27, 2015

Good Friends


Any one who has followed my blog (or my posts on the Design Team for Technique Junkie stamps blog) knows I like to use to different approaches for the same stamp. Both cards use the same chicken stamp - http://techniquejunkies.com/chicken/.

The first card above uses background paper from my stash and the Chicken Wire stamp http://techniquejunkies.com/chicken-wire-2/ on that background ground paper.   The chicken is colored with Copic Markers.

The second card uses a scrap of  background paper over another pieces of background paper.  The chicken is colored with Peerless Watercolors http://techniquejunkies.com/peerless-watercolors-complete-edition/.


Both cards use a sentiment from the Chicken Sayings set - http://techniquejunkies.com/chicken-sayings-set-of-2/.

Have a wonderfully inky day!


Saturday, July 25, 2015

Winning Hand


Happy Saturday Junkies! Pam here and I am back with another fantastic stamp showcase from TJ.  This is another set I picked up at the rubber stamp show last month and I have been dying to "play" with it lol.
The set is called Winning Hand and it is part of the Palettini line.  There is also a great sentiment to coordinate with this called Lend a Hand.

As soon as I saw the Winning Hand set I knew exactly how I wanted to stamp it-with lots of texture so I used Versamark Ink and covered with Ranger Distress Embossing powder Fired Brick.  This gave the cards some texture and really made them stand out.


For the background I wanted a "card game" feel so I used a The Crafters Workshop Stencil with Ranger Distress ink and created a stencil mono print.  
The top card was restamped and cut out again and "popped" on with homemade Xyron dimensional adhesive as was the sentiment.  The sentiment was also stamped with Versamark and covered with Distress Embossing powder- Black Soot- to match the texture o the cards.


Thanks for stopping by today and be sure to check back for more great inspiration from the TJ Design team and my blog for TJ showcases!
Embrace Imperfection!
Pam

Thursday, July 23, 2015

Treble Clef Card by A Bushel and A Hug

Happy Thursday Junkies!
Jerri here to share another card I made using the Technique Junkies July release stamp,  Large Treble Clef.  
This stamp is so versatile.  To make this card I just simply stamped the Large Treble Clef stamp in pink onto my card front. Using a ruler, I drew straight lines with a black Copic Multiliner, but any black pen would do.
For the sentiment, I used another July release stamp called Life is a Song. I lined it up and stamped it in black on my card. I wanted to place the stamp right on that bottom line I had drawn so I used a Stamp a-ma-jig tool to make sure the placement was correct. If you haven't used one of these tools you should check it out.  I use mine all of the time.  You can find tutorials on how to use the tool on youtube. I put three silver glitter buttons on the card for embellishment and then matted the whole thing on a pink piece of cardstock. Easy Peasy.

Well that's it for today.  I hope you enjoyed my card.  

Have a Fantastic Day!
Jerri


Wednesday, July 22, 2015

She Sells Sea Shells

Happy Wednesday Junkies!  It's the Crafty Nurse here back with more beachy fun.  We hope you are enjoying your summer and have found some crafty time for yourselves.

Today I am bringing you an oldie but a goodie technique called, "Spritzed Stone Tutorial" originally developed by Kimm Bennington-Thompson in 2009.  This technique can be used with any alcohol markers but the important element is the 91% alcohol.  This is stronger than your normal rubbing alcohol and can be purchased at the pharmacy.  Make sure you are working in a well ventilated area as it's a bit strong, but I love the outcome.

After creating the background, I stamped the July release Technique Junkie stamps called, "Shells PS009" and coordinating sentiment from the same set.  I then layered the "burlap" stencil by Tim Holtz using Gathered Twigs Distress Ink.  On top of that I flicked Lindy's Stamp Gang Spray in "Shabby Turbine Teal" and Heidi Swapp color shine in gold. To finish off I distressed the edges and layered it on coordinating papers.


Thanks so much for stopping by the Technique Junkies Design Team Blog today and make sure you make some time to play!

Signing off for now,
The Crafty Nurse

Tuesday, July 21, 2015

Bandana Technique


Hello friends. It's Beth Norman here and happy that summer has finally arrived to southern Ontario, Canada.  The air conditioning is on and got to go to the beach for the first time this year; the weather has been too cold and rainy.  I know my Texas and Idaho pen friends have been enjoying the heat for quite some time.

I found some inspiration on Pinterest for creating my Dragonfly card when I couldn't sleep and was up at 3:30 surfing the internet and stamping.  My cards also remind me of two previous cards I made using the Bandana Technique which can be found on the CD Simple and Easy Inking Techniques.

Technique Junkie Stamps Used:


I rubbed ink all over my 5 1/2" x 5 1/2" cardstock with a sponge and stamped out my images with VersaFine and then added the white highlights.  

Thanks for stopping by.  Have a great week!

Monday, July 20, 2015

Life is a Song

Hi, it's Gini and I've got a card to share with you today that uses a couple of the new release stamps for July from Technique Junkies. I stamped the background using the Peonies background stamp. I colored the flowers with Pan Pastels, for a soft look.  The sentiment, Life is a Song, was stamped and then die cut.

Thanks for stopping by!

Saturday, July 18, 2015

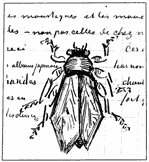
Bug

Hello!  It's Robin Redd, here with you today.
I made this card using the following two stamps:

S611 Barbed Wire, new July release stamp!
 http://techniquejunkies.com/barbed-wire/ 
This is a nice, large background stamp with sharp, clean detail.

 http://techniquejunkies.com/van-goghs-bug/ 
I chose pretty papers and colors to go with these stamps.  
I liked the way the papers contrast with the sharp lines of the stamp designs.


How would you design a card with these stamps?  I'd love to see what you would do.
http://robinredd.typepad.com/reddrobinstudios/


Thursday, July 16, 2015

Serenity

{jane bosi}

It's Thursday and, who couldn't use a little Serenity....now?  LOL!!  Always such a good joke!  I was in a bit of a water color phase and made this water colored splattered background piece.  I was also in the mood for playing around with some of the new distress inks--coral, pistachio and lagoon--such pretty colors!

I chose the Serenity Butterfly stamp to create both a back ground pattern and embellishment to finish things off.

Yes.  I'm still in my sequin phase.  #itsnotgoingtoendanytimesoon

TTFN & Don't forget to be awesome!  Jane 

Wednesday, July 15, 2015

Peerless Watercolors: Organization

Hi!

Today I wanted to share a tip about how I store and use my Peerless Watercolors.

The watercolors come embedded on fabric paper and ready to use. You just touch your waterbrush to the surface and paint activates and is ready-to-use. There are two sizes:

  • the original package has 15 colors on approx. 2 3/4" x 6 1/2" pieces.
  • the bonus package has 40 additional colors on approx. 2 1/4" x 2 1/2" pieces.
I have two storage methods. I put the full package in a portable set of page protectors sleeves. The picture below shows an option like this, from ScrapRack, called the Divine Nine. The pockets are 4x4 and 4x6 in size.
The pages come in a 10-pack - which will accommodate every one of the available colors, with room to grow.

You can put them into a 12" x 12" binder, or simply attach the pages to a keyring and fold it up, in half, width-wise. Super portable!  I have a slightly different page configuration which is no longer available - but the Divine Nine works just as well.


I painted a little swatch of each color on a small label and attached it to the inside of the pocket.

A great feature of these protectors is that each pocket has a flap to hold in the sheets and keep wet paint from transferring to other colors. It also keeps them from getting dusty. I just lift up the flap, touch my waterbrush to the sheet and let the flap close back onto the swatch. It doesn't waste a drop.


But now that they are out of their original packaging, you may be wondering, how do I know which color is which? I made a standard address mailing label sheet with the paint names on it so that I can list the colors I use in a project. And I'm sharing it with you! Click here to download the PDF file. It is formatted for a 3 column x 10 row (30 per sheet) mailing label.
Now perhaps you caught that the long pockets are about 1/2" too short for the long pieces in the Original pack? That's where my second storage method comes into play - the even-more-portable palette! I cut of the 2 3/4" x 1/2" pieces and attach them to the front page(s) of my sketch book with removable tape.

So now that I've shared how they are organized, I'll share a watercolored stamp image - the P009 Sunflower Centers stamp image. I stamped the image onto hot press watercolor paper using Stazon Midi in Cloudy Sky (gray) ink and colored away using Peerless Watercolors and a waterbrush. The colors are so vibrant!
How do your organize your Peerless Watercolors?

Palettini Collection, designed exclusively for Technique Junkies


Tuesday, July 14, 2015

Comfort of God


Hello fellow Technique Junkies.  It's Beth Norman here with a sympathy card for you.  I used the lovely With Sympathy set of 5 stamps from July's release, so this stamp is hot off the press.

This is the first card I made in my new apartment.  Even with all the packing, move and unpacking, I managed to post weekly, much to my surprise.

Do you recognize this gorgeous flower?  It comes from the Flourished Floral stamp.  You may recall that I used this image for this card.  After colouring 16 Flourished Floral stamped images for a custom order, I had withdrawals and just had to colour up this flower again, but this time I fussy cut the flower from the image you see below.

S627 Flourished Floral

Have a great week.  I hope I inspired you. 

Bee Strong

Good morning Junkies!  I've got a couple of really quick and easy projects for you today.


For this Fat Book page, I first sprayed a 4x4 piece of watercolor paper with Art Anthology Sandcastle Colorations.  I then stenciled with gold embossing paste and the Art Anthology Beehive Stencil.  Next, I stamped Botanical Bee (one of the new July Releases) onto a piece of multi-media paper, colored it with Art Anthology Lemon Tart Velvet and Splashed Sorbet and then fussy-cut it out.  The sentiment is included in the stamp set and was stamped on the same multi-media paper as the bee and given a spray of Art Anthology Glorious.  Lastly, I embossed the edges with Scattered Straw embossing powder and then glued down some microbeads (I wish you cold see the sparkle).


Here's a really easy but nice ATC.  Spray an ATC card with Art Anthology Heart Colorations.  Next, stamp Stargazers with black ink, going over the black areas with a Pitt Pen if you don't think the black is dark enough.  Instant flower color!  The sentiment is Seeds of Today and was stamped on a piece of multi-media paper and given a light spritz of heart which was immediately blotted so it would be very light.  Both Stargazers and Seeds of Today are new releases for July.

Don't forget to visit the Technique Junkies store for some really great stamps!

That's it for today.  Thank you for stopping by.

Until later......................


Marilyn

Monday, July 13, 2015

Together by Judy Jackson


It seems like a long time since I have posted any stamped cards.  Since my husband passed away very suddenly in late June, life became very complicated in my household.  Because I have had so many other things that are a higher priority than stamping, I will be posting some cards I have previously made and have not posted on my blog.  I have had the help and support of family and a ton of friends.  So the saying here is very appropriate. 

This card uses the stamp Little Girls http://techniquejunkies.com/little-girls/ and a saying called  Together http://techniquejunkies.com/together/ .

The image is colored with Copic markers.  Background paper was altered with inks and cut into three strips for added interest.

I hope you enjoy some stamping time very soon!

Saturday, July 11, 2015

That's Music to my Ears

Happy Saturday Junkies! So excited to be sharing another fantastic July release from the baker's dozen with you today! My project features the new Treble Clef (large) stamp and one of my favorite sentiment stamps (Always Find a Song) from Technique Junkies.   
It's been a while since I've spent some quality time in the studio so when I started this project I was feeling "grungy" as you will see from the colors I used. It also started as a tag but through my creative process it ended up as a card. That's one of the things I love most about the process. Rarely does my final project end up anything like it started. 


The tag itself was created by applying Tim Holtz's tissue wrap (music) to a manila tag and covering with Distress Paints spritzed with water. After drying the Treble Clef was stamped in Archival black.

The sentiment was also stamped in Archival black and covered with Weathered Wood Distress Ink-to give the letters some color.
Tissue tape accents were added and a ribbon as well (also tinted with Weathered Wood Distress stain).
To make the tag really pop I matted it onto the music patterned paper which was also altered with Distress ink to match the letters in the sentiment.
I really love this Treble Clef stamp, being a music lover myself! And it comes in two different sizes. Be sure to check it out as well as all of the new July release from Technique Junkies!
Embrace Imperfection!
Pam

Thursday, July 9, 2015

Believe in yourself


Happy Thursday Junkies!
Jerri here from A Bushel and a Hug.  I hope you are having a fantastic week.
Today I am sharing a card that I made for the Technique Junkies Design Blog using two of the new July Release Stamps.

\
Barbed Wire #S611 is the featured stamp on this card.  As soon as I saw it, I knew I wanted to emboss it with silver on a black background.  I think it turned out both beautiful and masculine. The sentiment stamp is called Believe in Yourself #SD645.

Here's how I made my card:
  1. I used my Static Puff Pillow on a black piece of cardstock, Make sure to cover it well with the puff, as you don't want stray pieces of silver showing up on the black background.
  2. Using a Versamark Ink Pad, stamp the Barbed Wire onto the black cardstock.
  3. Sprinkle Silver embossing powder over the stamped image and then shake off excess.
  4. Heat image with your heat tool until all embossing powder has melted. Set paper aside to cool
  5. Stamp Believe in Yourself #SD645 onto a piece of white cardstock in black ink.
  6. Sprinkle sentiment with clear embossing powder, shake off excess.
  7. Heat the sentiment until powder has melted.
  8. Trim both of the stamped images with your paper trimmer.
  9. Matt the Barbed Wire image with white paper and then again with a piece of black cardstock as shown above.
  10. Adhere the trimmed sentiment to the front of the card using pop dots or foam tape.
This card is super easy, super fast and I think would work well for a man or woman. Easy and Versatile!!

Thank you for letting me share my card with you today. 

I hope you have a WONDERFUL day!


Jerri


Wednesday, July 8, 2015

Black & White

Hey Junkies!

The Crafty Nurse here with a Design Team post featuring more of the July stamp Release at Technique Junkies.    Pat's outdone herself again this month and given us so many great choices to work with.

Today I'm featuring a sympathy card.  It is often hard to motivate yourself creatively when a sympathy card is needed.  For that reason, I like to make them ahead of time and have them in my stash.

Using the theme of darkness felt during this time, I've chosen a black and white design using July Stamp release, "Peonies #S626" and the Sympathy set of 5 called, "With Sympathy #SS049".

The card is very straight forward stamping with black Versafine ink and heat embossing with clear powder.  The sentiment is also embossed on Bazzill heavy vellum.  I added a few gems to finish off the card and layered with white card stock.


Thanks so much for joining us today at the Design Team Blog.  Hope you've had a chance to check out all the great new product in the Technique Junkies store because today is the very last day of our July sale.

By for now,
The Crafty Nurse

Tuesday, July 7, 2015

Abstract and Checks Inchies

Technique Junkies, Sunflowers and Dragonflies, Inchies

Hello fellow stampers.  It's Beth Norman here with some inchie art.  I'm using an older stamp as I am unpacking from a move and have yet to find all my products. 

It’s no secret that this is a favourite stamp of mine, and I’m trying to think of different ways to use it, rather than the typical background.  I used Technique Junkies Abstract and Checks and cut them up into inchies.  Next, I took a gold Krylon pen and edged gold around each inchie and then adhered the inchies to my black background.

This is what it looked like before I cut it up.  Note, these are coloured with different colours.  I used brighter Copic markers on the inchies.

Technique Junkies, Sunflowers and Dragonflies, background image

I like this stamp because it reminds me of a Zentangle.  I created the queen from Alice in Wonderland by free handing the outline and feeling it with tangles.  

Queen of Hearts

Have a good day and thanks for stopping by!

Monday, July 6, 2015

Stand Tall

 I love the bold graphic element of this Stand Tall stamp and thought it would be lovely paired with a distress ink background.  I used a variation of the Stained Resist Tutorial off of the Artistic Effects CD to create the background.

Saturday, July 4, 2015

Happy Birthday, USA!

Happy Birthday, U.S.A.!  
Today, in the United States of America, we are having a birthday celebration.
And, I made this card in honor.


http://techniquejunkies.com/layered-doilies/ 
and the birthday greeting from the SS010 Greetings Set.
http://techniquejunkies.com/greetings-set/
 
I started by stamping the Layered Doilies stamp with a VersaMark Ink Pad and poured on some red embossing powder to the top third of the design. I shook off the excess, being careful not to get any red embossing powder on another part of the image.

Next, I poured on white embossing powder the the second third of the image.  
I shook off the excess, being careful not to get it on any other part of the image.

I completed covering up the image with blue embossing powder, shaking off the excess.  
I heated through until it was completely melted on.

Now, this part is something I have never done before.  And, I wasn't sure how it was going to turn out.  After the embossing on the Layered Doilies cooled, I stamped the 'happy birthday' greeting with the VersaMark stamp pad and  poured red glittered embossing powder on and shook off the excess.
  I think it turned out pretty cool!  What do you think?  Have you layered heat embossing before?
If you have, share a link to your project.  I'd love to take a look.

Until next time...
http://robinredd.typepad.com/reddrobinstudios/


Wednesday, July 1, 2015

July 2015 Release Blog Hop!

Welcome, friends! We have got a treat for you today! It's July 1st and today we are celebrating the release of 13 new stamps.  Our baker's dozen is really special -- and to show you just how much, the TJ Design Team has prepared some gorgeous eye candy for you today.In addition, all of the July release stamps are 15% off until July 8th (your discount will appear at checkout).

Here is one card to get you started:
This card uses two stamps from the new release, The background is the new Stargazers Stamp -- isn't it gorgeous? I just did some simple coloring with Copic Markers. I actually Googled Stargazers first so that the colors were more true to life...and I am thrilled with how they turned out.

The sentiment is from the new With Sympathy Set. There are 5 stamps in the set. No-one likes to send sympathy cards, but it is always nice to have some on hand just in case.

On with the hop!  Here is our line-up today:
Next: ---> Pam DeChellis http://journeyawakensthesoul.blogspot.com
Sally Lynn MacDonald http://www.sallylynnmacdonald.com
Enjoy the hop, and all the great eye candy - I hope you love this month's release!