


| ||||||||||||||||||||||||||||||||||||||||||||||
Friday, November 24, 2017
35% off Inventory Reduction Sale!






Thursday, November 23, 2017
Merry Christmas Card Set

Hello friends! Giovana here today, first I want to wish all my American friends a very Happy Thanksgiving!! Hope your day is a great one, full of family memories, food and lots of laughs.
For today's project, I want to share with you a set of 4 Christmas cards, they are very simple (I am still recovering and my craft chair is very low, makes my leg a bit sore) but elegant, which makes them more special.
For this project I used "Flourished Christmas Tree" and the sentiment is from "Gifts of Christmas".
The Flourished Christmas tree was stamped on a piece of White cardstock in Versamark Watermark, then added embossing powder, here I used Light Blue, Gold, Silver and Brown.
After that I die-cut the stamped images using stitched rectangle dies, also die-cut coordinated metallic cardstock to add behind each image.

All card got this sentiment inside, stamped in Jet Black Ink color.

It didn't take to long to make this set. Hope this idea inspires you to create your Christmas cards.
You can use my 10% off code to get these stamps TJ10Giovana
Have a fantastic day!
Happy Thanksgiving!

Tuesday, November 21, 2017
Metal and Brad Tutorial


Image used: Stay Humble


Monday, November 20, 2017
Stay Humble!

The Technique Junkies background stamp is called Sudsy Stuff - http://techniquejunkies.com/sudsy-stuff/ . I inked up the stamp with a gray ink on blue card stock. I added die cut ocean plants, and a die cut sea turtle. I placed the turtle die cut on sticky embossable table and added several shades of embossing powder, and heat set the turtle. Then I pressed a Versamark pad on the turtle and covered it with clear embossing poweder. I did this several times so to look at the turtle it almost appears to be glass.
I stamped the Technique Junkies November release stamp Stay Humble - techniquejunkies.com/stay-humble/ - on yellow vellum. I stamped with a black Versafine ink and embossed it with clear embossing powder. The edges were torn and then adhered with adhesive from a Xyron machine.
And remember you can get an addition 10% discount with this code - TJ10Judy.

Judy Jackson
Saturday, November 18, 2017
Most Girls....
Hello All Lanette Here!
I just wanted to share a quick Sassy Tag Mixed Media Tag!

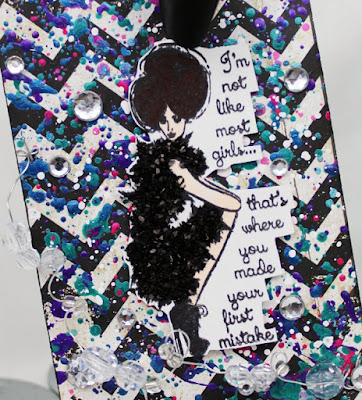


I just wanted to share a quick Sassy Tag Mixed Media Tag!

I had so much fun pulling this little tag together with
a bit of splatters, bling and a couple of beads....

and lots of chunky fun glass glitter!
Here is a better look at this beautiful Stamp.
Thank you so much for stopping by today!
I hope that I have inspired you in some way!

Friday, November 17, 2017
TJ Inkspirations: Shimmering Ombre Distress Oxide Inks with stamps and stencils
| ||||||||||||||||||||||
| ||||||||||||||||||||||


Thursday, November 16, 2017
Colorful Paint Rings using MISTI, Distress Inks and Color Burst Powders
Good Morning! Chris here today, sharing a colorful card using the new background stamp, Paint Rings and the greeting stamp, Stay Humble.
Today I started ,my card with a panel of Canson cold press watercolor paper. I've recently been having lots of fun using Color Burst powders to paint with, so this is where I began my card. I added a small area water to the center of my panel and using a wet brush to pick up turquoise Color Burst powder from a craft mat, dropped into my wet panel. I used a heat gun to dry the panel and added more color twice, building up color slowly, and controlling the area.
I let this dry fully then stamped the Stay Humble greeting with Versafine Ink.

I then did a bit of selective inking using my MISTI. I placed my panel of cold press watercolor paper and the Linen Dots background stamp in my MISTI and using Distress ink cubes, I selectively inking and repeatedly stamping small areas of the background stamp with Distress ink. Often I had to double stamp to get the intensity of color and coverage that I wanted on the textured paper. I used a number of bright colors of ink moving throughout the panel, grouping them by area or size of the rings.
I loved the colorful look of the paint but wanted a bit more intense color, so I added a bit of matching Color Burst using that same painting technique of picking up powders with a brush. I made sure to "color outside the lines" just bit too to add to the painty-ness!
When dry, I trimmed the panel to 4.25" x 5.5" and adhered it to a card base with liquid glue and pressing it under a book to dry flat.
Subscribe to:
Posts (Atom)


