Saturday, May 30, 2015

Evil Sister

Hello, there!  It's Robin Redd (a.k.a. RockinReddRobin)!  
I made this fun card with my sweet sister in mind.  We both know who the evil sister is...lol.

http://techniquejunkies.com/lets-face-it-2/ 
I used P007 Let's Face It 2 stamp with black stamp pad.  
I colored her in using Copic Markers.

http://techniquejunkies.com/good-or-evil/
And, then, there's this fun stamp...SD602 Good or Evil!

Until next time...
~Robin Redd


Everything Will be OK - Distress Ink Three Ways

Happy Saturday Junkies!  So glad to be able to share with you another May release before we move on to June and some more super fabulous releases!
For this project I decided to showcase a TJ sentiment stamp "Everything will be OK" using Distress Ink/Markers three different ways with a stencil to make the background!
Here are the three cards:
To start each card I first stamped the sentiment in Versamark Black ink, covered with clear embossing powder and heat set (on 2 pieces of Neenah Solar white cardstock and 1 watercolor paper).


For the first card, distress ink was applied through the stencil with a blending tool (in rainbow colors). Before removing the stencil I applied Versamark watermark ink through the stencil and the added clear embossing powder (after removing the stencil). Normally Distress ink would remain "wet" long enough to hold the embossing powder itself but for this technique, the time it takes to ink the stencil prevents this. I love the shine this creates.

The second card background was done using the Tim Holtz Marker Spritzer.  If you haven't checked this out it is such a cool tool! Each color of Distress marker used was loaded into the spritzer and applied (sprayed) onto the stencil creating the rainbow effect again except this time with a misted look!
The final card is a stencil mono print using the Distress ink minis.  This is by far my favorite technique! Check out my blog for a couple of tutorials on this technique!

Love the bright and cheery look to these cards, which are so complimentary to the sentiment, to send to a friend or loved one going through a rough time!
Thanks so much for joining me again here at Technique Junkies! Stay tuned for the upcoming June  releases and special Design Team blog hop next week!
Embrace Imperfection!
Pam

Thursday, May 28, 2015

A Bushel and A Hug Post- Day by Day

Happy Thursday Junkies!
Jerri Here.  I hope you are well and finding some time to be crafty.

This stamp is Georgeous!!!  It's called Fence Silhouette.   I heat embossed this stamp in black.  I used Black Versafine Ink and clear embossing powder. Once I set the embossing powder with my heat tool, I created the look of a sunset using chalks.  I love to use chalks and always seem to get great results with them.  They are very forgiving. I create most of my sky backgrounds using chalk.  I used some reds, oranges and even some pink and purple to get this look.
e sentiment I used is Day by Day .  I wanted to keep it simple so I stamped it and did a basic matting with coordinating paper.  

I think this would be such a great card for someone who is going through a stressful time and it's super easy.  Not much to it and anyone can do it.  The beauty of this card is in the stamp.  I hope you give it a try.

Have a Fantastic Day
Jerri

Wednesday, May 27, 2015

Chicken Sandwich Anyone?


Good Day Junkies!  The Crafty Nurse here with a post from the Technique Junkies May Release.  

For this card card I broke out my Distress Inks in Scattered Straw and Abandoned Coral on Smooth Bristol paper to create the technique called, "Color Sandwich" from the Simple & Easy Inking Technique CD.  When blending distress inks make sure you start off the page and then move in circular motion toward the card with light consistent pressure.  The Bristol Smooth paper is amazing for blending distress inks

I embossed "Chicken MC002" with Versafine Black Onyx Ink and heat set with clear powder, which I prefer to black embossing powder.  The sentiment "Needed To Be #553", fits nicely next to my image and adds a little bit of whimsey needed for the card.

To finish off, I added Viva Pearl Pen in Pearl all over the dots on the "Chicken" image and in black to add interest to the top right corner.  


I sure hope you get a chance to stop on over to the new Technique Junkies store and see all the new May release stamps as well as other great new products.  

Happy Inking!

The Crafty Nurse

Tuesday, May 26, 2015

Vintage Ship Collage Before and After


Good morning, it's Beth Norman, here with a before and after for you.  This beautiful Vintage Ship Collage, was stamped out on a background I created by simply spraying Dylusions spray onto white cardstock.  Once dry I stamped out my beautiful stamp from the Palenttini collection.


I used a white pen from Stampn' Up! to add highlights to the image.  Which is your favourite?

Monday, May 25, 2015

To the Moon


Hi, it's Gini and I'm back today to share a sweet vintage card.  Sometimes  detailed images, like this Mother and Child, can be slightly intimidating to color, but it is super easy.  I used Spectrum Noir Alcohol markers to color and then just cut out the image.  I matched the colors of the patterned paper with my markers.  The sentiment, To the Moon, was stamped on patterned paper to tie it all together.

Saturday, May 23, 2015

Silly, Honest & Kind

Hola! It's Robin Redd!  (a.k.a. RockinReddRobin)

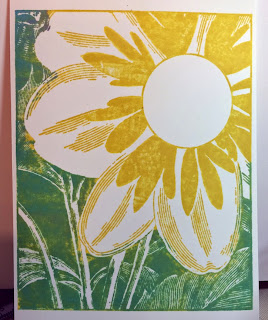
I wanted to use this big beauty, S542 Large Passion Flower on my next card.  
http://techniquejunkies.com/large-passion-flower/

But, I wasn't exactly sure how I was going to make it work.

 
First, I inked up the entire stamp with yellow ink.  
Then, I took a blue stamp pad and went over the leaves, etc.  
We all know, yellow and blue make green so it shows up green...which was my intent. 
 But, it wasn't quite what I had in mind.

Then, I took a Kaleidacolor pad and swiped it diagonally across the stamp.
Pretty...but it's just not right, yet.

Next, I embossed it with white embossing powder and  colored it with Pan Pastels.  
Because it was white embossed on white cardstock, 
it was difficult to see the image, which made it a challenge to color in.

Finally, I, simply, stamped it in black.  
It looks sharp, but I wasn't sure how it would look colored in 
because there is so much solid black on the flower.

At last, I went with the Pan Pastel colored image.  
I finished it off with SDX001 Be Silly stamp, simply stamped in black.
 http://techniquejunkies.com/be-silly/ 
I'm real happy with how it turned out.  
How would YOU use these stamps to make a card or anything else for that matter?

Thursday, May 21, 2015

Sand Dollars

{jane bosi}  Happy Thursday, Junkies!!!  I'm happy to share a colorful collection of cards I made, just goofin' around!  

As I sat down to play, I knew I wanted to use this beautiful Sand Dollar background.  But, I wanted color!  Inspired by this image, randomly found online somewhere....
I pulled out the tried and true Non-stick Color technique and got on it!  The two earth tone prints are from the same application of ink. Specifically, I was using Ranger Ink Distress Stains.  The two blue cards vary in that I used the stains directly to the stamp surface.  One also has a spray of water to blend the inks--the other is just straight ink to stamp to paper...Can you tell the difference?

Finally, I took all of this:

Added: Love You Circle, You Make Me Proud, Be Silly and Forever and A Day to come up with this:

Be inspired by color!  Try your hand and use the Yahoo group to show us what you've come up with!  Or, use the comment section to link to your own creation!  I can't wait to see your work!

Don't forget to be awesome!  TTFN, Jane

Tuesday, May 19, 2015

Little Bird Journal Page


Good morning Junkies!  Marilyn here with another journal page.  Today's features Birds and Butterflies SD614, Patiently Waiting SD552, and Darling Blossoms S615.  I used a lot of Art Anthology products which can be found here.


I started with an 8-1/2 x 5-1/2 sheet of watercolor paper.  First, I sprayed Art Anthology Colorations in Grass, Guacamole, and Wild Orchid.  After it dried, I sprayed again to deepen the color.  Next I stamped Bird & Butterflies SD614 with Potting Soil Archival Ink.  I darkened all lines with Cinnamon Toast Colorations and painted my butterflies with a glaze made from Art Anthology Fiji, Lemon Tart, and Tango Velvet.  Next I created a glaze with Aloha Velvet and water and painted my bird. Using the Art Anthology Blossom stencil I added cherry blossoms.  Next, I stamped Patiently Waiting SD552 on a piece of prepared paper (a scrap piece of watercolor paper sprayed with Plush and Hottie Colorations).  I then stamped Darling Blooms S615 with Tree Branch Archival Ink randomly across the page to add depth.

This page will be headed to its new owner shortly.

Thank you for stopping by today.  Hope you liked my page.

Until later..........

Monday, May 18, 2015

Sitting Silently

Today I want to show you two cards using the same stamp.

 
This stamp is called The Best Gift -  http://techniquejunkies.com/the-best-gift/.
 
I used the Antique Glimmers technique in different ways on these two cards.  For the burgundy card, this technique is on the panel where the birds are stamps.  Then that is layered on three pieces of card stock to get the look I wanted.  That was then layered on the burgundy background card stock.
 
For the green card, I used a piece of background paper  that had a lot of open areas and was light in color.  Then I used that piece and applied the Antique Glimmers technique to it.  The back panel also has similar colors for the Antique Glimmers technique. 
 
Both cards have different embellishments and you see I have two different looks for these cards.
  
Have a lovely inky day!
 
Judy Jackson

Saturday, May 16, 2015

Always...

Happy Saturday Junkies!!  Pam here and I am excited to share another May release stamp with you today! The stamp used is Margot's Flourish Panel. This stamp has amazing detail and looks fabulous stamped with Versamartk Watermark ink, embossed with white embossing powder, and inked with Distress inks.  


For this card I chose to use three shades of blue to create and ombre effect-Peacock Feathers, Mermaid Lagoon, and Tumbled Glass.  I stamped two separate panels and placed them side by side on a card front-after running them through my Xyron Creative Station-loaded with the 5" Permanent adhesive cartridge.  Matching ribbon and paper flowers were then added as embellishments.  Another TJ stamp  Always Be There was stamped in Archival black and used as the sentiment.


As I was stamping and coloring this project I imagined this design using more elegant colors would make a great wedding invitation background!! Hmmmm.... another project!
 I hope you enjoyed today's inspiration and check out this and all the other new releases at the TJ store. Pat has such a fantastic selection of stamps!

Happy Crafting!
Embrace Imperfection!
Pam

Thursday, May 14, 2015

A Bushel and A Hug- Stained Embossing Technique

Happy Thursday Junkies-Jerri Here.
Whew! what a crazy month this has been already.  May seems to be one of the crazier months for sure.  Several birthdays, always a graduation or two, Mothers Day..... Oh and just a few more days of freedom for me before the grandbabies get out of school. Let the craziness begin!!

Today I am sharing a card I created for Technique Junkies using the Stained Embossing Technique.

I had a BUNCH of fun creating this card.  
I took this picture at a different angle so you could see that the card is a Z fold.  The sentiment is on the back part of the "Z".  I left an open space on the back (left side) of the card for writing. When the card is laying flat, you can see both the front of the card and the sentiment, which peeks out on the right hand side.

How I made the card:

By using Distress stains (I used Tim Holtz)- with a Cuttlebug embossing folder, you can create a beautiful background which is pretty enough to use alone in my opinion, or along with a stamp.

 Normally I would apply the stain to my embossing folder in a random pattern but for this design I was a little more specific in where I placed the color.  I wanted the flowers to be purple and tried to get more of the greens on the stems. I used water color paper for this process.  Complete directions on how to do Stain Embossing can be found on the Artistic Effects CD at Techniquejunkies.com.

Once my Stain Embossed piece was dry, I embellished it with a Viva Pearl Pen and then I placed little silver dots with a silver Metallic Sharpie.
I had a leftover dragonfly ( Dragonfly (set of 2) ) from a previous project that I was able to use on this card. I had stamped it on a piece of vellum with silver detail embossing powder and cut it out.  I placed the dragonfly on the card with a pop dot.

The sentiment used is called Needed to Be. This is a beautiful sentiment that rings so true with me.  
I used my silver embossing powder for the sentiment as well.
Thank you for checking out my card! If you have a question just leave it in the comment section and I will get back with you.  

Have a Fantastic Day!

Jerri


Wednesday, May 13, 2015

Happy Wednesday Junkies!  The Crafty Nurse here bringing you a post featuring Technique Junkies May Release.

For today's project I've highlighted "What Cancer Cannot Do #SD607."  The background technique is called, "Stenciled Spray Fun" from the Sensational Stencils CD.  I used Dylusions Ink to get that vibrant pink and purple combination.

I wanted to highlight the stamp so I inlayed the panel using Lawn Fawn's Rectangle dies making one flush panel.  To do this simply cut out a few sizes of the rectangle die and piece them back together like a puzzle. 

I finished off the card with a few flower dies from WPlus9 and added small pearls for the centers.


Thanks for stopping by the Design Team Blog today and look forward to seeing you at the Technique Junkies store for lots more of the May Stamp Release.

By for now,
The Crafty Nurse

Tuesday, May 12, 2015

One Layer Panel Card


Good morning fellow Technique Junkies.  It's Beth Norman here with a tutorial for a one layer panel card that I designed.  It's a good way to use up your favourite stamps.  I am so in love with the Whimsy Branch and use it whenever I can. 

My card measures 5 1/2" x 5 1/2" simply because my Poppy is so large.  This technique works well with an A2 size (4 1/4" x 5 1/2") as well. 

I'd love to see some of your One Panel cards on our Yahoo group.

Stamps Used:

Whimsy Branch SD393
Bee Quotes S402
Poppy SD293


Supplies:  Ink Pads, three (or more) stamps, ink, sponges, sticky Post-it notes


Sponge on your colour.  Use as many ink pads as you desire. 


Sponge colour all over your cardstock and stamp your main image in the center of your cardstock.


Place sticky notes on both sides of your main image.  For my 5 1/2" x 5 1/2" card I left a 1 1/4" (3 cm) border.  Sponge ink along the sticky note.


In the opposite direction, place sticky notes so it leaves a small square, and sponge with ink once again.


Leaving your sticky notes in place, stamp out your images as shown.


Place your sticky notes over top of the sponged colour, leaving the sticky note on the long side in place.  Sponge colour ONLY along the side, and stamp out your image, with the sticky note in place.


Repeat the step above, placing your sticky notes along the edge of the previously inked edge.  Ink your long edge (you will note I forgot to ink before I stamped out my image) then stamp out your image, leaving sticky notes in place.


Take off all the sticky notes, and you will find your card inked as shown.

I hope you liked my technique.  I have done it on glossy cardstock with a Kaleidacolor and brayer on my A2 sized card.

I look forward to seeing your work on our Yahoo group.

Cheers,

Beth


Monday, May 11, 2015

What Cancer Can Not Do


 Hi, It's Gini and I've got another card to share with you today using Technique Junkies stamps.  So many people are effected with cancer, and having an encouraging card to send may be just what they need. I painted Art Anthology Velvet paints on the Wasted Palettini background stamp. After that was dry, I sprayed the Colorations spray over the top.  Then I stamped the What Cancer Can Not Do stamp over the background using VersaMark ink, and heat embossed with black powder.  This was a fun technique to use for this stamp set.

Sunday, May 10, 2015

Proud as a Peacock

Hello!  It's Robin Redd, here!  (a.k.a. Rockin Redd Robin)
I used two stamps from the May Release to make this card.  
I don't know if they were made with each other in mind or not 
but I think they are PERFECT together!
http://techniquejunkies.com/peacock-feathers/ 
The background stamp, S619 Peacock Feathers, was inked up with Kaleidacolor, Blue Breeze.

http://techniquejunkies.com/you-make-me-proud/ 
I used SD612 You Make Me Proud stamp for the focal point.

Get it?  Proud as a peacock?!
Cute, huh!