Wednesday, September 16, 2020

FRAMED FOR CATNIP

Oh my gosh! I am so in love with the Kitty Mug Shot set. I have been having so much fun making cards. I think this one is my favorite yet, though!
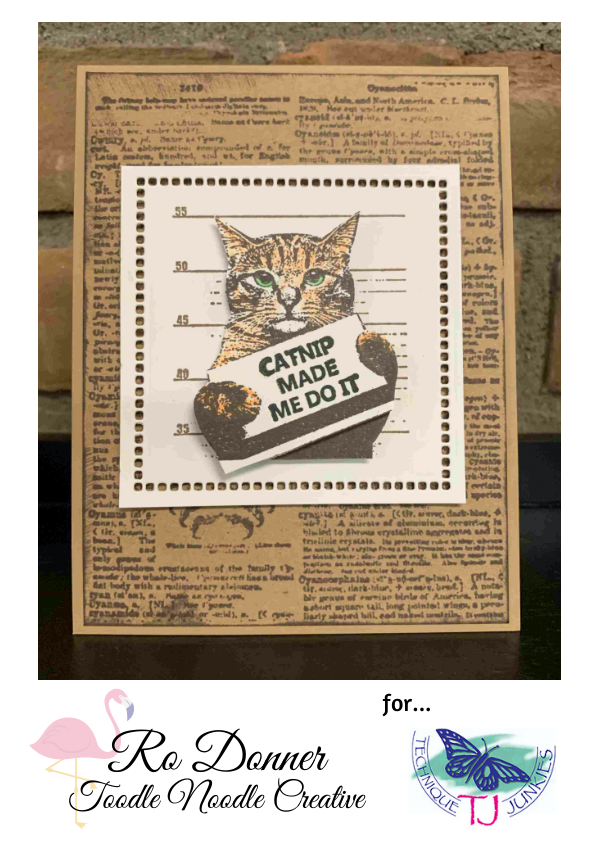
KITTY MUG SHOT (SS112)
VINTAGE DICTIONARY (P012)

If you look closely, you can see it's a very dimensional card. Four layers! The white frame is popped up on the base (layers 1 and 2). The cat is popped up (layer 3). And the sign is popped up (layer 4).

To create the card, I stamped Vintage Dictionary onto kraft cardstock, trimmed it down, inked the edges with brown ink, then attached to a kraft card base.  I then stamped the Kitty Mug Shot in brown in onto white cardstock three times and colored them. The first one I used for the frame base and cut it out with a die cut. The second I trimmed out only the cat. And the third I trimmed out only the paws and sign. Each were attached with foam tape. 

I am lovin' it!!! This set is so fun! It comes with seven different sentiments.
 
Aren't they a hoot? 

I hope you are enjoying the change of weather. As the days get cooler and shorter, spend more time in your craft space. Make cards! If you are looking to add to your stash, you can save on the purchase of your stamps from TJ. Simply enter the code below at checkout!


Hope you enjoyed my project today!

Til next time,
Keepin' it inky!


Tuesday, September 15, 2020

Kitty Mug Shot against the wall


The fastest way to a make a colorful brick wall is to spray it! I used pixie spray on the Brick Wall Stencil and sprayed with Worn Saddle and Wine Stain Shimmering Bliss Sprays; they were topped off with a dash of Harvest Sunset Shimmering Bliss. I added some paws from the Paws Stencil with brown ink, and topped it off with the focal image Kitty Mug Shot cat colored with colored pencils. I can't get enough of that cat! Have fun with this one!

Don't forget - the Buy 5, Get the 6th Free offer is still valid on the Shimmering Bliss Sprays!
Pat Huntoon

Monday, September 14, 2020

Shredded the Toilet Paper


I used Kitty Mug Shot and Textured Newsprint.  All of the images were colored with Copic Markers.  I spritzed the whole front with  Mixed Metals Shimmering Bliss Topper


Please remember to save yourself some money  by using the coupon code TJ10Judy when you check out.  It will save you 10% on your total order!  Saving money is a good thing!!


Have a marvelous day and take some time to get inky!!


Shredded the Toilet Paper

Sunday, September 13, 2020

Fun with Modern Circles


Hi Junkies!  It's Holly posting today, and I'm sharing these fun cards I created with the new Modern Circles stamp set.  I truly had a blast making all kinds of different cards with this new circle set.  Some cards just had a few different circles on them while other cards were exploding with colors and sizes and patterns, such as the card below.


Isn't that fun??  You can spend all day making all kinds of backgrounds with these circles and every single one will be totally unique.  No two will be alike.

You can also just stick with one color for all the different circles like you see in my card below.


There are just so many different possibilities with these circles.  These are so fun and easy to play with.  You really can't go wrong with some paper, some ink pads, and this Modern Circles set.  


Card #1 - Gratitude

Card #2 - Happy Birthday

Card #3 - Small Steps


Friday, September 11, 2020

TJ Inkspirations: Shimmering and Contrasting Modern Circles


Sometimes I make a stamp or a stamp set and while I am making it I already have an idea of what I want to do with it. The Modern Circles Set is one of those times, and this technique is exactly what I was thinking when I made it.

The video below shows you how to make a contrasting, shimmering background, and I have set up some little kits in case you would like to make it for yourself. I did NOT include inks with the kit since I used Distress Oxide inks and I believe they are pretty common.

In addition to the kits, you can also take advantage of a discount on the Shimmering Bliss Sprays: Buy 5 sprays and get the 6th FREE. No discount code is necessary - the discount will applied automatically at checkout.

Here is the artwork for the video, the little kits, and the video (more artwork after the video, too):

Mile on my Broom with Kit 1

Snowman with Kit 2

Gnomies Forever with Kit 3

Here are the kits:


And finally, the video:
Shimmering and Contrasting Modern Circles Technique Junkies


And more artwork!

Halloween Kitty with Kit 1

Flip Flops Fit with Kit 2


Foot Down with Kit 3


I hope you are a little inkspired by today's issue. See you next week!
 
Sincerely,
 

Pat Huntoon
Technique Junkies LLC 

Wednesday, September 9, 2020


 I have long been a fan of pink and black together. The contrast is wonderful! Today I am using the Heart without Dreams stamp. I used Cerise Aladine Ink on the feather, and Reglisse (Black) on the words. The size of these stamps are great -- small little 2" cubes, and the black is especially nice. They are 35% off still online, too.

The background uses the same two inks. I used Blending Brushes through the Flamboyant Flourishes Stencil. I think is looks so rich, don't you? I hope you enjoy today's card.

Pat Huntoon

Tuesday, September 8, 2020

A Heart Without Dreams


Hi there!  Here in Southern Ontario, we are enjoying nice cool temperatures this week.  Quite the change from last week, but we’ve been told to expect the weather to get warmer again next week.  I hope everyone enjoyed Labour Day weekend.  DH worked this weekend, so I spent a lot of time in my stamp room getting creative.  Can you believe I’m working on Christmas cards?  Those will be posted next month.  Let’s enjoy summer a little longer.

 Now onto my card.  I cut a piece of 4 1/4″ x 5 1/2″ white cardstock twice.  One is for my background and one is for stamping/embossing.  Next, I cut my stamp into two pieces, so I could stamp my feathers out.  Gasp, cutting apart stamps?  Is that even legal?  I used to think that stamps should never be cut, but now I realize that stamps can be used in a number of ways if they are cut.

Using Pretty Peacock and Dusty Durango inks, I stamped the feather in a variety of directions.  I heat embossed one feather with gold embossing powder.  Next, I trimmed the decorated cardstock to 2 1/2″ x 5 1/2″.  A mat was added using Cinnamon Cider.    The sentiment was stamped out in Dusty Durango.

Have a great week!