Thursday, November 16, 2023

Have a Merry Berry Christmas

Deb here with two of the November Release stamps - Christmas Berry Bouquet  and Scripted Merry Christmas . I think these work so well together and this card was finished in less than 30 minutes ! It's always nice when you are able to sit down and create a card that seems effortless .


  • I stamped the Christmas Berry Bouquet with Tuxedo Black Memento ink on a piece of cream cardstock.
  • The image was colored with my COPICS and Flair pens.
  • The sentiment was stamped below the bouquet with Lady Bug Memento ink.
  • I adhered a piece of holly patterned paper to a white card base. 
  • The completed stamped panel was trimmed and adhered on the right side of the card base, leaving a strip of the patterned paper showing on the left side.
  • A thin strip of red textured cardstock  was adhered along the left edge of the stamped panel.

Christmas is getting closer each day. Have you started your holiday cards yet ?? If you decide to do some holiday shopping for some fun stamps, you can use my code - TJ10Deb - to save 10% at Technique Junkies . I hope you all are staying warm and cozy and finding some time to be creative..

Wednesday, November 15, 2023

Trying to get into the Holiday Spirit


Hello TJ Crafters!

Are you trying to get into the Holiday Spirit?  Me too.
And there's obviously more than one way to do that (wink)!

On this card I made it pretty fast and pretty funny! 
I paired the new #SD1277 The Bottle Won't Open with the funny By Us ladies.


To create this fun and quick card you'll need:

Blank A2 card (1/2 piece of white card stock folded in half)
Red, green and black ink pads
Red and green markers
Optional:  red glitter and glue

1) I used a stamping platform and lined up my "The bottle won't open" stamp so it would stamp about 1/2 inch to 3/4 inch down from the top of the card.  You can eyeball it.

2) Next I applied the green ink pad to the top portion of this stamp then stamped it. If it needs to be darker - apply more ink and stamp again.

3) Now apply the red ink pad to the lower portion of the sentiment stamp.  Re-ink and stamp again if you need it darker.

4) Remove that stamp from your stamping platform and line up your By Us stamp.  Ink it up with black and stamp it below the words. As you can see in the example below you'll stamp it close to the sentiment.

Last - color your holly berries and leaves - and snazz up those ladies with color and glitter. 

*** I hope you get into the Holiday spirit soon ***
*** Save 10% Off everything with discount code TJ10AJ ***

Happy Stamping,

AJ ~ Art Cards with AJ

P.S. Did you see the entire November Release? You might want to check it out! There's of picture of the Gotta Have it All release below my card.


Tuesday, November 14, 2023

Beary Fun

Hi Junkies!  (Chris here)

Again, I'm in love with this realistic style stamp from Technique Junkies.   This bear is amazing.  I wanted to create a scene where he was walking in the woods.   I used an embossing folder to create the trees.  On the debossed side of the paper I carefully stamped the bear.  It gives the illusion that the bear is behind the trees.   I added some blue ink and glitter to create a wintery feel.   I felt like it still needed something...so I splattered silver sparkle watercolor all over to create a snow storm.   I'm so glad I did.  The card has the perfect amount of sparkle. 

Don't forget to scroll down and see the bonus card.   After making a winter scene, I wanted to make a summery one too. Which one do you like better?

Materials:

STAMPS: use code TJ10Chris to save 10%:
You can see the full supply list on my blog


No copics today

Monday, November 13, 2023

Encouragement


Hello, Jeanette here. I have two more cards to show you that feature stamps from the November release as well as a couple of previously released stamps.


Technique Junkies Vintage Script Collage:

The sentiment is from the Technique Junkies Inside Out Twisted Encouragements stamp set.


Technique Junkies Splendor of Nature:

I also used the Technique Junkies Stormy Sea Border stamp.


There are so many stamps and other products to love at Technique Junkies so be sure to check the store often. 

If you like saving money - and who doesn't - please use the code TJ10JEANETTE when checking out at Technique Junkies to receive a 10% discount.

If you'd like to see other cards I've made using Technique Junkies stamps/products, you'll find them on my blog - HERE.

Sunday, November 12, 2023

Red Glittered Christmas


Our Scripted Merry Christmas stamp looks so pretty atop the Holly and Berries stamp on the bottom! A little glitter ribbon and Berries colored with a glitter pen adds sparkle. This is such an easy, sparkly Christmas Card!

Stamps may be found here:

Saturday, November 11, 2023

Yes, You Can Make a Holiday Card in 5 Minutes (or less)


Hello everyone and Happy Saturday!  Ity's Design Team Member Michael here and, yes, you read the title of this blog post correctly.  Holiday cards in 5 minutes (or less). I made these two Christmas cards using embossing folders from my stash and the new Scripted Merry Christmas

Let me explain how...start the clock.  

Card 1 - Holly Leaves Background


  • I made an A2 card base using white cardstock and adhered a piece of Christmas paper to the front.
  • I die-cut a piece of white cardstock using a 4" x 5.25" stitched rectangle die, embossed it with the Holly Embossing Folder (37-1987) from Cuttlebug/Provocraft (retired), and adhered it to the card front.
  • Using an oval scalloped die, I die-cut a piece of red mirror cardstock.
  • Next, I stamped Scripted Merry Christmas on a piece of white cardstock, die-cut it using an oval die, adhered it to my red scalloped oval piece, and then to the card front.
  • To finish off the card, I added a few red enamel dots.  
Card 2 - Christmas Ornaments Card


  • I made an A2 card base using white cardstock and adhered a piece of Christmas paper to the front.
  • I die-cut a piece of white cardstock using a 4" x 5.25" stitched rectangle die, embossed it with the Christmas Ornaments Embossing Folder (37-1989) from Cuttlebug/Provocraft (retired), layered it on a piece of white fun foam, and then adhered it to the card front.
  • Using a scalloped circle die, I die-cut a piece of red mirror cardstock.
  • Next, I stamped Scripted Merry Christmas on a piece of white cardstock, die-cut it using a circle die, adhered it to my red scalloped oval piece, and then to the card front.
  • Because of all the texture in the embossed image, I did not add any enamel dots. 
I really made these two cards in less than 5 minutes.  I love how the embossing folder kicks them up a notch and by using a simple sentiment like the Scripted Merry Christmas, you have a card worthy of sending to anyone on your list.  

Thanks so much for stopping by the blog today.  I'd love to know if you like this idea and if you use embossing folders for your holiday cards.  If you like the Scripted Merry Christmas stamp or anything else on the Technique Junkies website, you can save 10% at checkout by using my code - TJ10Michael.

Until next time...

Hugs from Brasil.

~Michael 

Friday, November 10, 2023

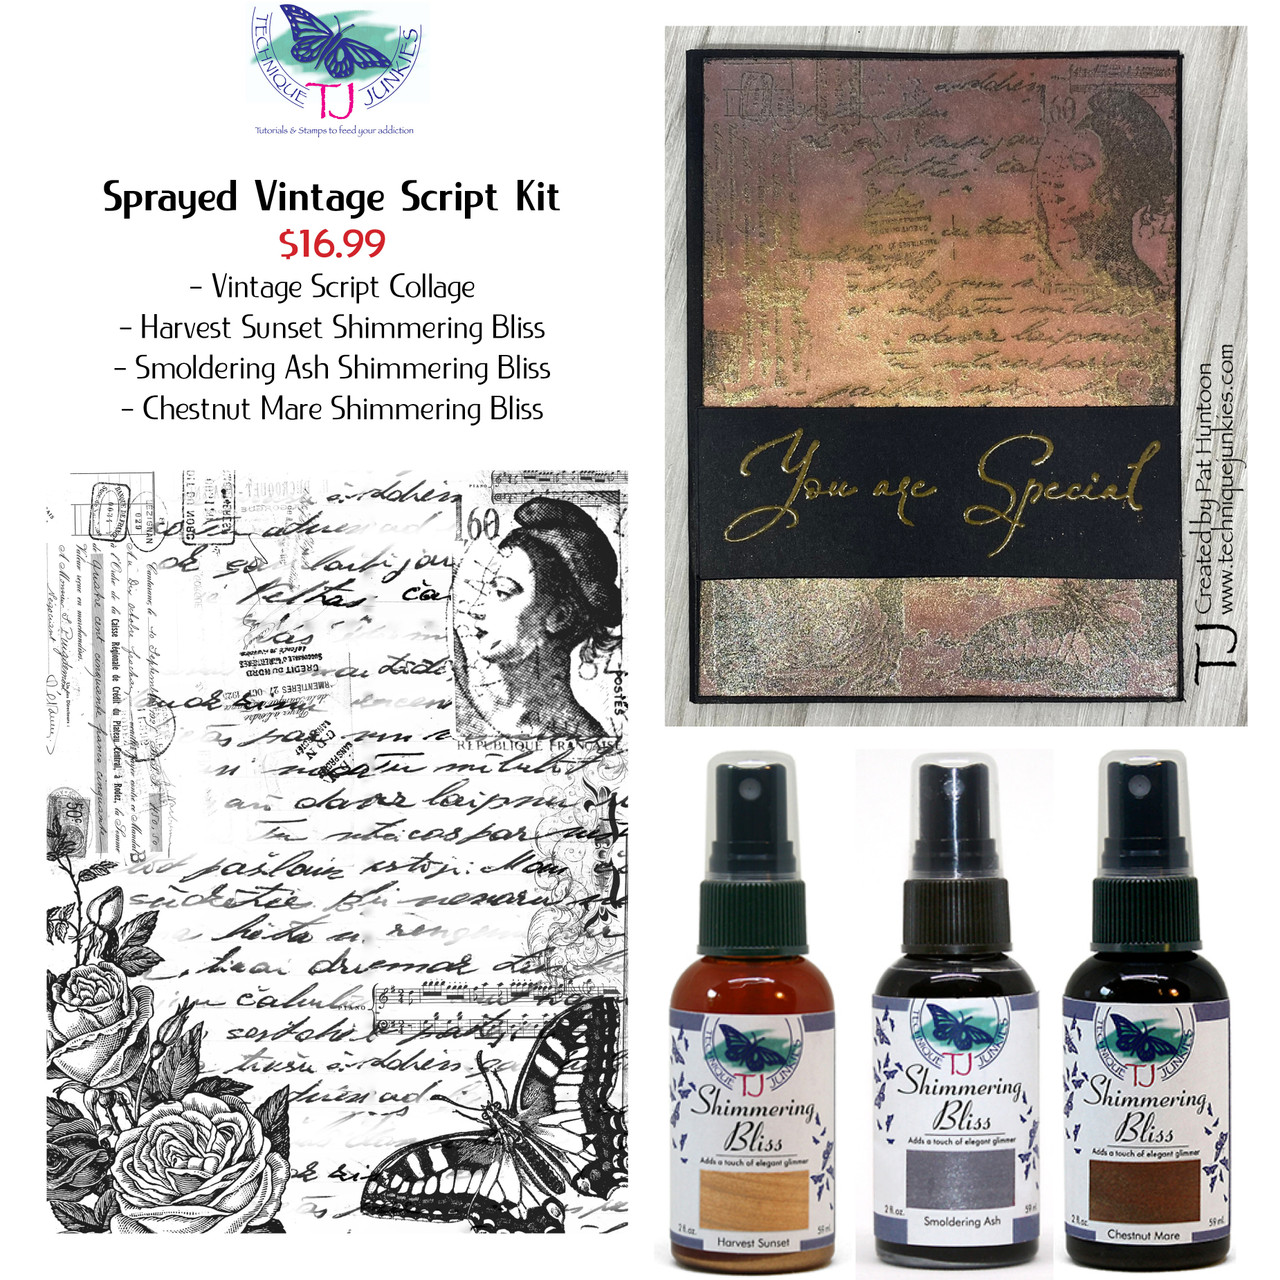
Shimmering Bliss Closeout and a Video Tutorial


Half Price Shimmering Bliss

vintage_script_collage__28631 image

Due to a variety of reasons, we are discontinuing Shimmering Bliss by Technique Junkies, and the remaining stock is 50% off! The sale is here: https://techniquejunkies.com/shimmering-bliss/


To show you how to use some of the sprays, we have a Vintage Card VideoTutorial for you - AND a kit that reduces the cost even more! The video is below, and the link to the kit is here: https://techniquejunkies.com/shimmering-bliss-closeout-sprayed-vintage-card/


The video is HERE ( or click on the image below):

Sprayed_Vintage_Script_Kit__21875 image