Warm Winter Reflections
Today’s card features the
Warm Winter Wishes stamp set along with the
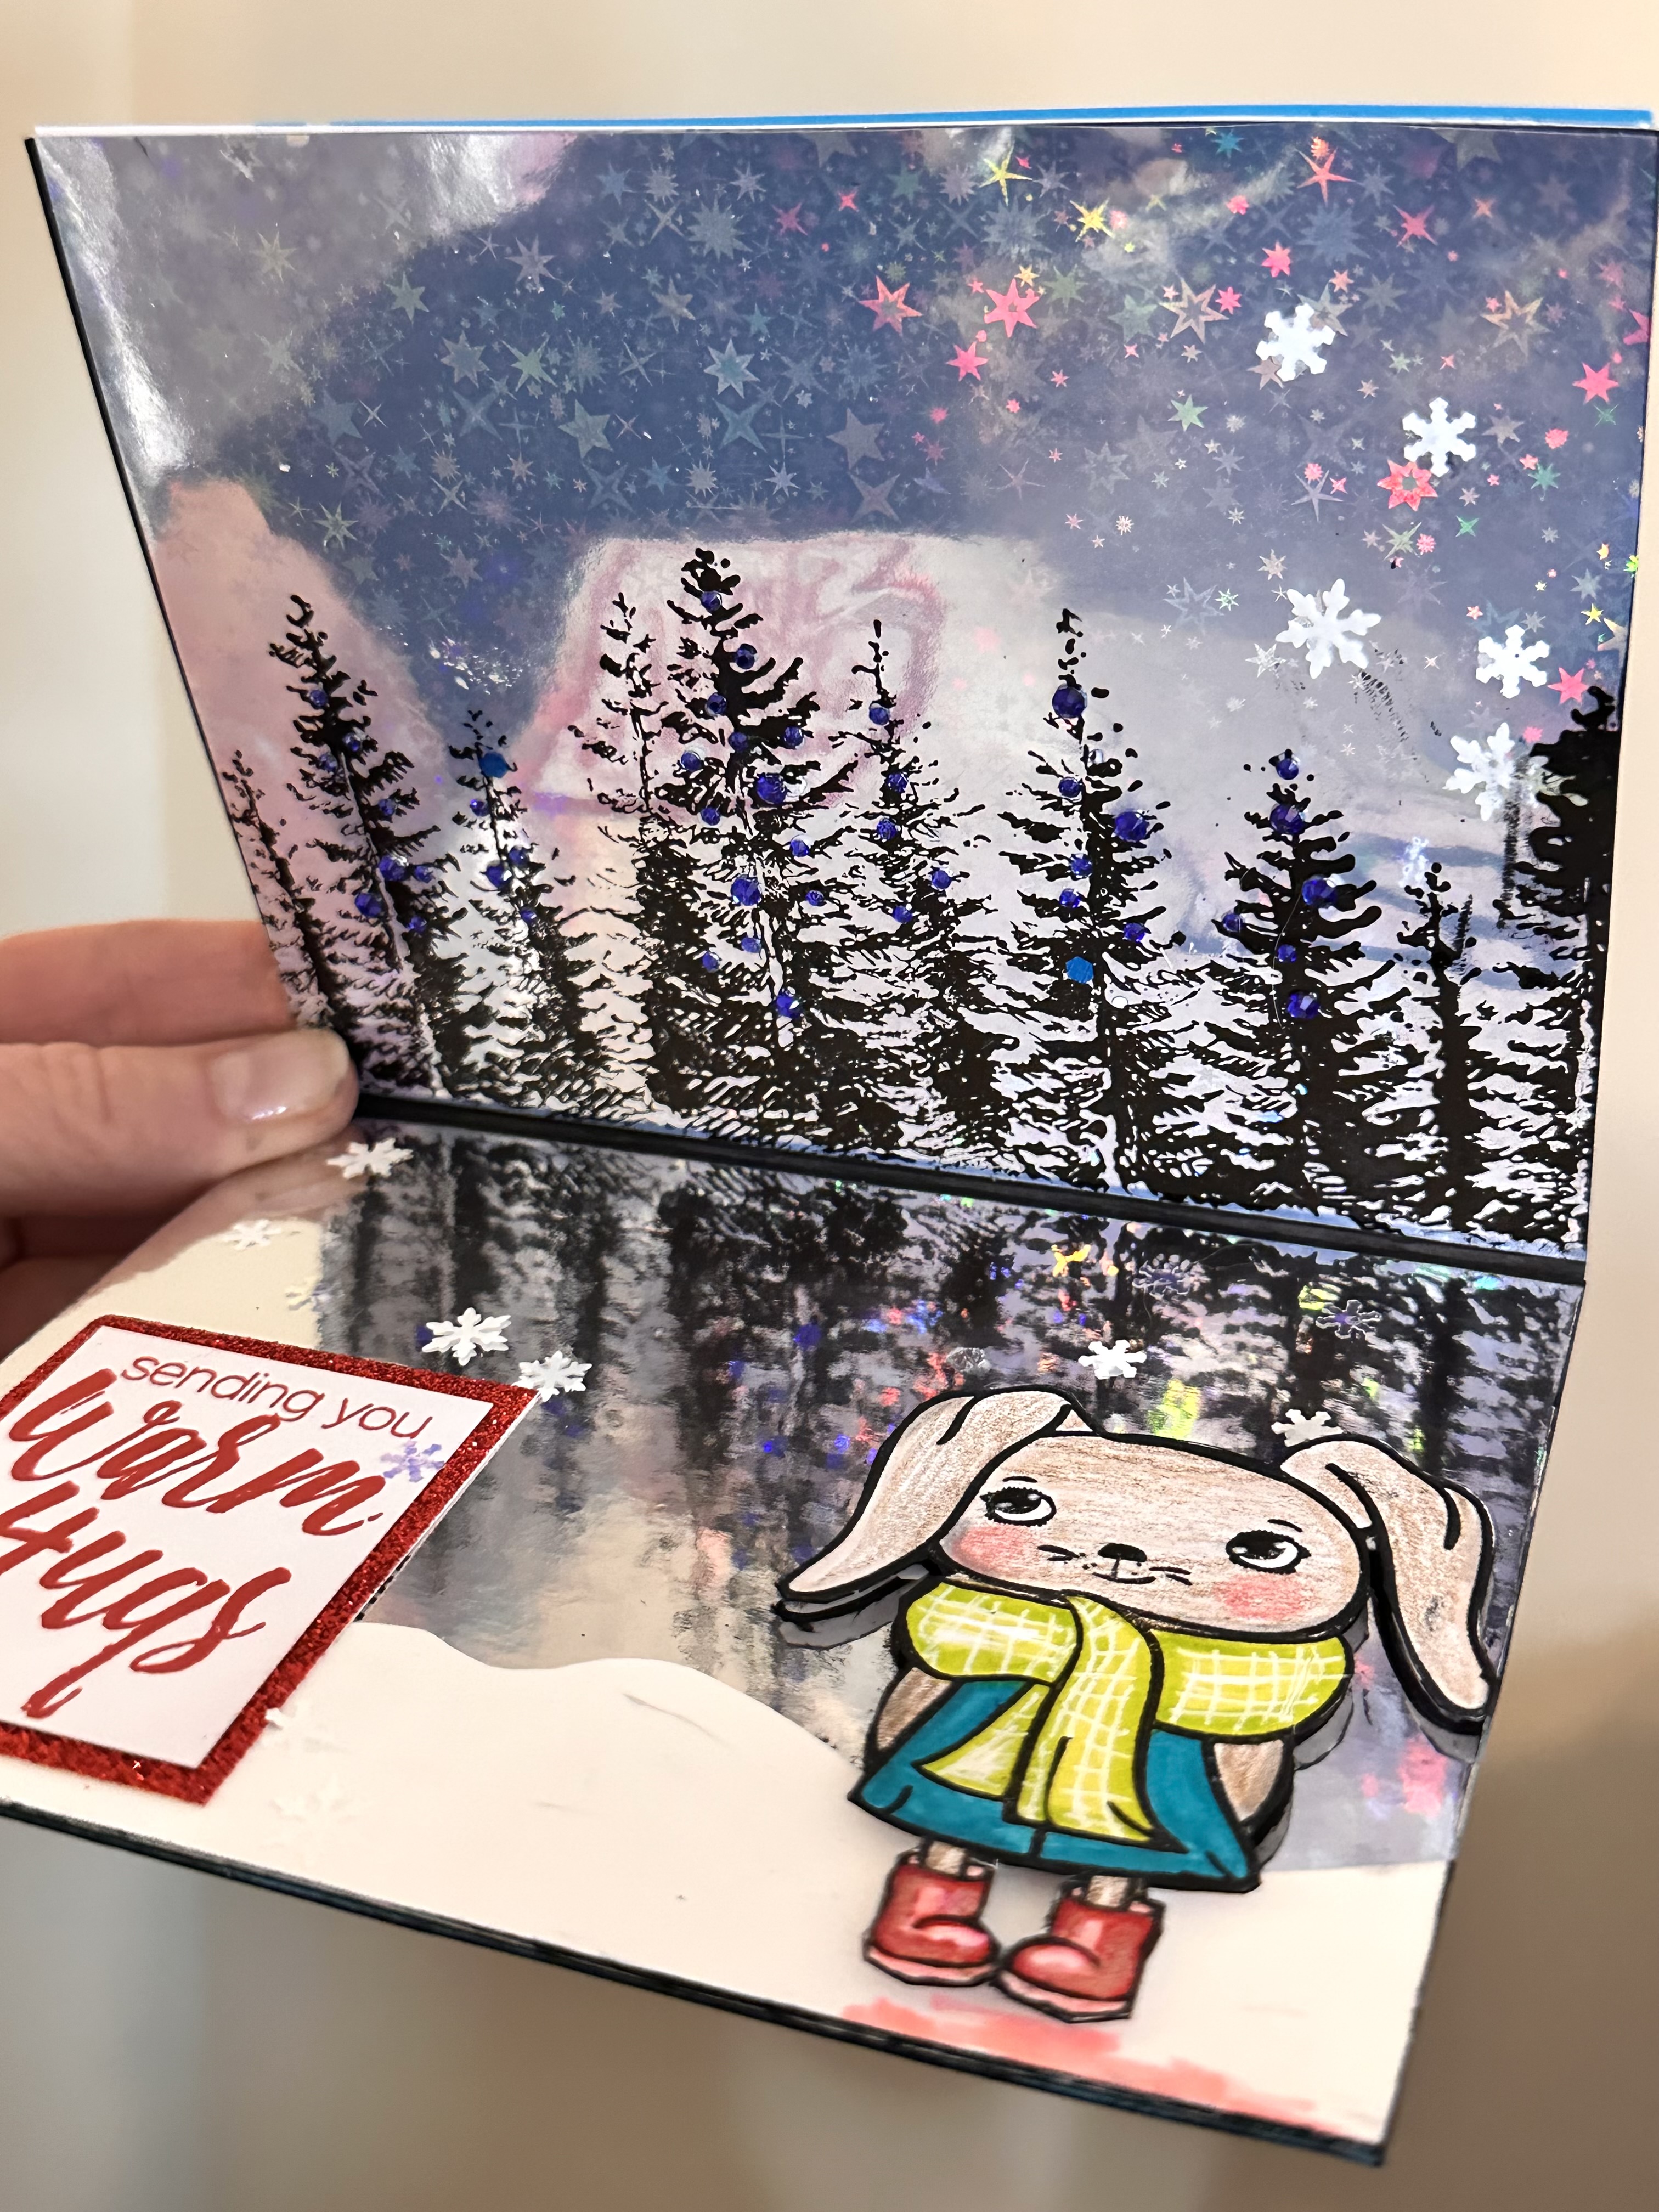
Fir Forest background stamp, but as you’ll see …I did something a little different. I created a reflection card inspired by the Stampscapes Facebook group. What’s different is your written message is on the back of the card and the inside is a scene that kind of…dances due to the reflection from the mirror card stock used. I’ll do my best to break it down. It’s not difficult - really!
What you’ll need:
White card stock 2 pieces 4.25x5.5 each
Blue card stock 2 pieces 4.25x5.5
Black card base A2 size (4.25x5.5)
Silver Mirror card stock 4.25x5.5
Holographic card stock of your choice. I used a starry holographic design.
Staz-On black ink pad
White ink pad or embossing pad and white embossing powder
Small blue crystal gems (these are optional)
Red glitter card stock scrap or red card stock will work
Red ink pad
Foam pieces - just a few little pieces is all you need. (If you don’t have foam - stack and glue a few scrap pieces of card stock then put these behind the bunny).
Random size snowflakes - you can punch these out, use stickers, use die cuts, or stamp these if you have snowflake rubber stamps.
To make this card…
Front: On the blue card stock Stamp these Warm Winter Wishes sentiment in white ink or use white embossing powder. Add random size white snowflakes. I had a snowflake punch I used on the side of the blue piece so I put white card stock underneath. The punch I have is old so use what you have and add white snowflakes to the front.
Inside Top: Take the 4.25x5.5 piece of holographic card stock and stamp the Fir Forest on the bottom using the Staz-On black ink. Set aside to dry. It should dry quickly. After it is dry adhere it to the inside of your black card
Inside bottom half: Cut a scrap piece of white card stock in a wavy design so it resembles snow. See example. Glue to the bottom of the silver mirror card stock.
Next: Stamp and color the bunny from the Warm Winter Wishes set, color, and fussy cut. Add foam pieces behind it then adhere to the bottom right side of the snow. See photo for placement.
Stamp “Sending you warm hugs” in red and layer on top of a piece of red or red glitter card stock. Adhere to the left side of the snow.
Back: This is where you write your message. I first adhered a piece of blue card stock to the back then I glued a white piece that was slightly smaller. Add a snowflake and the rest of the space is for your note.
Optional: Add blue gems on the trees and tiny snowflakes randomly around the trees and on the mirror piece. See photo.
If you add gems to your trees be sure to add a piece of card stock in between when you store this card and mail it so the gems don’t dent the mirror card stock.
I know this card was different. I’d love to know what you think. I hope you’ll give this a try.
If you decide to shop online be sure to save a little money when you do and use my discount code TJ10AJ for 10% off.
Happy Holidays!
AJ